How to Lay a Patio from Reclaimed Bricks

On Sunday I turned a wild hair and decided to lay a reclaimed brick patio. It took about ten hours, and three years, because we installed the MOT base shortly after our building work completed in spring 2016 and then left it sitting there looking hideous for months and months and months.
There’s a lot to be said for taking your time to think about a project. If we’d laid the patio three years ago, I would have used Indian sandstone, which would have cost about £3k including the labour (a major consideration, and the reason why we didn’t proceed there and then) and would not have been very environmentally-friendly (something I barely even thought about at the time).
I’ve always upcycled furniture, and we built the extension with reclaimed bricks, but over recent years my passion to reduce, reuse and recycle has increased ten-fold. Partly it’s the zeitgeist, partly it’s a genuine worry that if we don’t take action then we won’t have a planet left to bestow upon future generations, and partly it’s in my genes to make do and mend - my Geordie grandparents laid their crazy-paving patio using stone hauled up by hand from the local beach. The builders couldn’t understand why I wanted to save all the bricks from our house extension (that came from knocking the external back wall and some of the internal walls down) but patiently stacked them in the garden anyway. “You don’t want to keep all these broken half bricks, do you?”. Yes, yes I do. I didn’t know at the time exactly what I’d use them for, but I knew they’d come in handy for something at some stage. So far we’ve used them to make raised beds, finish the garden wall between us and our semi-detached neighbours, edge the borders, and lay the patio - and there’s still quite a few left over.
How to install the base
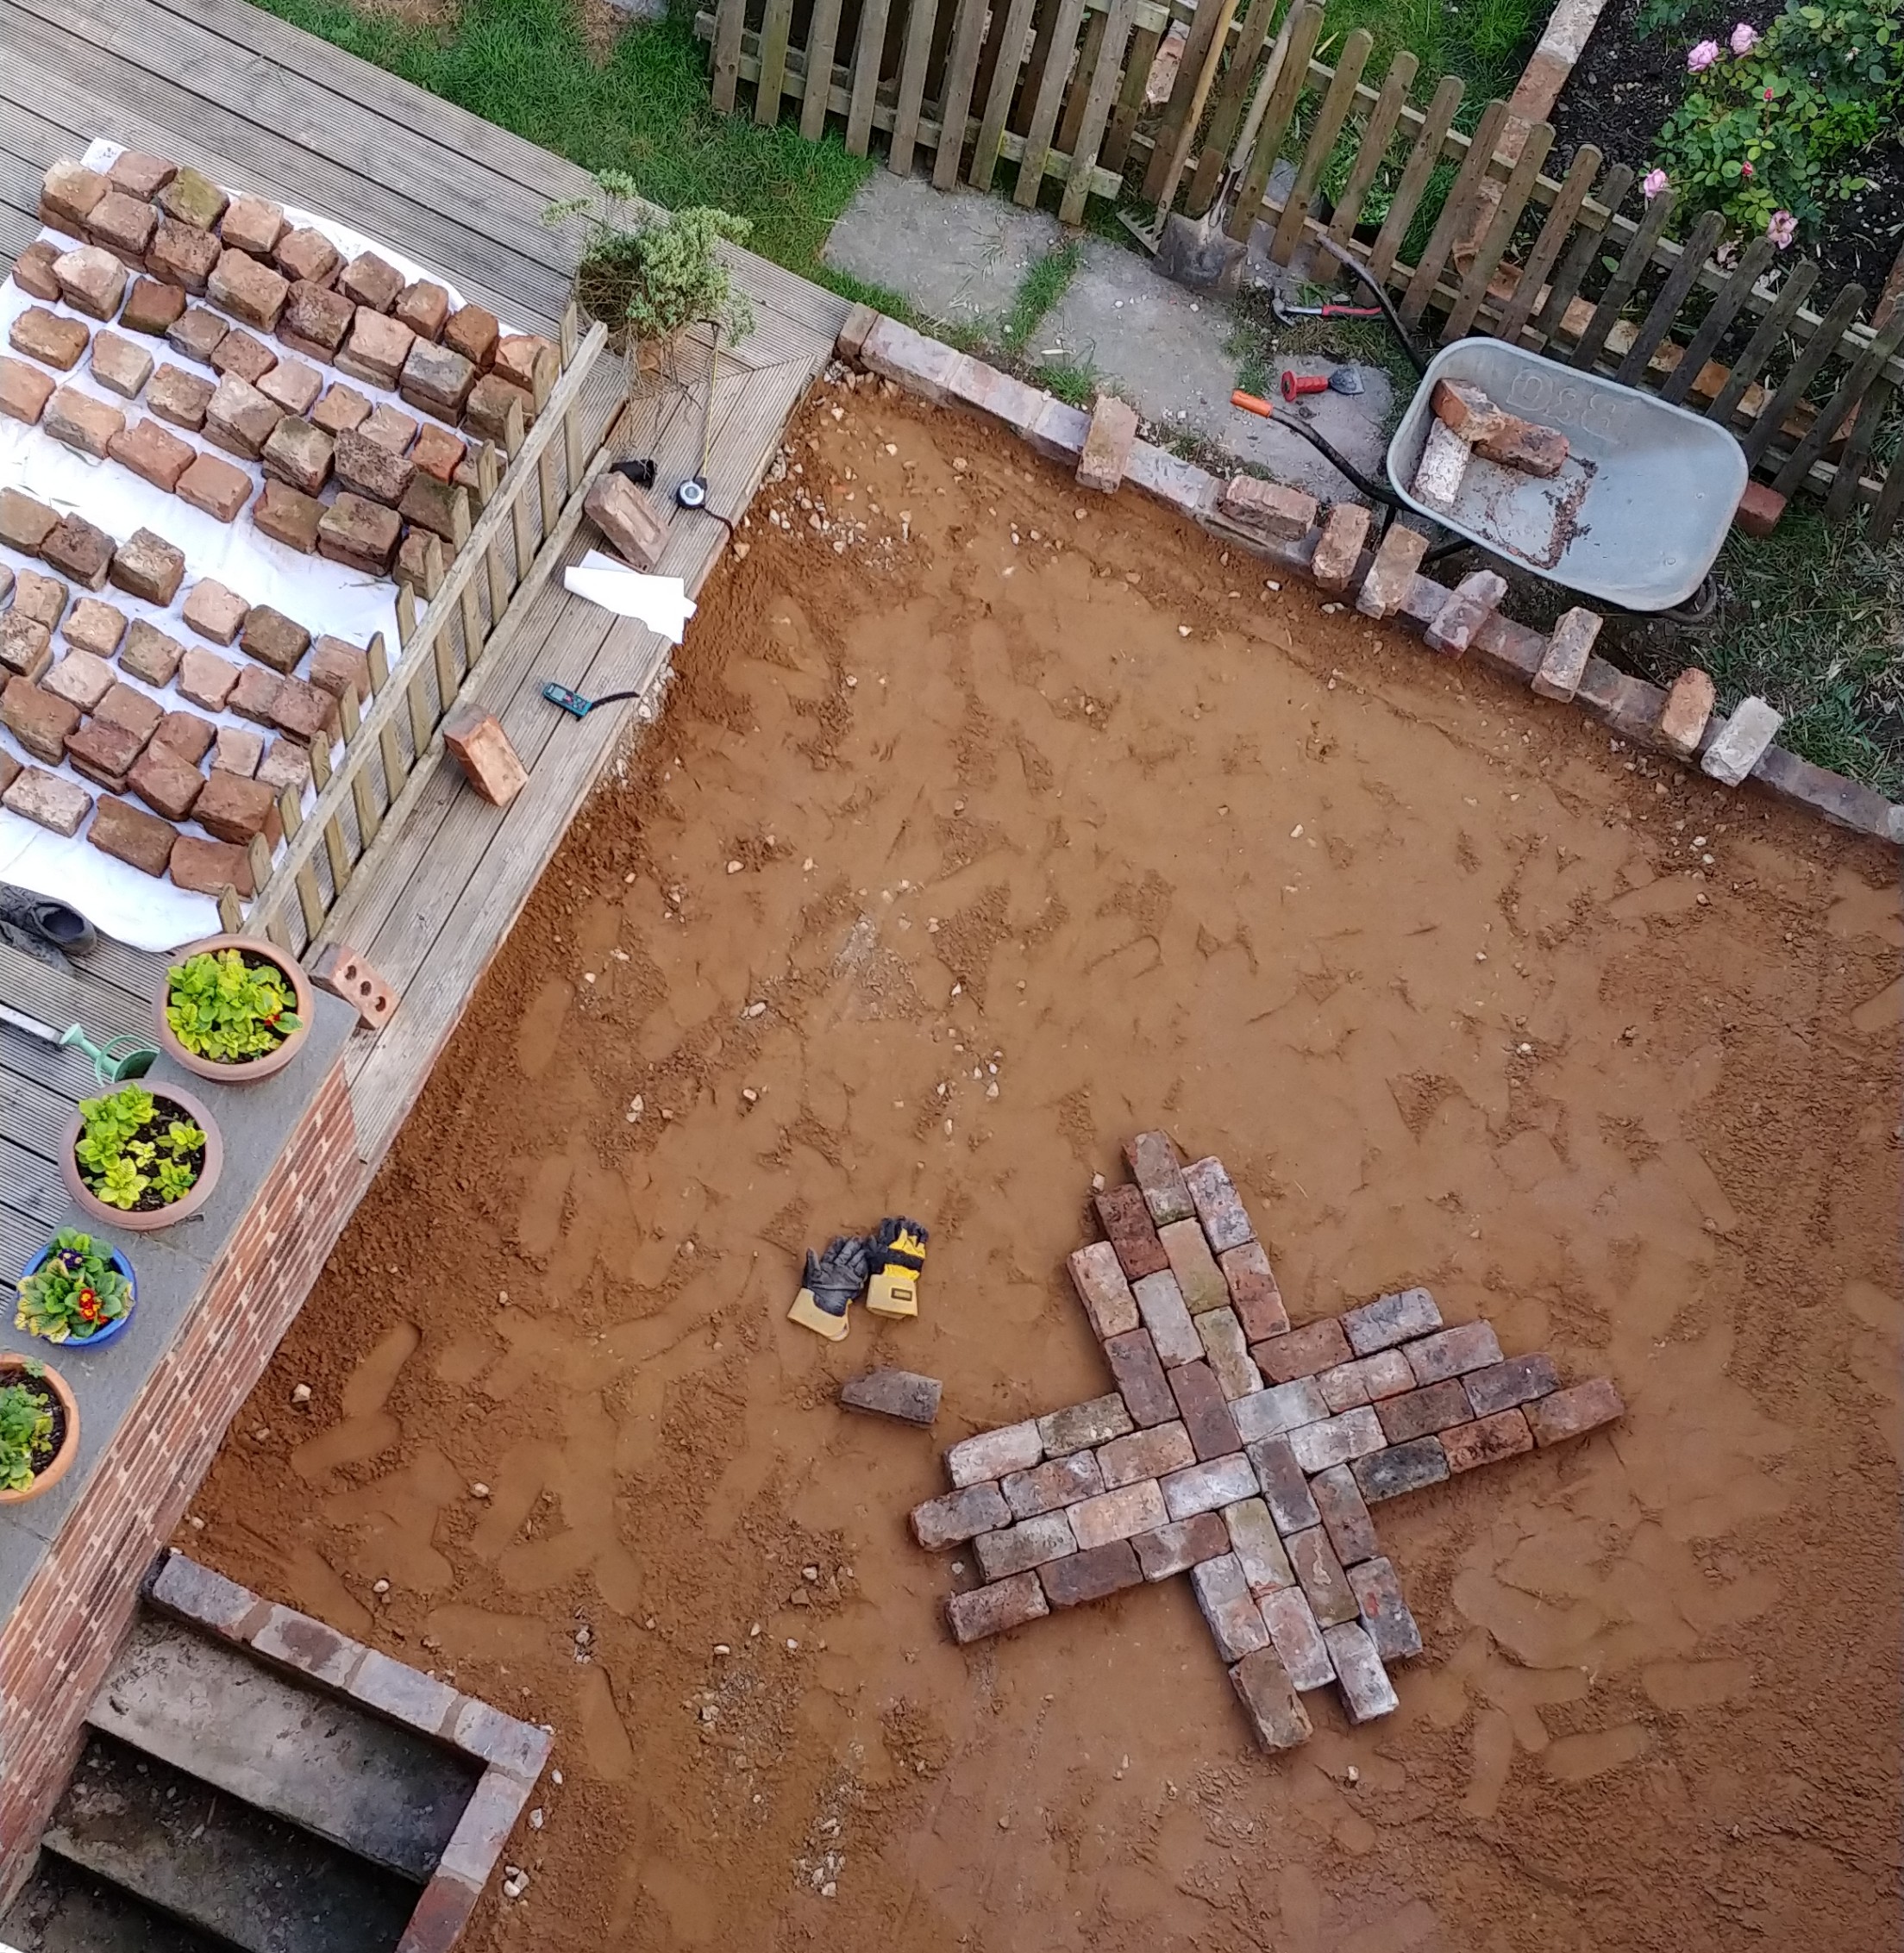
The base for a patio depends on the type of stone that you’re using. For our reclaimed bricks, we used about 20cm of compacted MOT, followed by 50mm of sharp sand. The MOT had compacted naturally over 3 years and was completely solid, but if we’ve laid it recently we’d have needed to use some kind of compacting power tool. Our patio is about 18sqm, and we used about 9 tonnes of MOT to fill the base.
Before adding the sand, my husband mortared a single course of bricks in place around the edge, straight onto the MOT. The sides of the patio butt up against brick steps on the left, a brick wall on the right, and the house on the bottom, so he only had to install the bricks on the top edge closest to the garden, and on the cut-out part leading down to the cellar steps on the bottom left, and the outdoor tap on the bottom right.
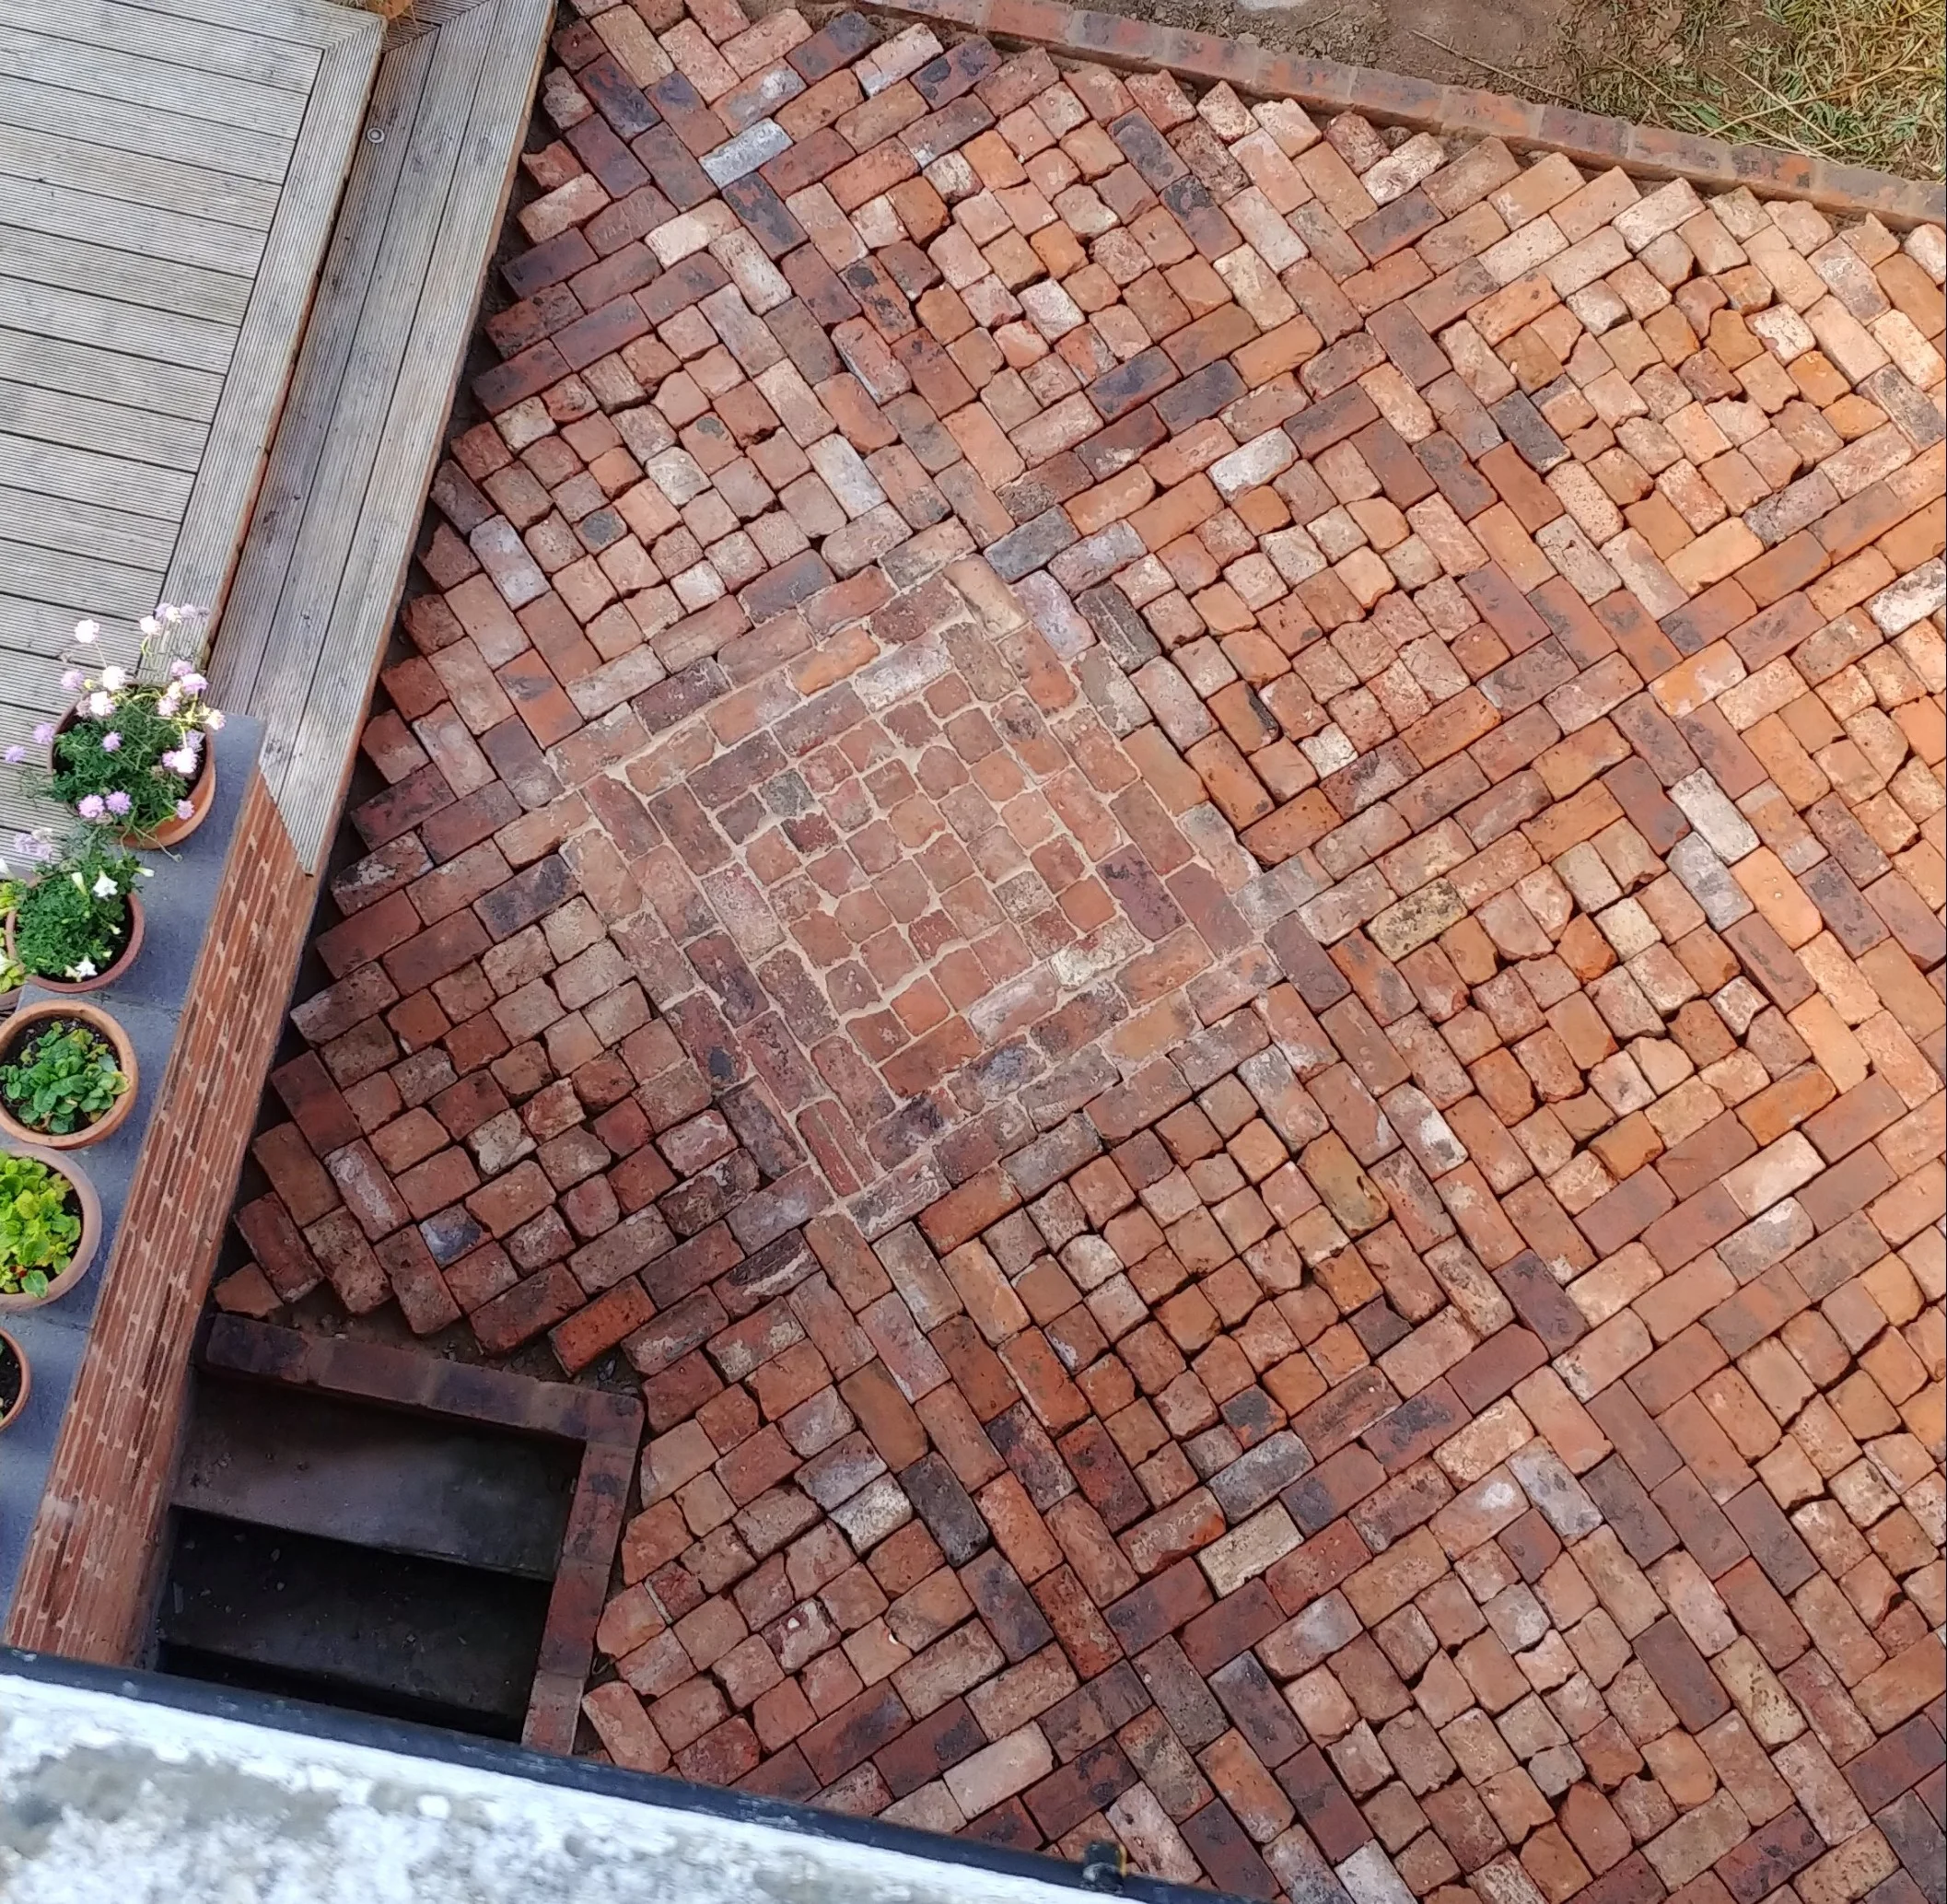
You can see the mortared brick edge at the top, and around the stairs leading down to the cellar on the bottom left.
He then laid the sharp sand, levelling it by dragging a long piece of wood across the surface.
Creating the perfect design
To create the pattern, I looked up a few images of brick paths on Pinterest. My original thought had been to lay them in straight lines from left to right using whole bricks only, but I was swayed by some lovely images of herringbone paths, and others showing cobbled walkways. Why not do both, I thought.
I grabbed some bricks on Saturday night and started laying them out. I had a vision for a mix of herringbone and cobbles, set on the diagonal to create a diamond effect, but didn’t quite know how to make it work. After some fiddling around with actual bricks, and some sketching with a paper and pencil, I worked out that if I used four bricks to create a spiral effect, then a ‘walkway’ that was four bricks wide (length-ways) could fan out and link up seamlessly to another brick spiral. Meanwhile, I could intersperse a cobbled section that was three bricks wide (width-ways). I didn’t use any particular maths or design process to come to this conclusion - it was purely through trail and error. You’re very welcome to copy the pattern to save yourself the effort.

Four-brick spiral with walkways fanning out.

My sketched out pattern.

A close-up view of the pattern.
When I laid the first cobbled section, I used 36 half bricks (6 x 6 cobbles). I quickly ran out of half pieces as most of our broken bricks were more like 2/3 of a brick, or 1/4 of a brick, with weird jagged or pointed edges. So after filling two of the diamonds with 6x6 cobbles, I switched to using 5x5 cobbles instead. It worked perfectly from that point onwards and I couldn’t even tell you which two diamonds were filled with 6x6 instead of 5x5, as the overall effect is the same.
A few tips for anyone using the same pattern…
I used a laser measure to find the exact centre of the patio. I laid my first four-brick spiral right on the centre point, and the design fanned out from there.
As I was laying the bricks, something that helped was to mark the centre of each spiral with a stick. This made it easier to keep track of where I needed to stop using whole bricks and switch to using cobbles.
I found it easier to create the walkways first, and then when they were all complete, I went back and filled in the cobbles.

At first I filled in the cobbles as I went along.

I then realised it was easier to lay the walkways and leave the cobbled squares open.
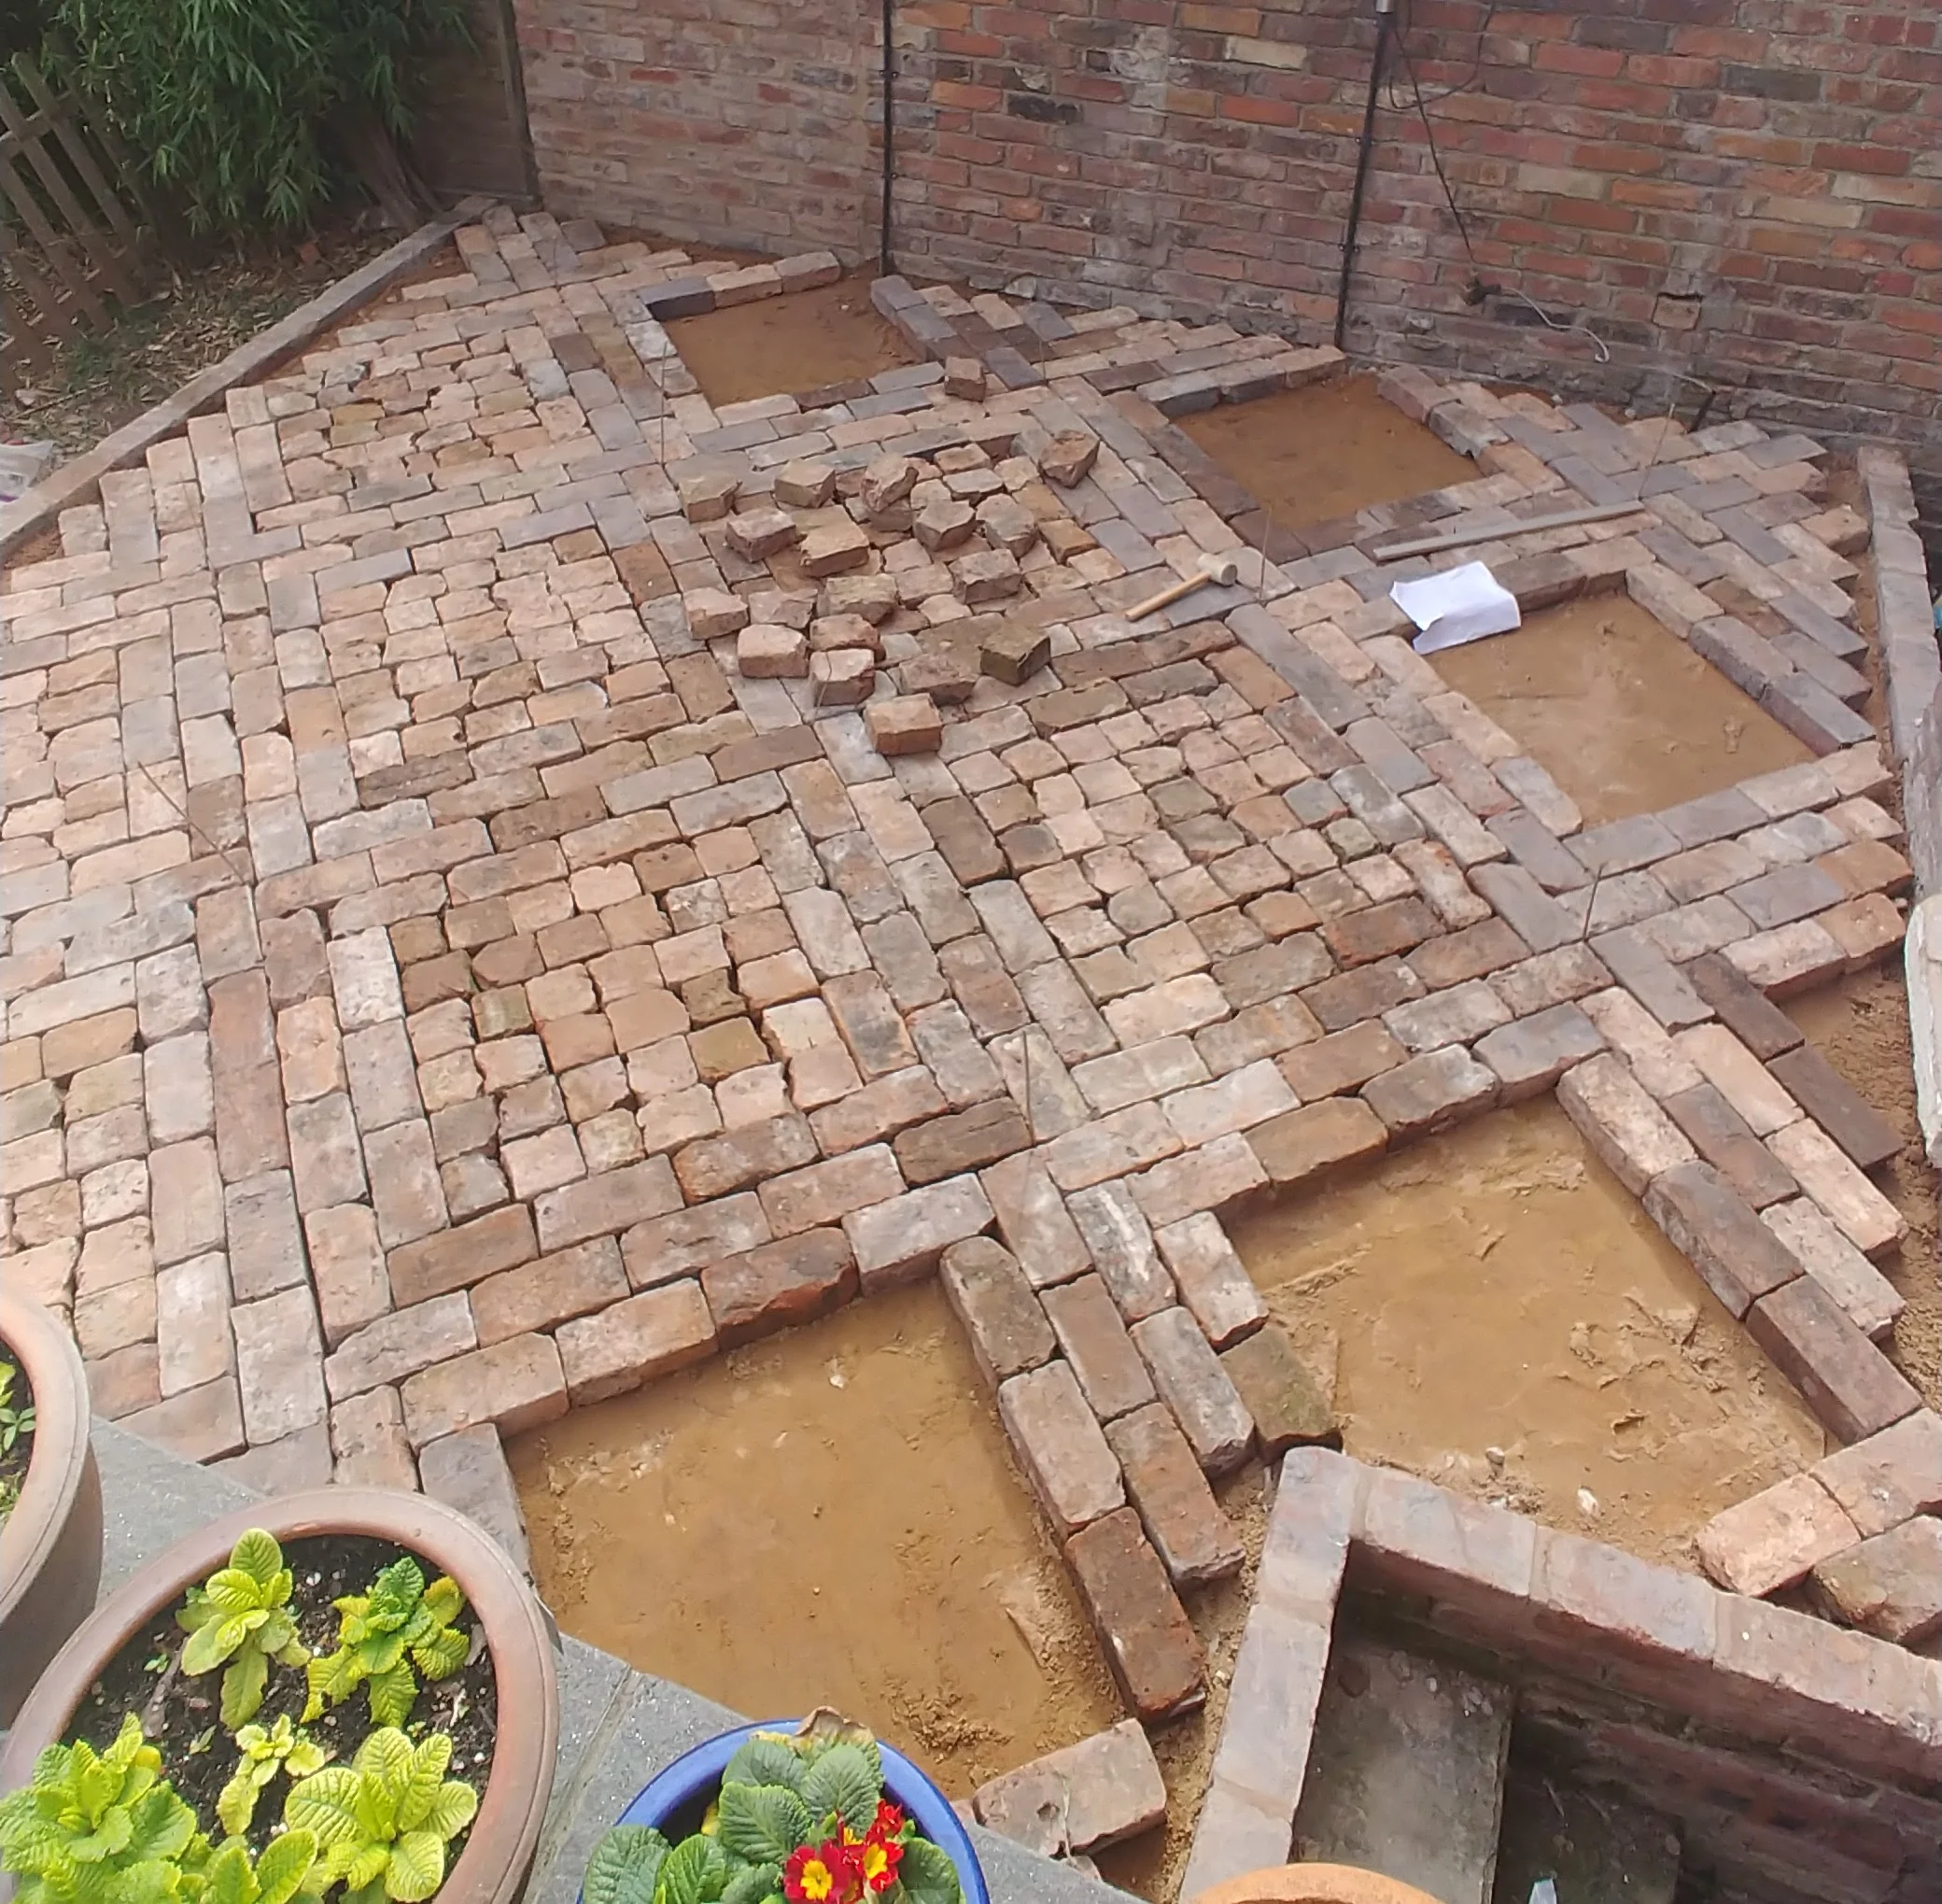
Walkways are done, let’s lay some cobbles.
Ta daa!
I referred constantly to my paper design, as it’s very easy to go cross-eyed looking at brick after brick after brick and accidentally lay the walkway too wide or too long.
A few general tips for laying reclaimed bricks
The most time-consuming part of the job was hauling the bricks. We had multiple stacks of bricks hidden behind various shrubs at the end of the garden - and because not all the bricks were suitable (some were too heavily coated in mortar on the tops, or were chipped in odd places), I had to take each stack apart to find the bricks I wanted, stack them in a wheelbarrow, wheel them over to the patio area, and unload them. Each brick weighs about 3kg and I used about 700 of them, so that’s over two tonnes of bricks shifted just for the patio, let alone the ones that I picked up, assessed, and discarded. If you’re attempting this project, you could divide the work into two - phase one to identify and stack the bricks next to your working area, and phase two to actually lay them. I did the whole thing in a single day, which was feasible but exhausting. Oh, and of course wear rigger gloves - gardening gloves won’t cut it. I actually wore a hole in my rigger gloves after about 8 hours and had to switch to a new pair.
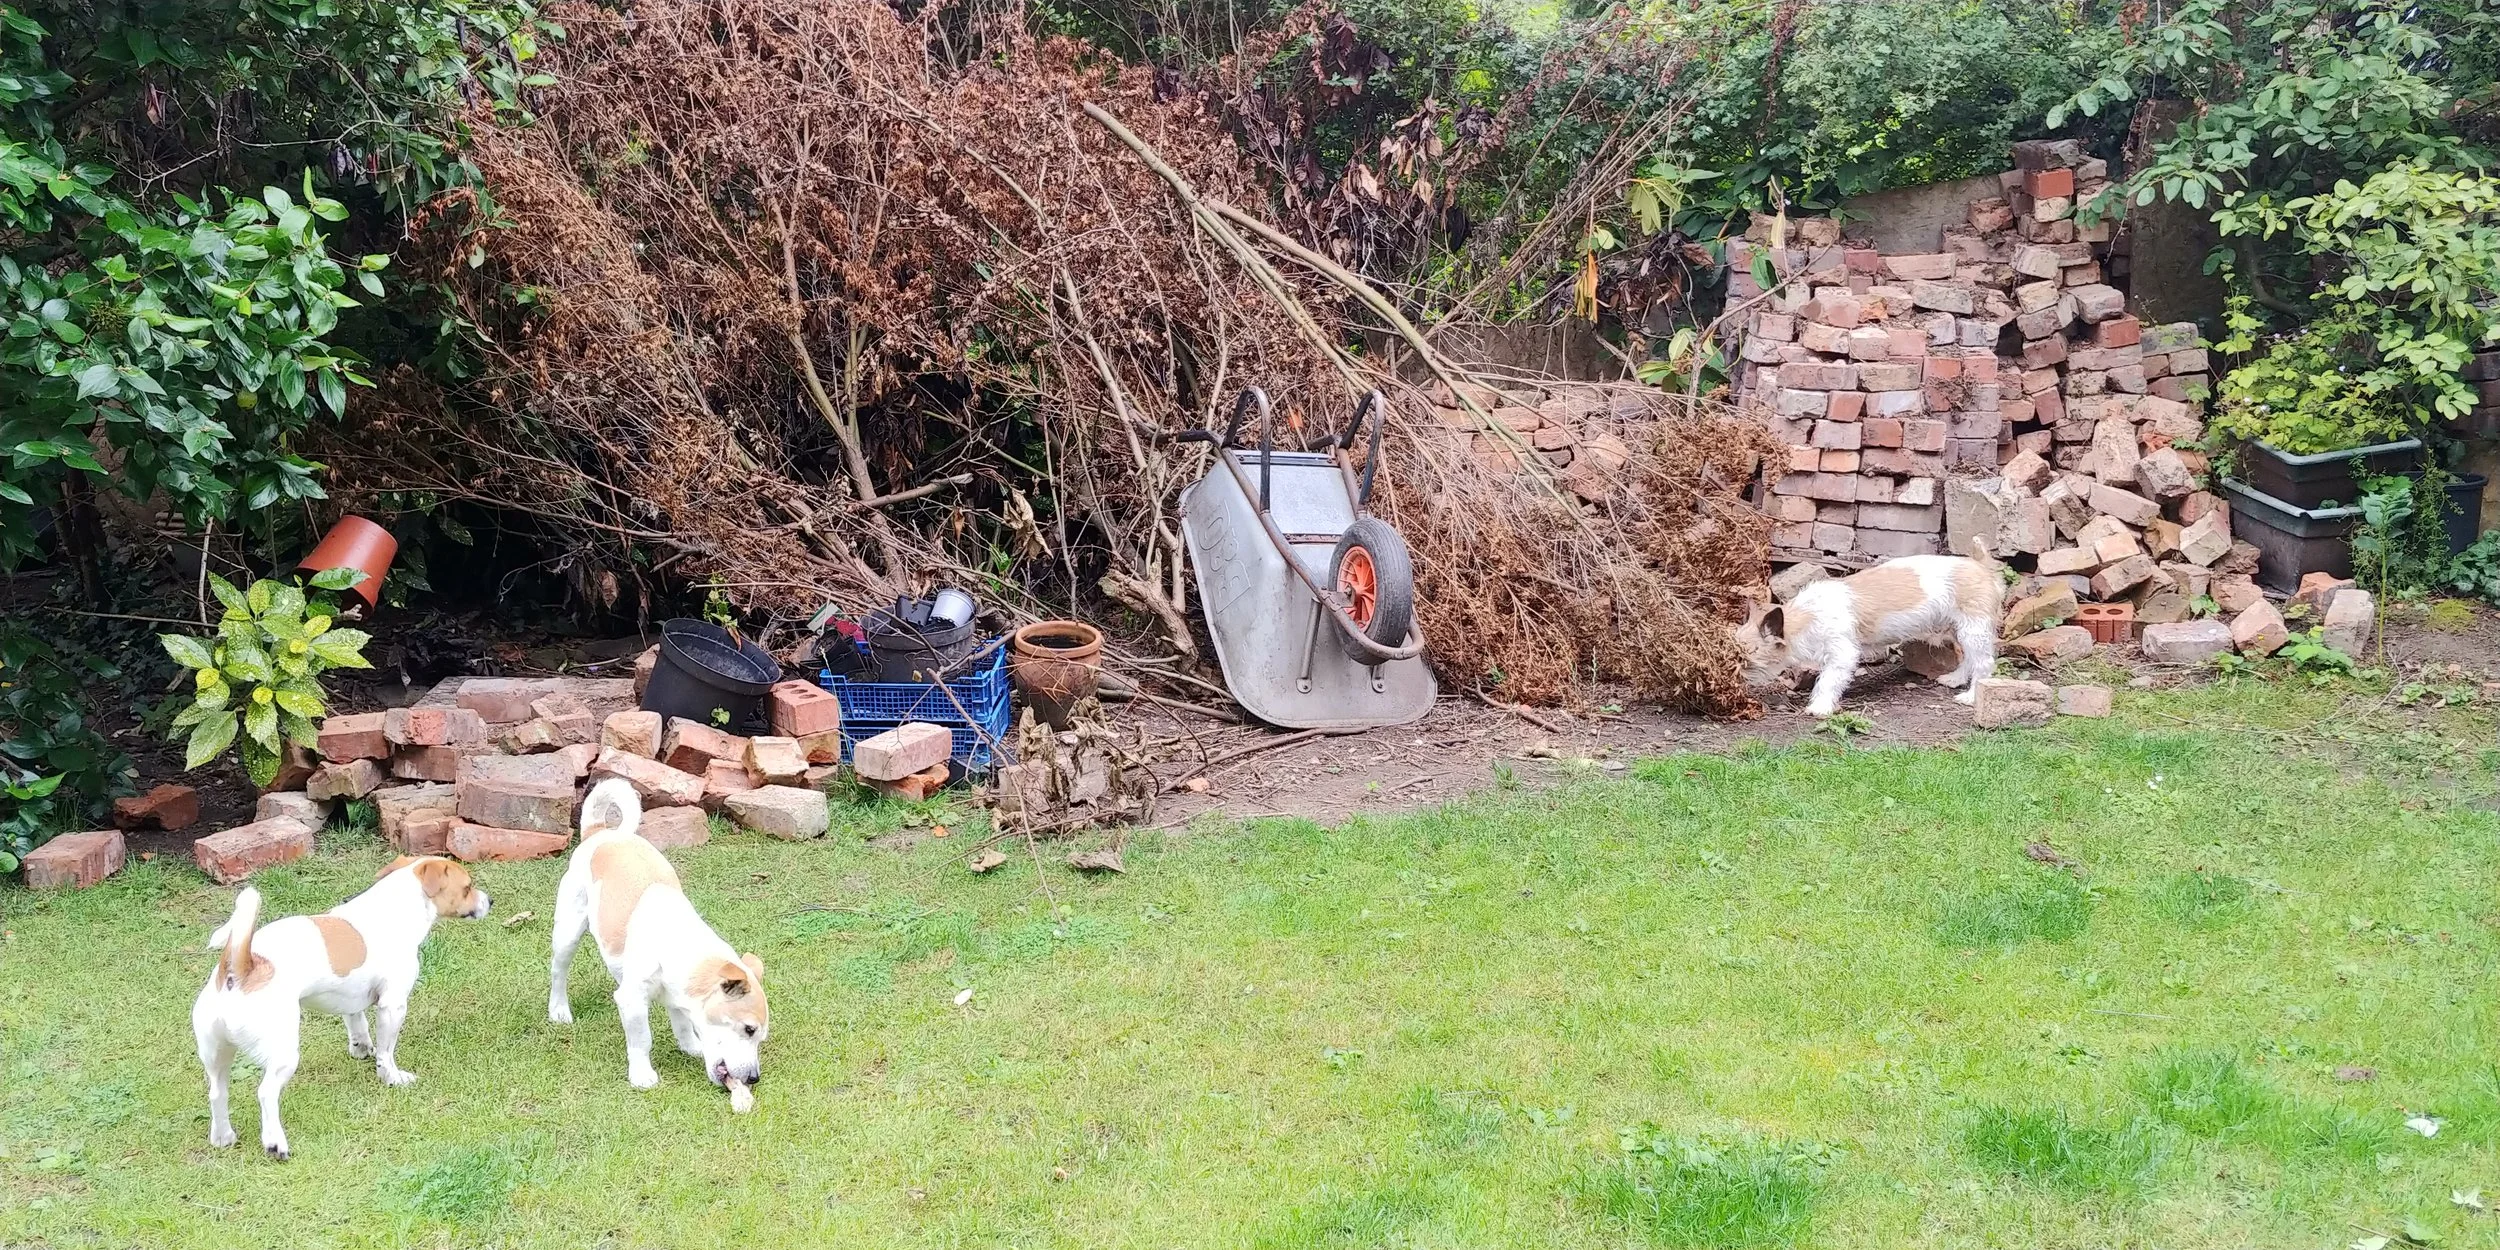
Various unwieldy stashes of bricks.

A wheelbarrow full of bricks.
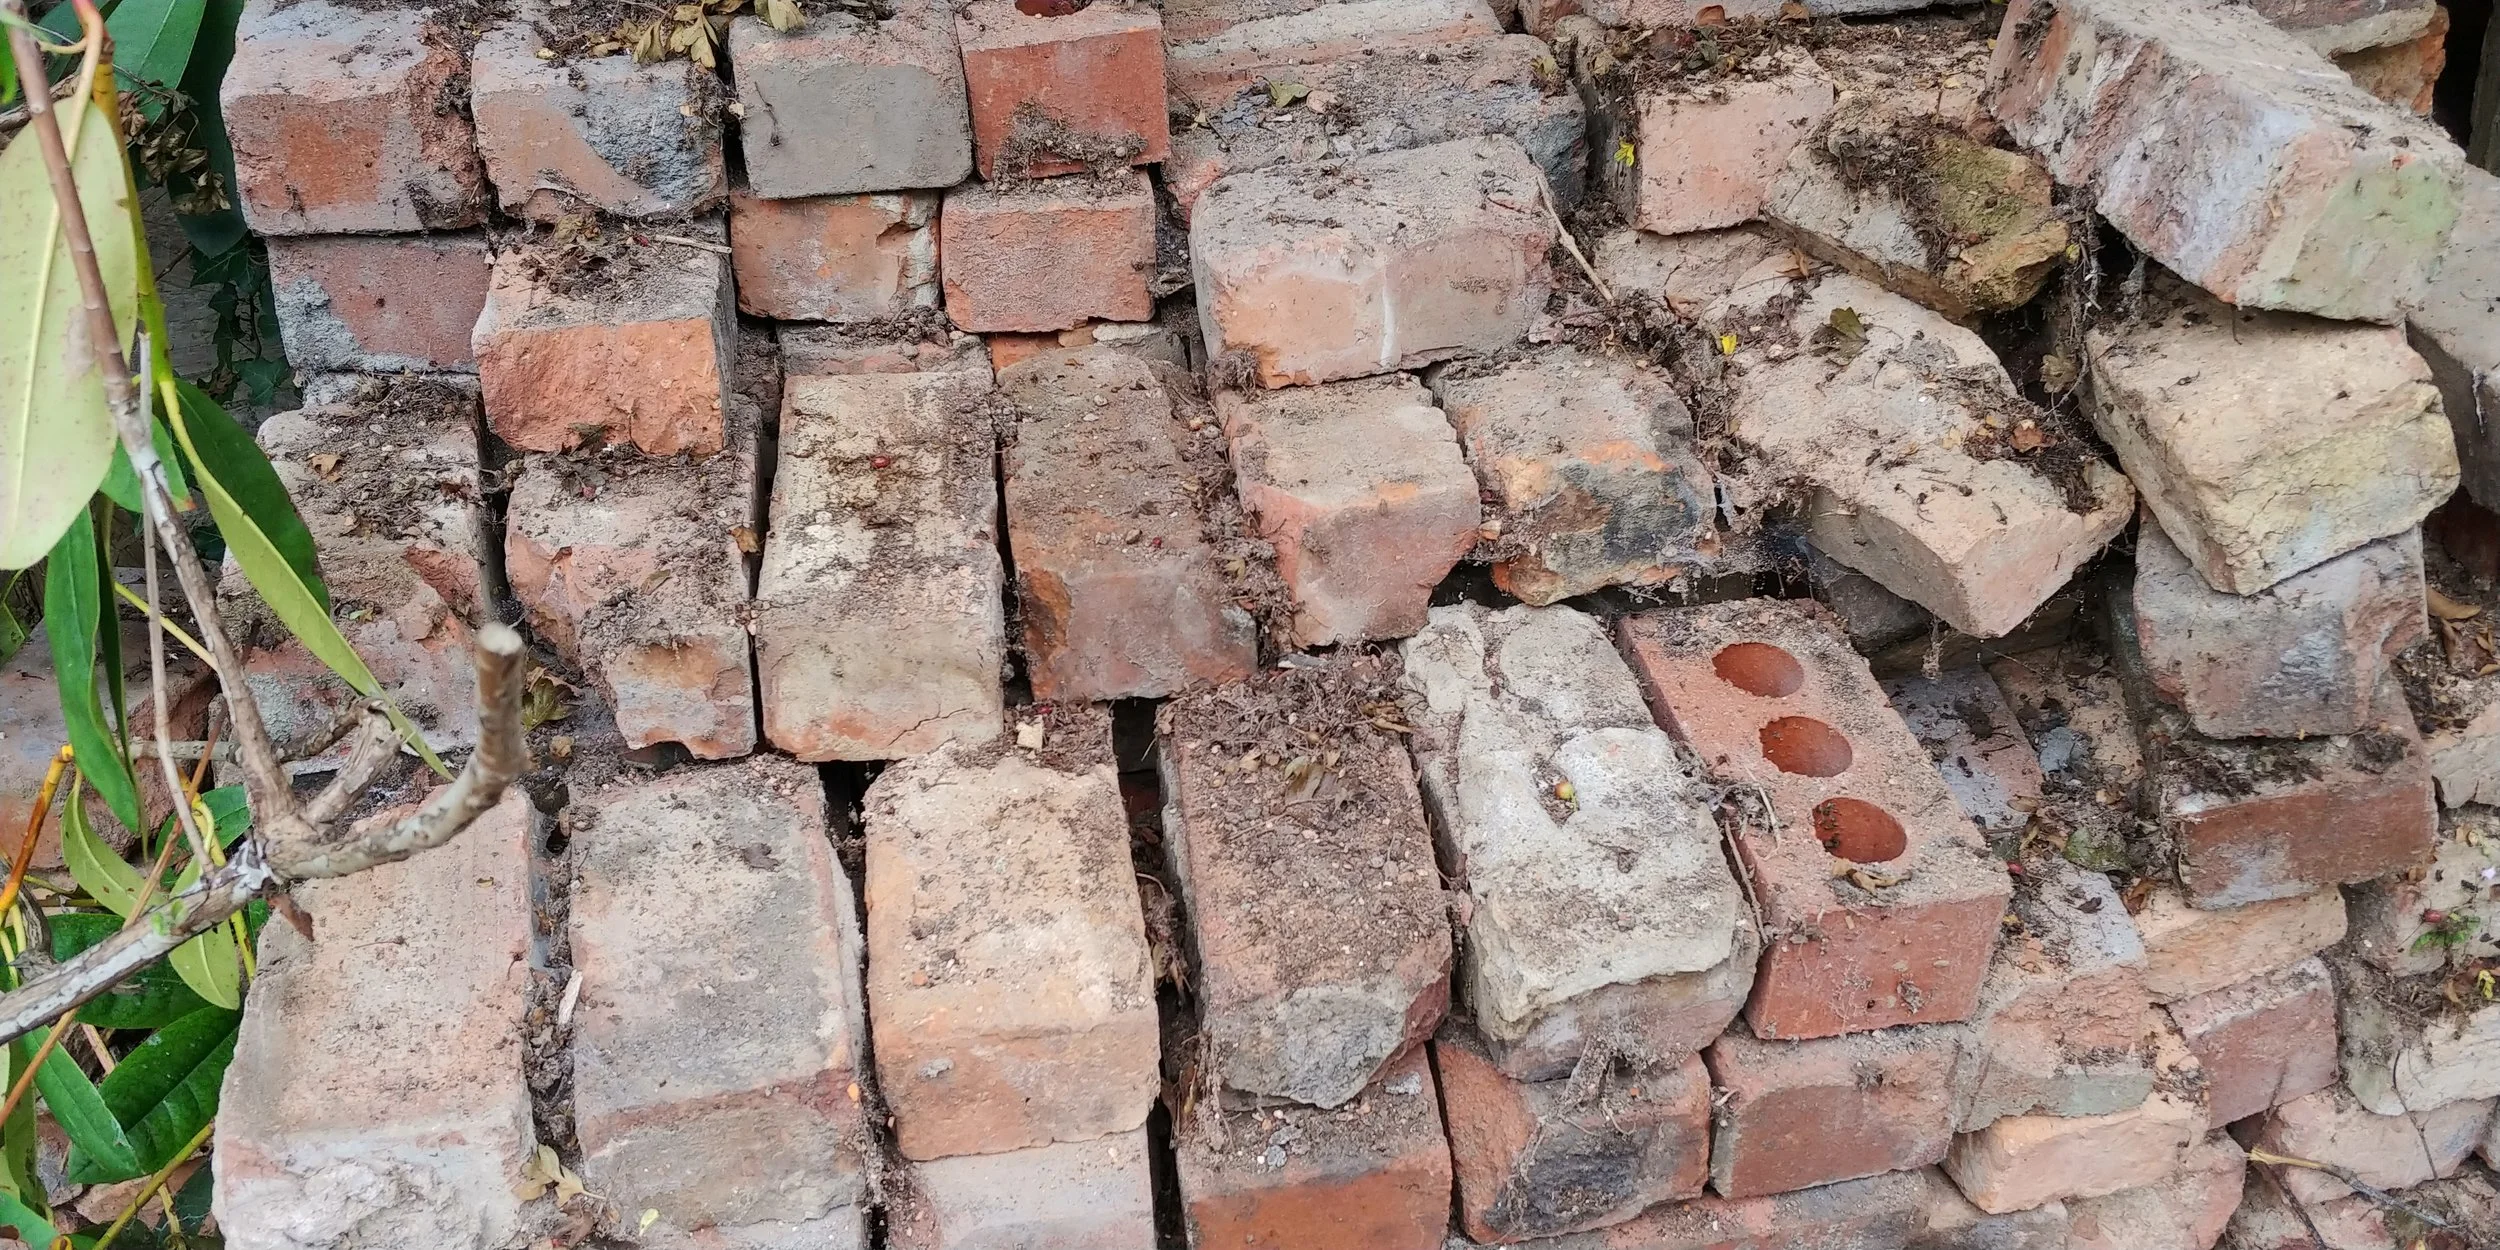
Close up of a typical brick pile. I don’t even want to tell you how many massive spiders were lurking in here.
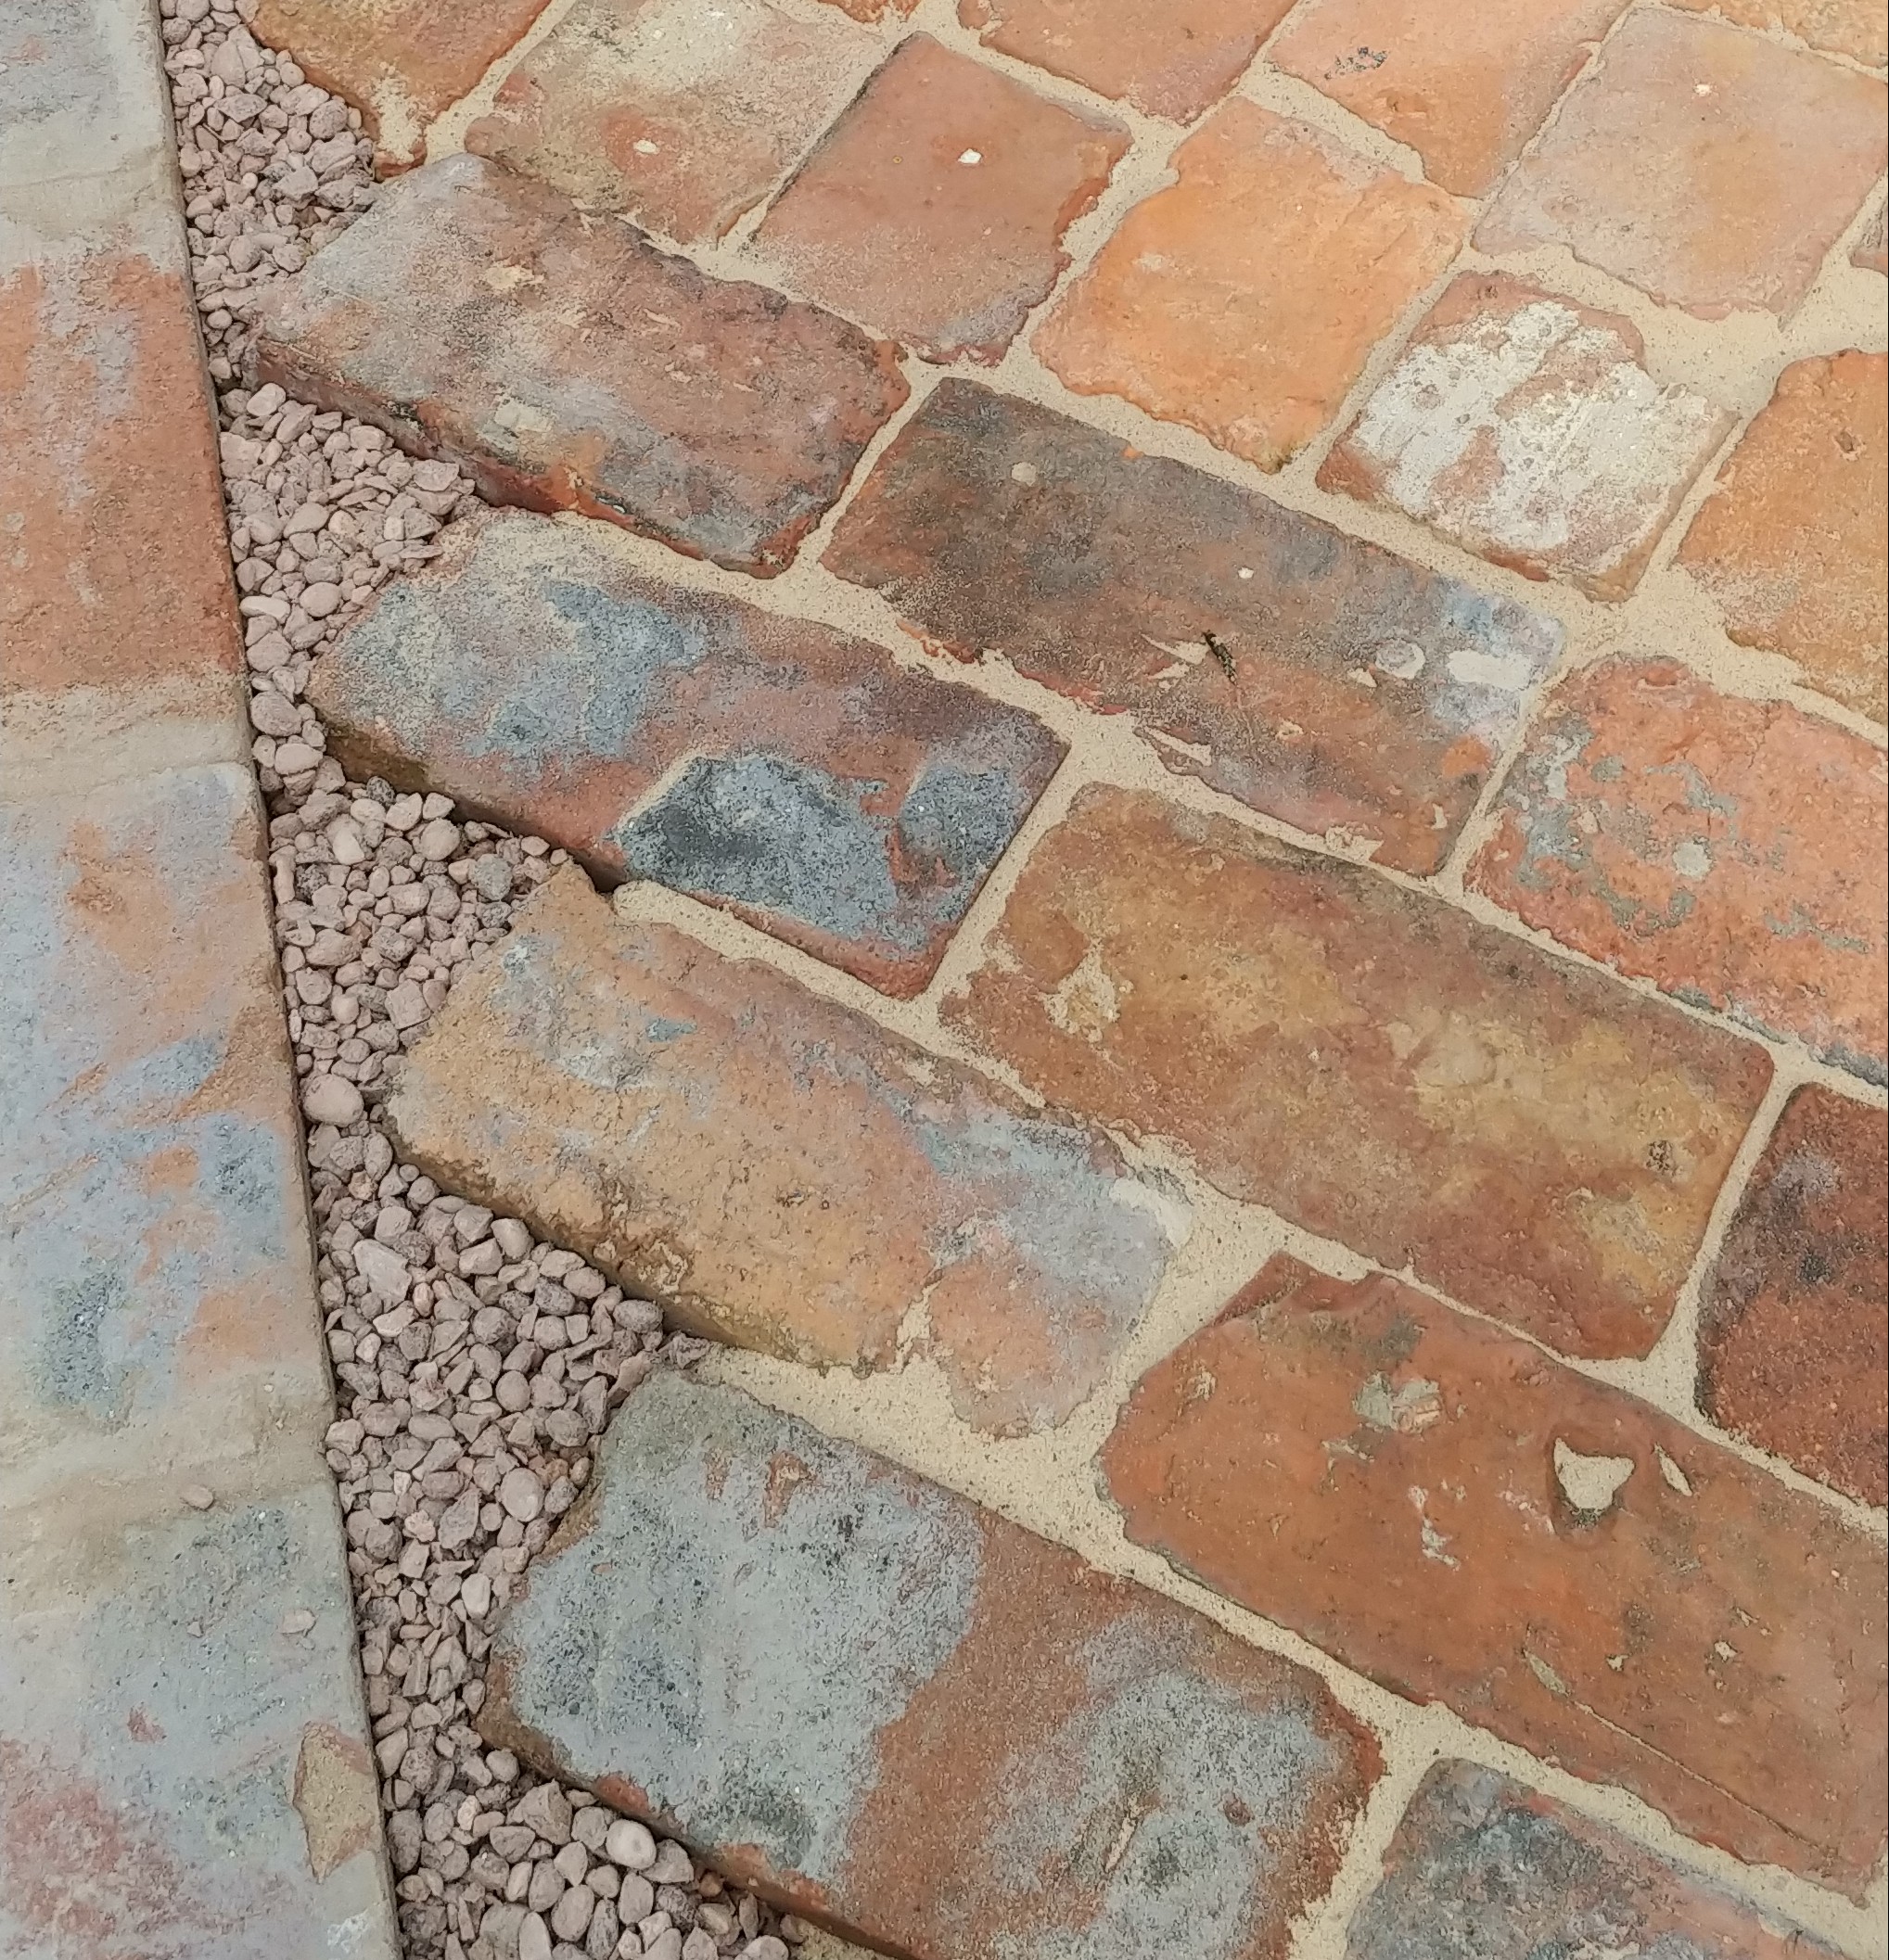
Don’t worry too much about making them level. Reclaimed bricks are slightly different depths (our external bricks were deeper than the internal ones) and will have all sorts of odd little chips and crevasses - ours are about 150 years old so a spot of weathering is to be expected. You could easily spend hours and hours trying to get everything perfectly level by digging out in the sand for the larger bricks, or building up underneath the shorter ones. My advice? Don’t bother. Lay them all out, deal with the most obviously higher or lower ones, and leave the others to add to the generally rustic effect. Once the paving sand is in place, it significantly helps to smooth out the transitions from one brick to another. So I basically just put them in place on the sharp sand, tapped them with a rubber mallet (or stood on them), and then moved onto the next one.

Close up of the cobbles showing how rough looking they are. Once filled with paving sand, it disguises the jagged edges.
Some of the bricks still had mortar stuck to them. We chipped this off with a hammer and brick bolster. Wear goggles as the chips fly everywhere.
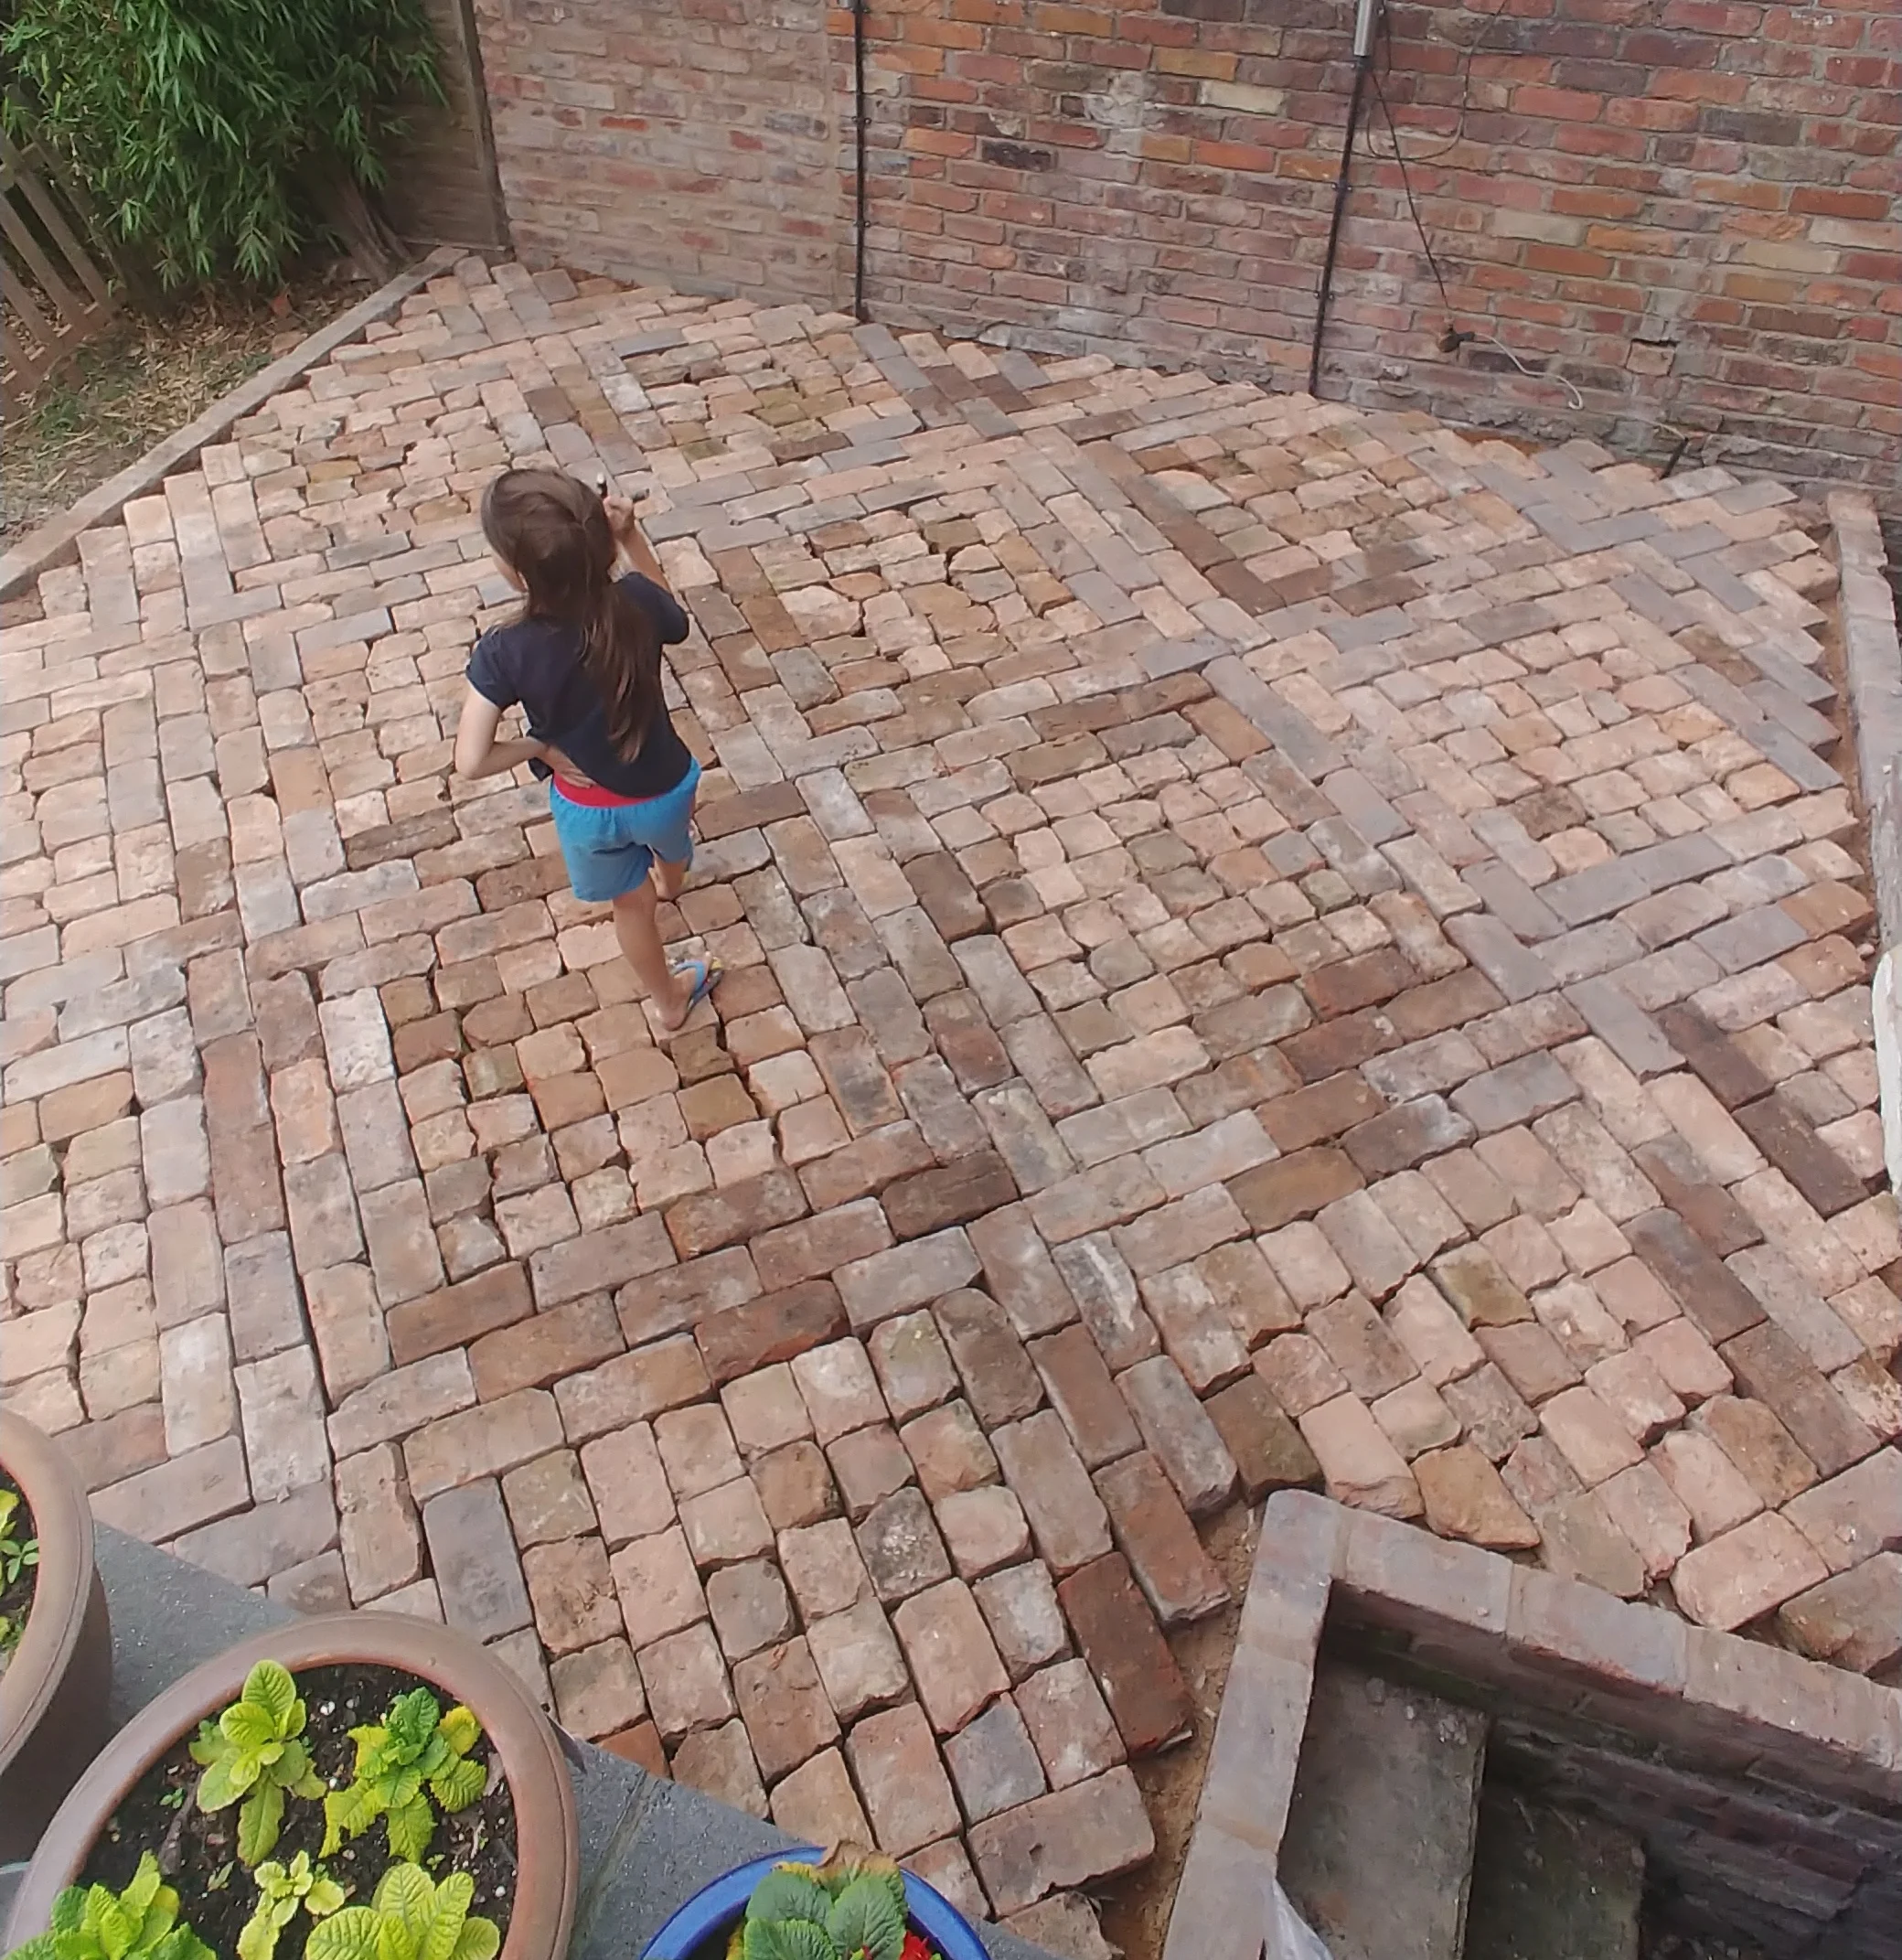
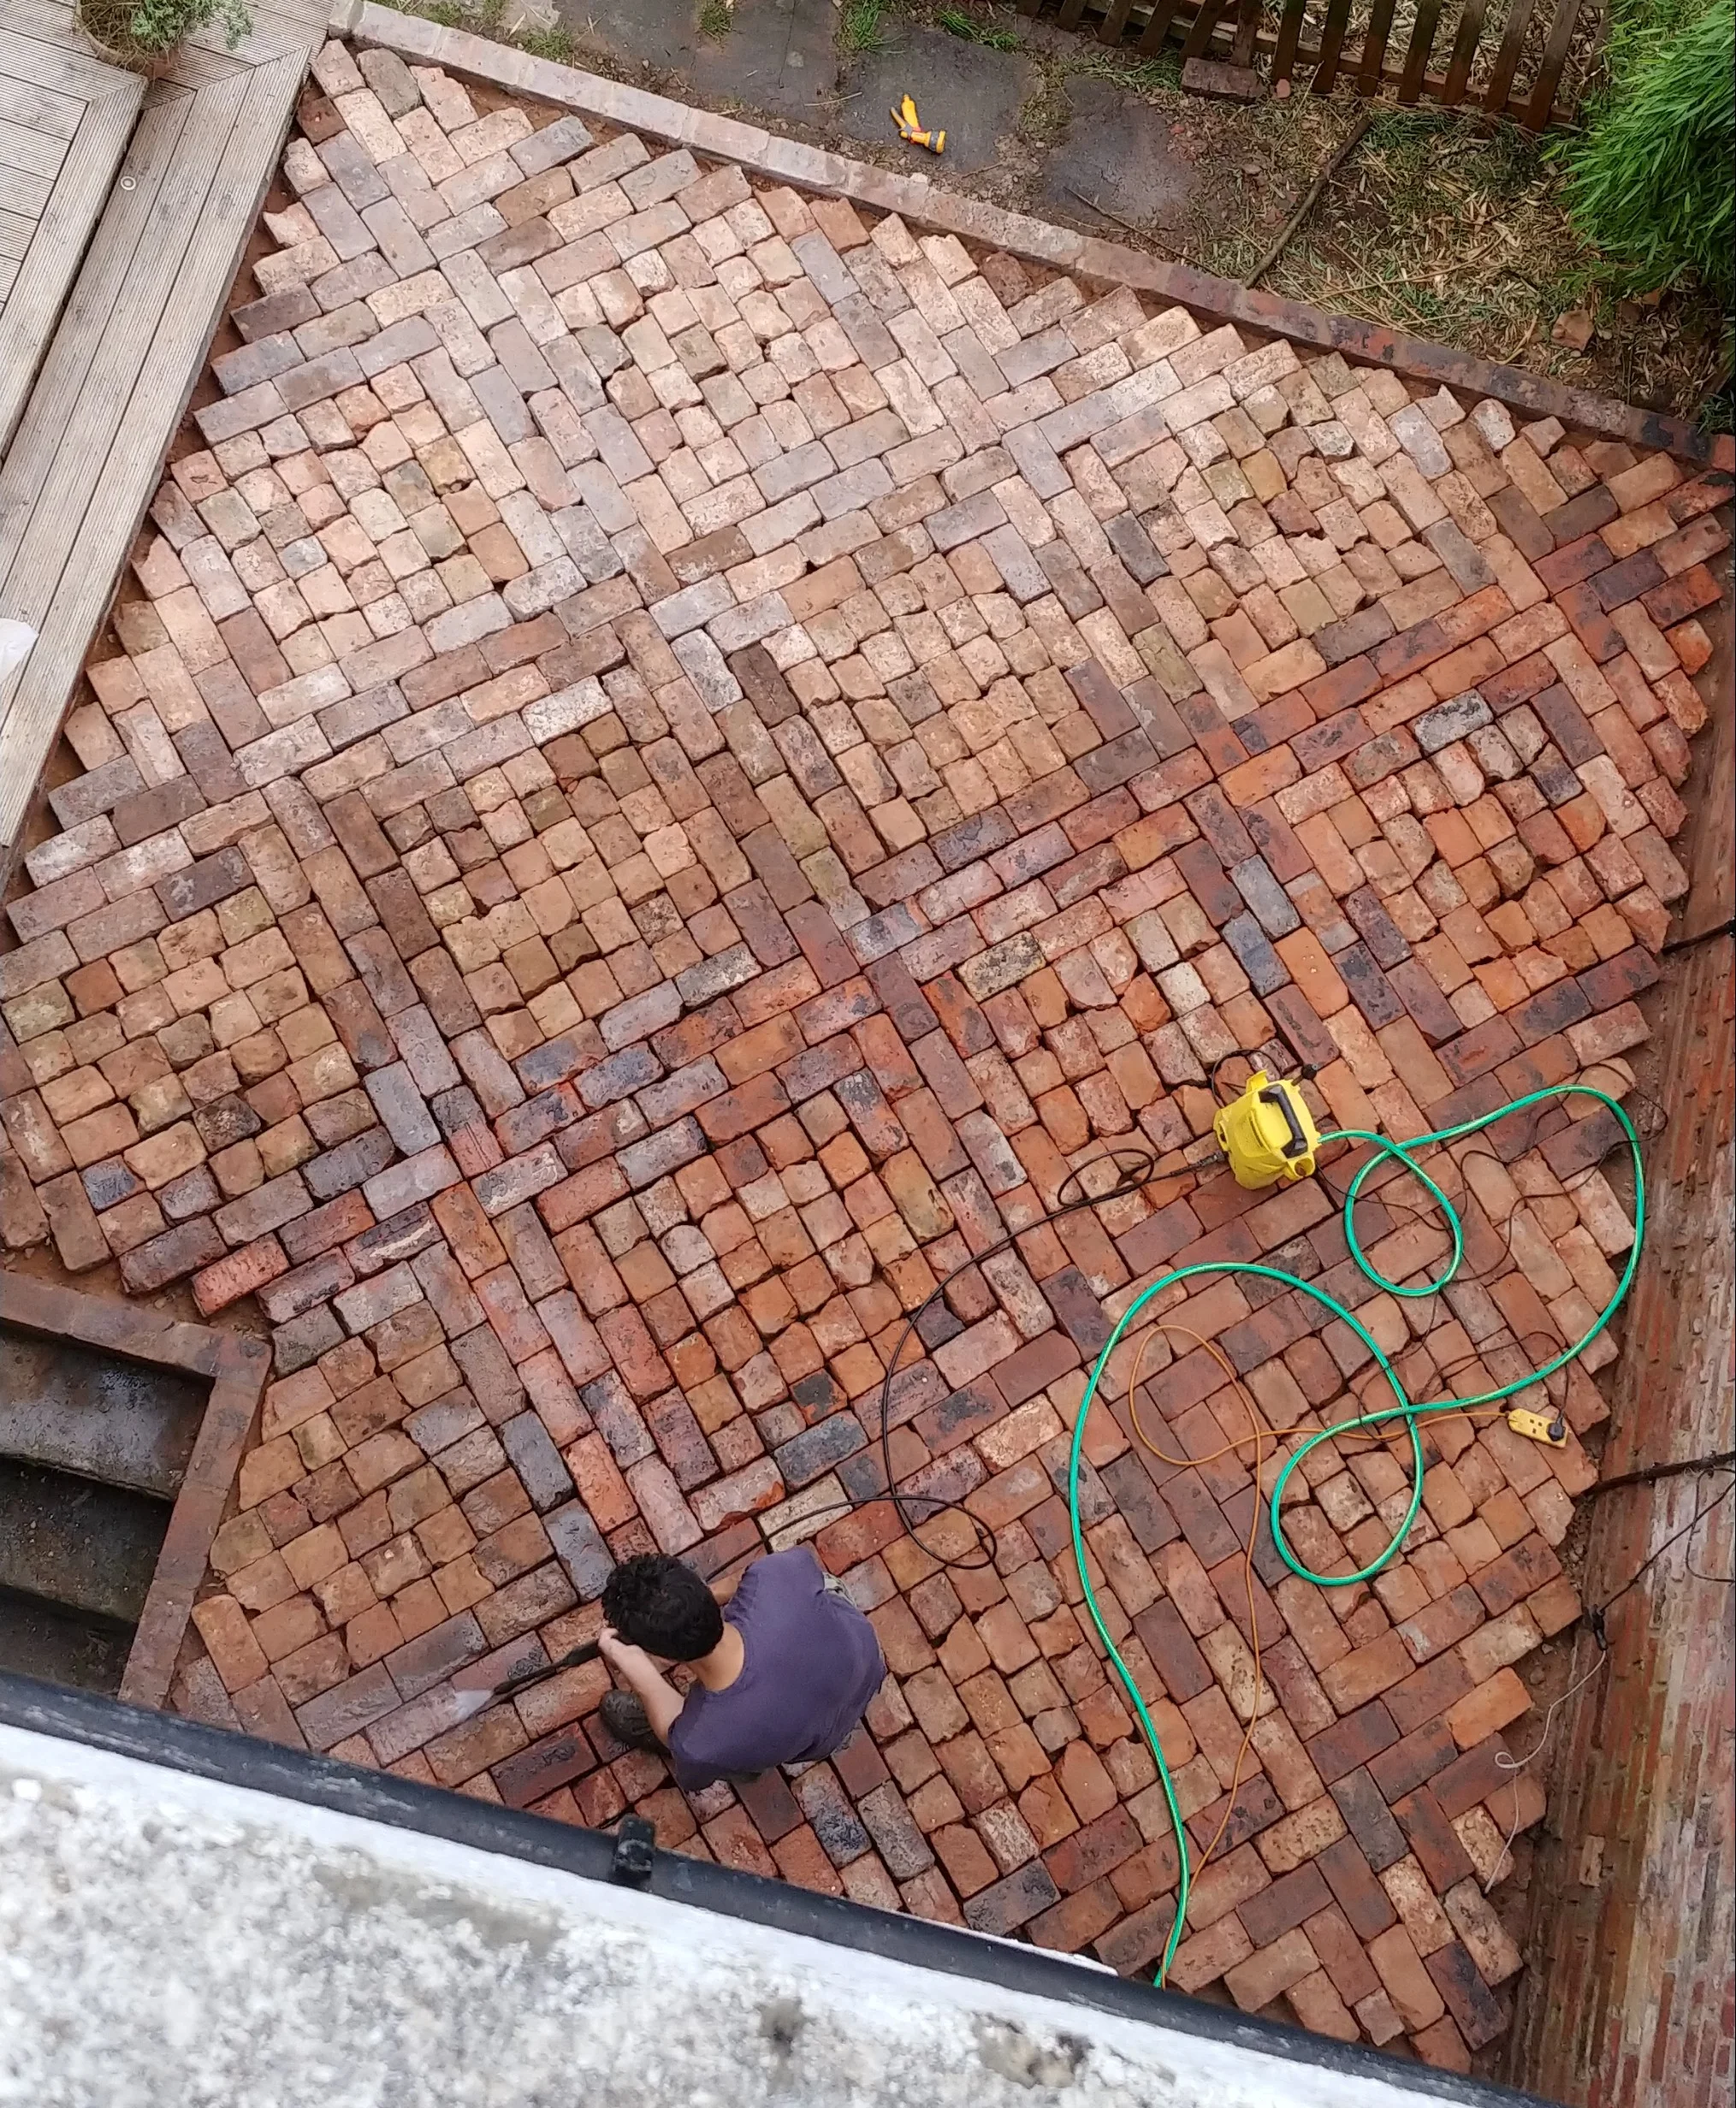
I kept our brick pathways in a straight line using a laser spirit level that beams a red line across the ground - but to be honest, just eyeballing them worked fine too. It needs to look good to the eye rather than to the tape measure, and when you’re working with wonky materials, it isn’t really possible to achieve purist straight lines. I also kept running upstairs to the bathroom to make sure it looked OK from a birds-eye view, and nudging the bricks along a little bit to course-correct when required.

Birds-eye view.
Once all the bricks were in place - after ten grim sweaty hours of labour - my husband power-washed the bricks, and I retired to the bathroom to power-wash myself. The colour transformation was amazing to watch.
Spot which part has been power-washed.
How do you glue them together?
I was asked this on Instagram, and it’s a fair question :-) The answer is - you don’t. Instead, you just brush paving sand over the bricks until all the gaps have been filled. This will probably take a couple of days as it settles overnight or after some rainfall. When we had our driveway installed at our old house by professionals, this is exactly how they laid our setts - MOT, sharp sand. setts, then paving sand brushed into the cracks. Our patio is solid as a rock thanks to the paving sand.
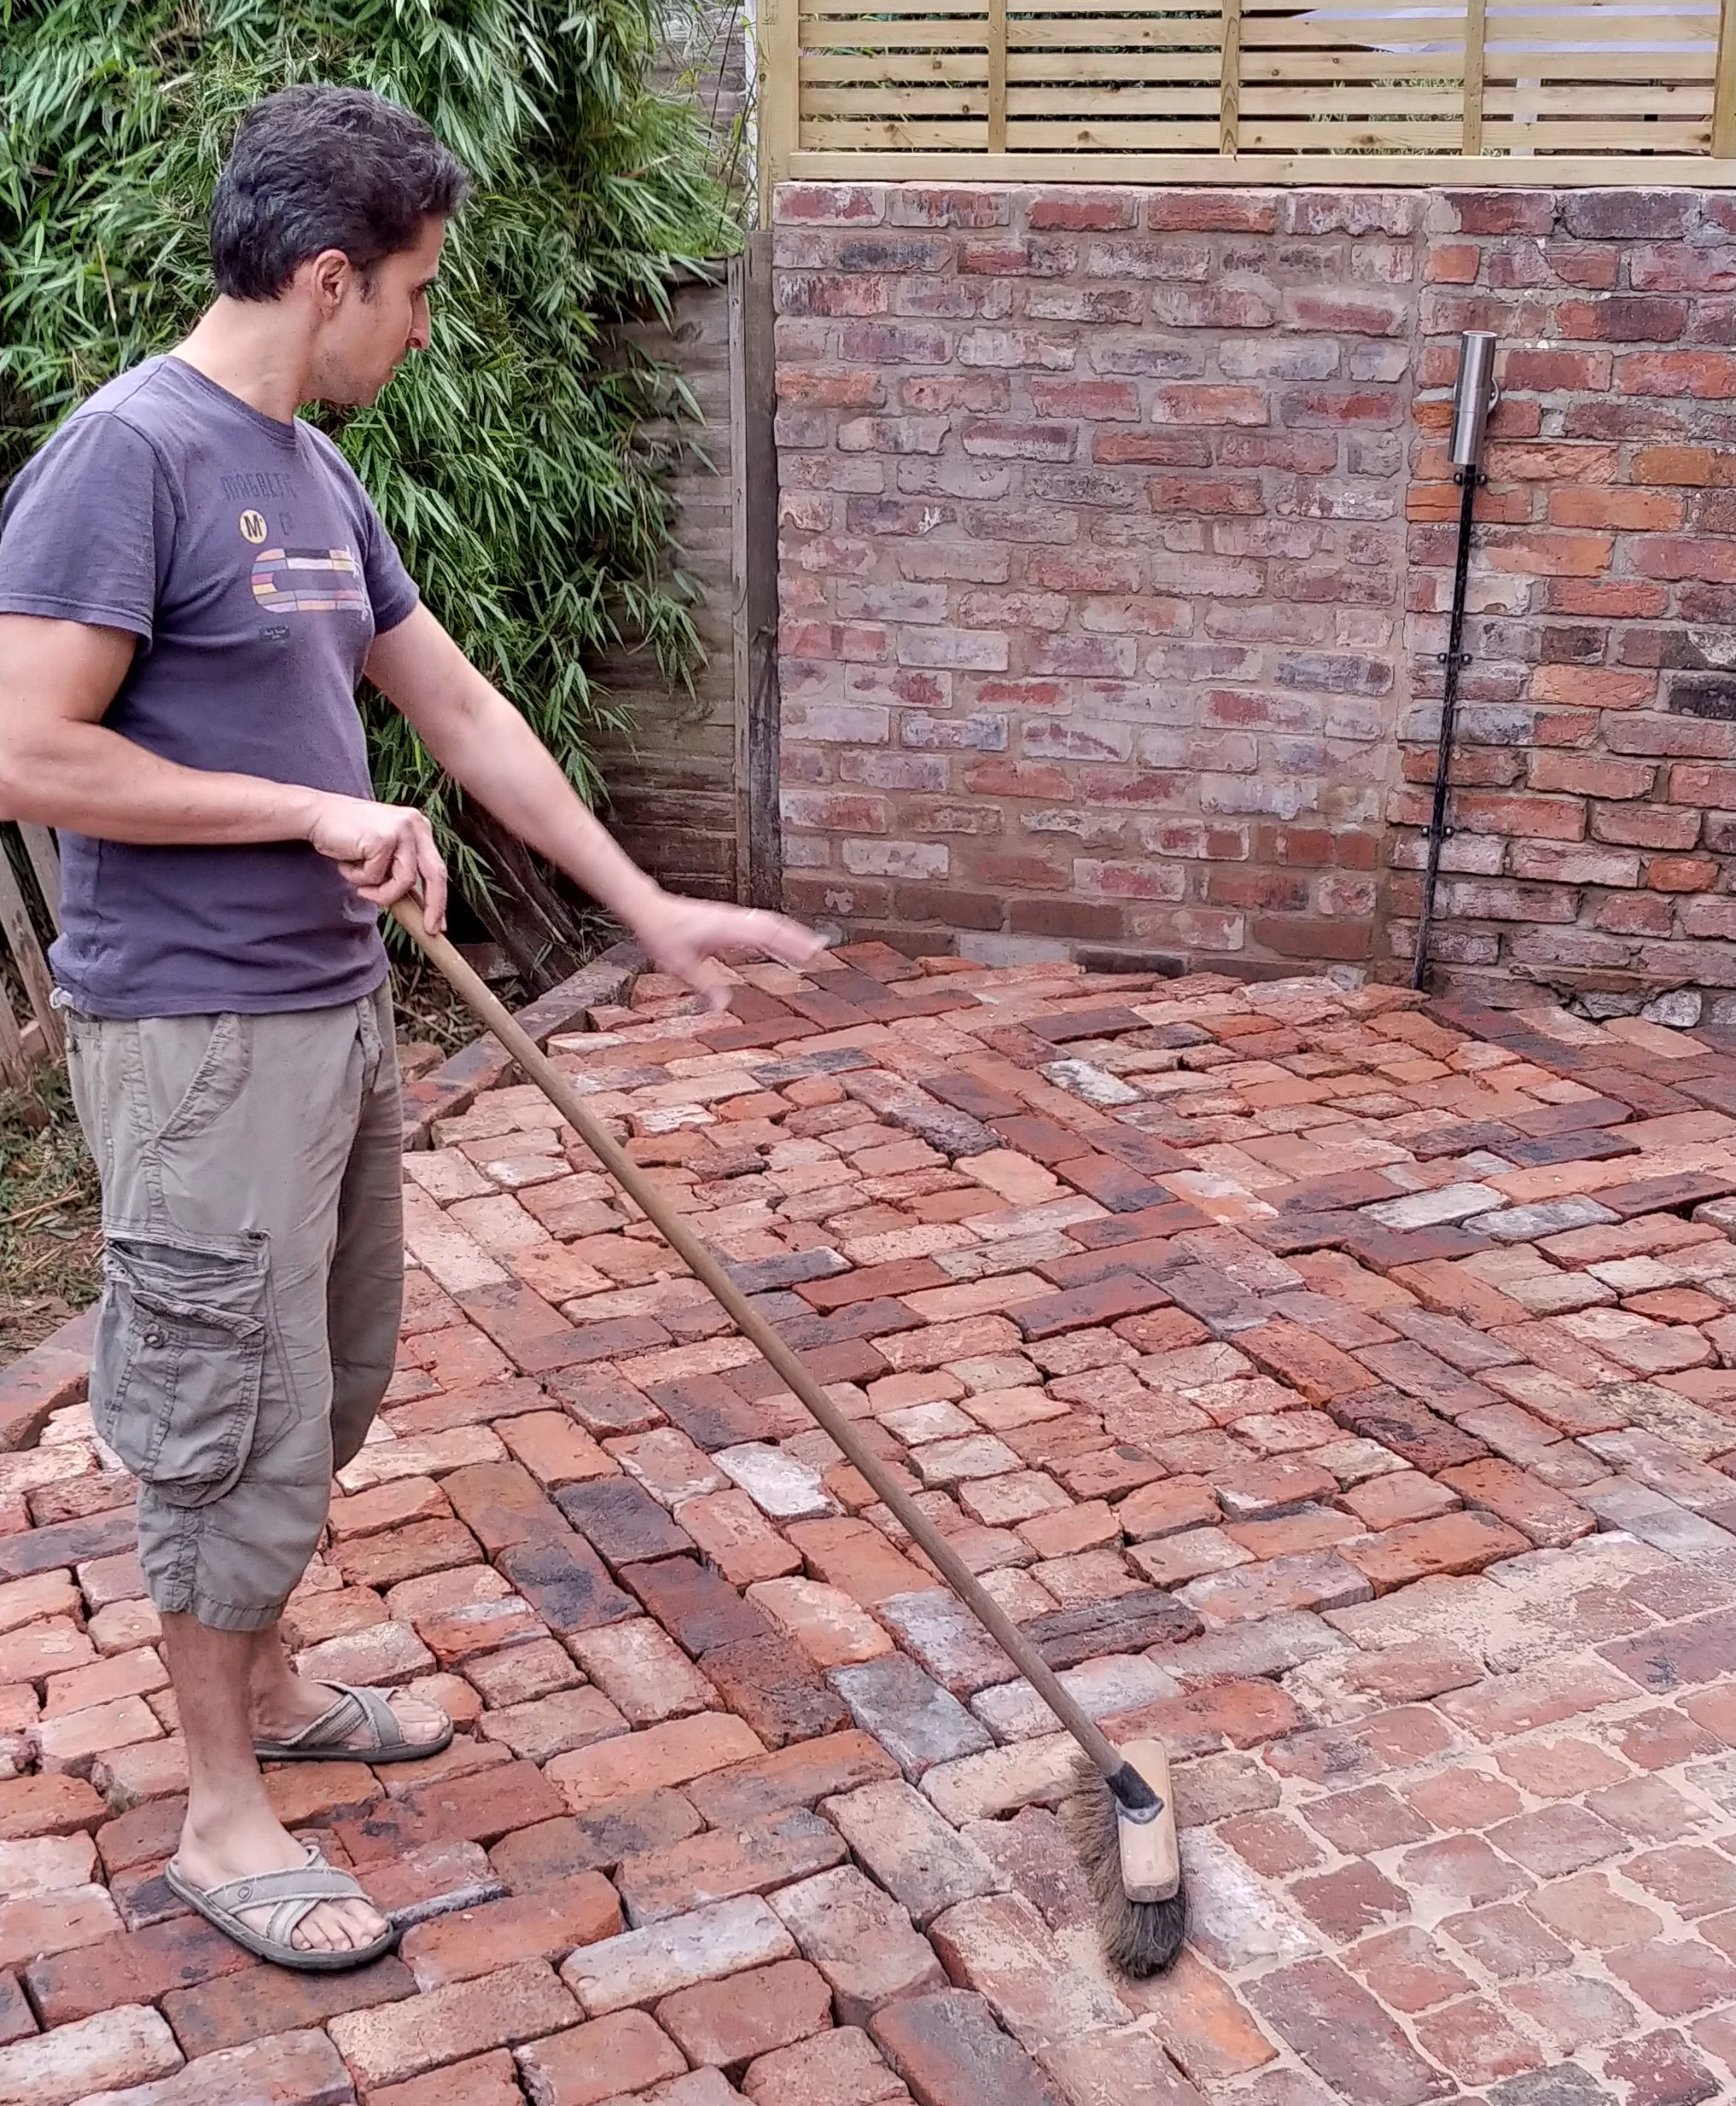
Brushing the sand into the gaps.
Trial patch of sand brushing from above.
A key benefit of using paving sand rather than mortaring them in place is that the whole area is drainable, which contributes greatly to environmental sustainability. We didn’t worry about slanting it away from the house as we’d had the MOT sitting there for three years through torrential Mancunian downpours without a single drainage issue. Any rainwater soaks straight through the sand and the MOT and goes into the soil below. You might want to consider slanting your MOT and sharp sand bed to be on the safe side.
Our patio is our secondary hard-standing outdoor area - our primary area is the deck. I think if we were laying a patio as our primary area, I might think about using a compacter on top of the bricks once laid. It’s not something we need to do as it won’t get heavy traffic, but you might consider researching if it’s necessary.
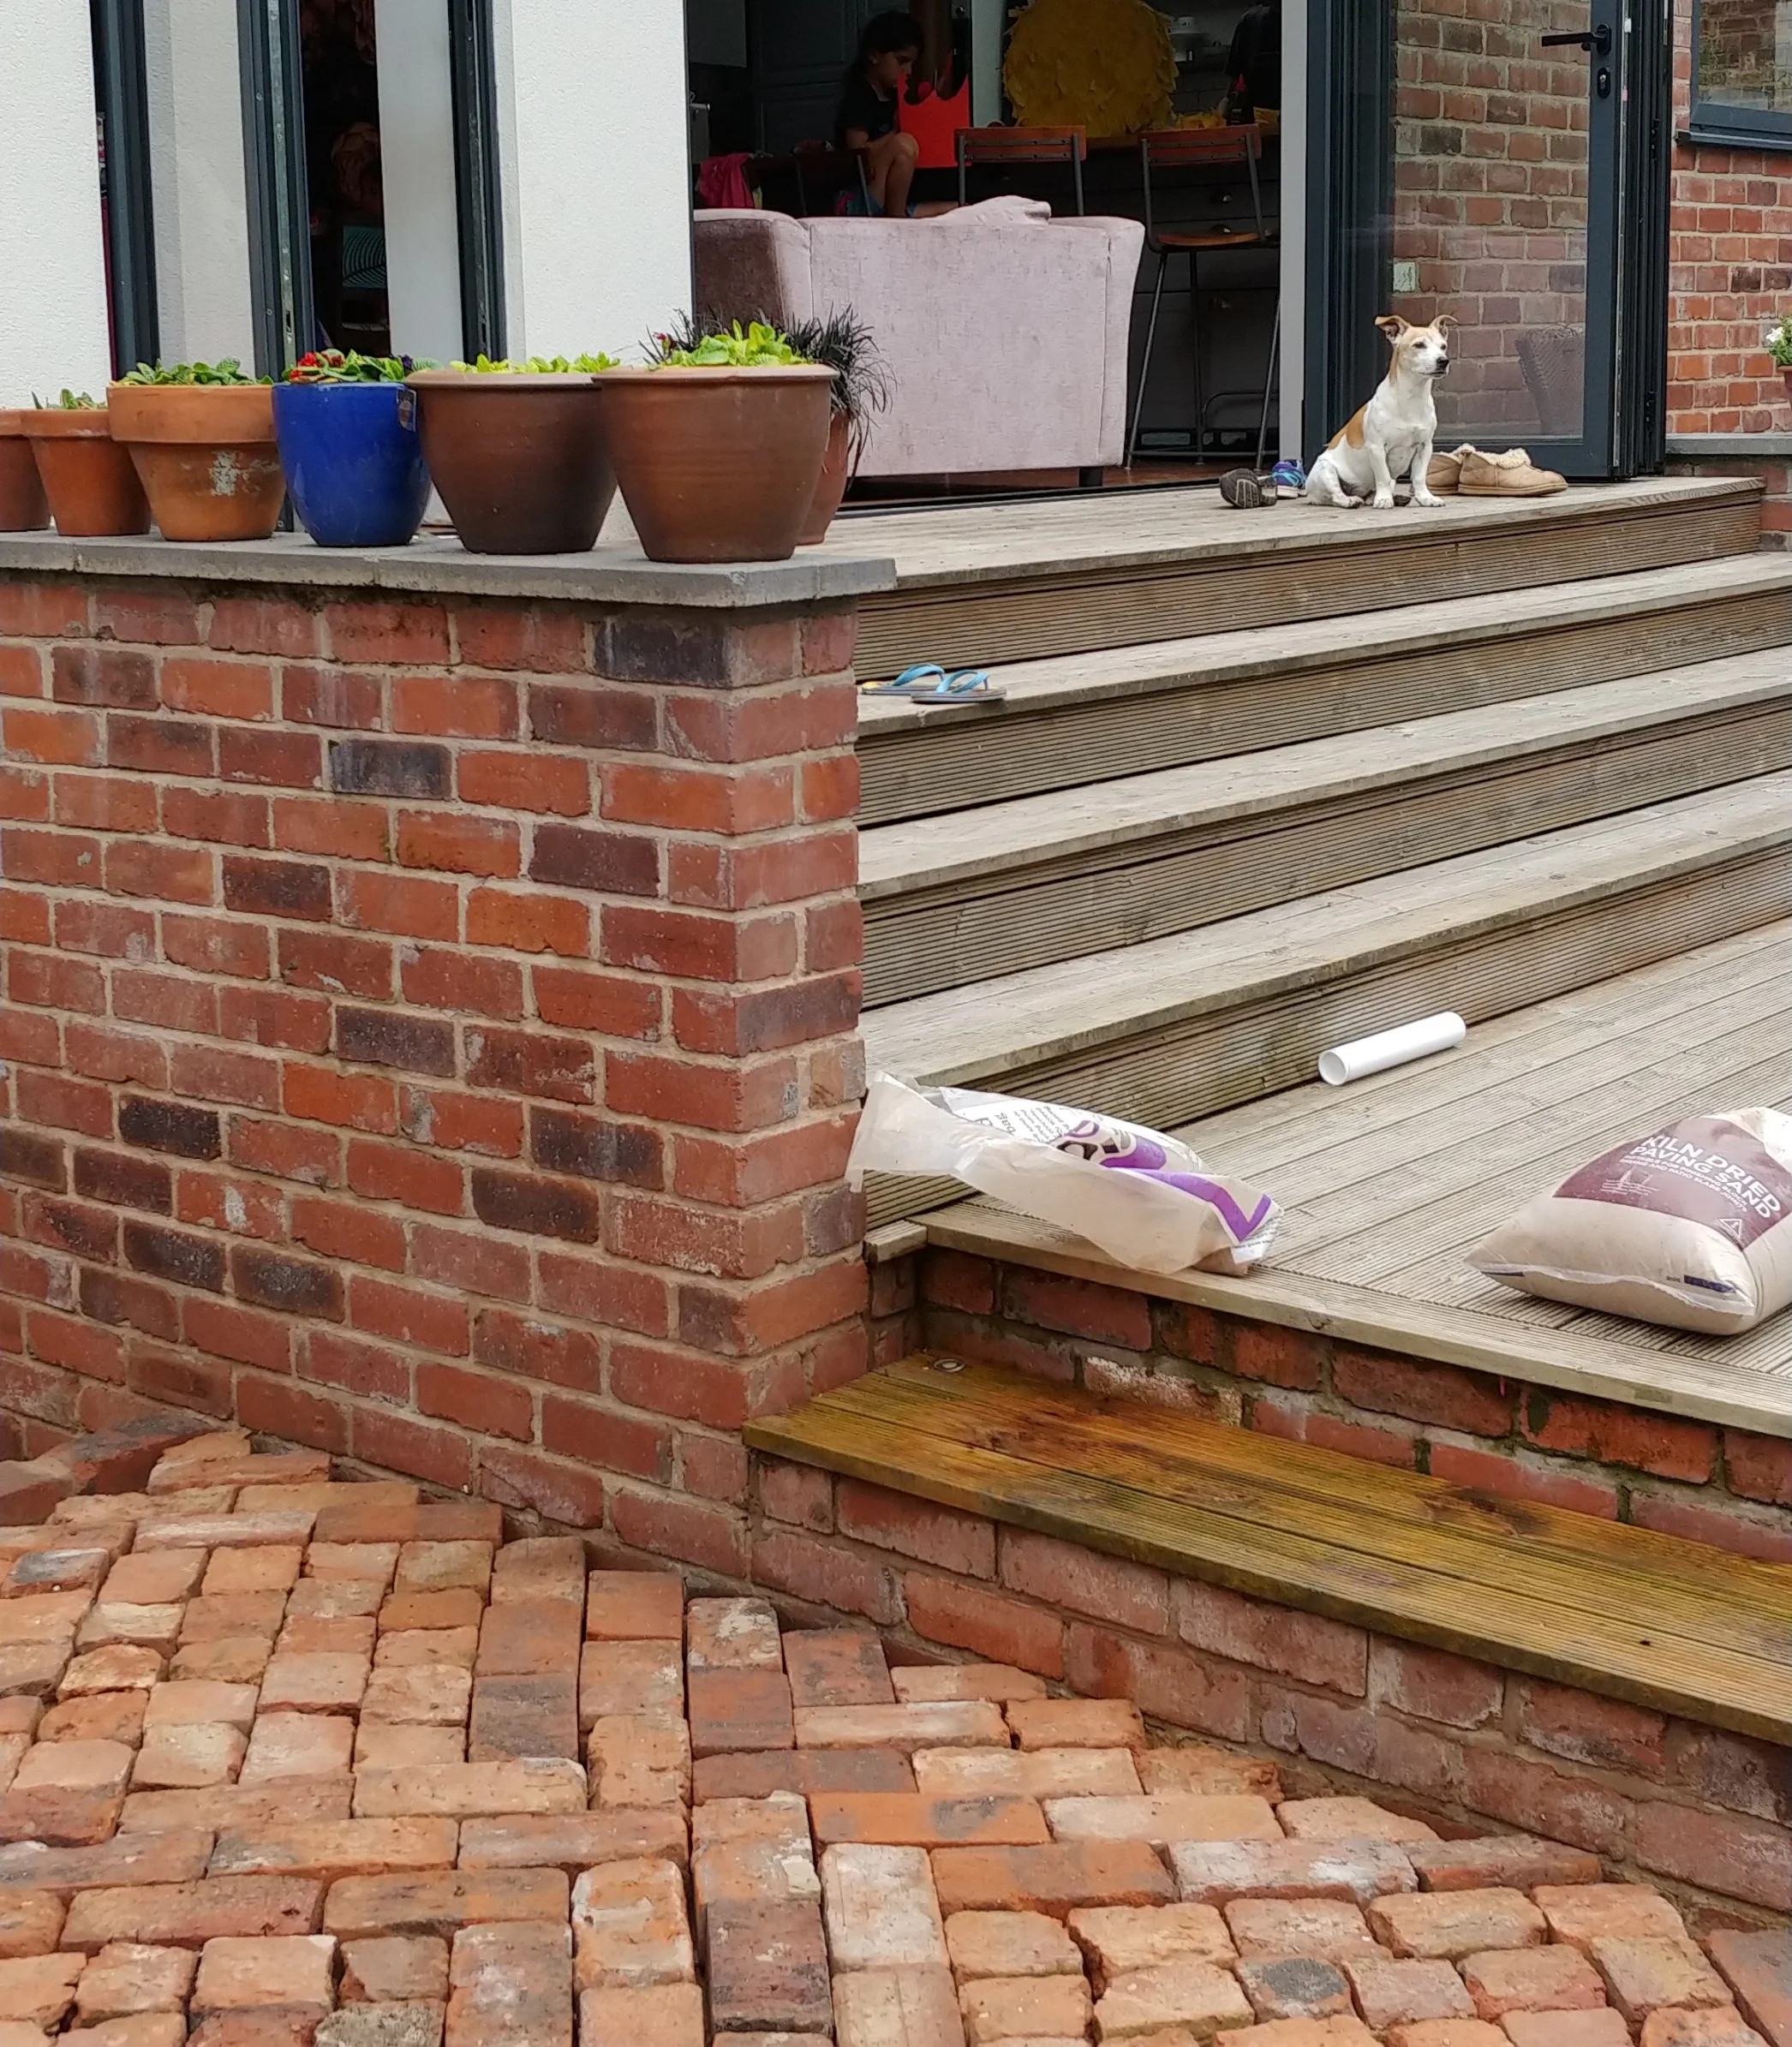
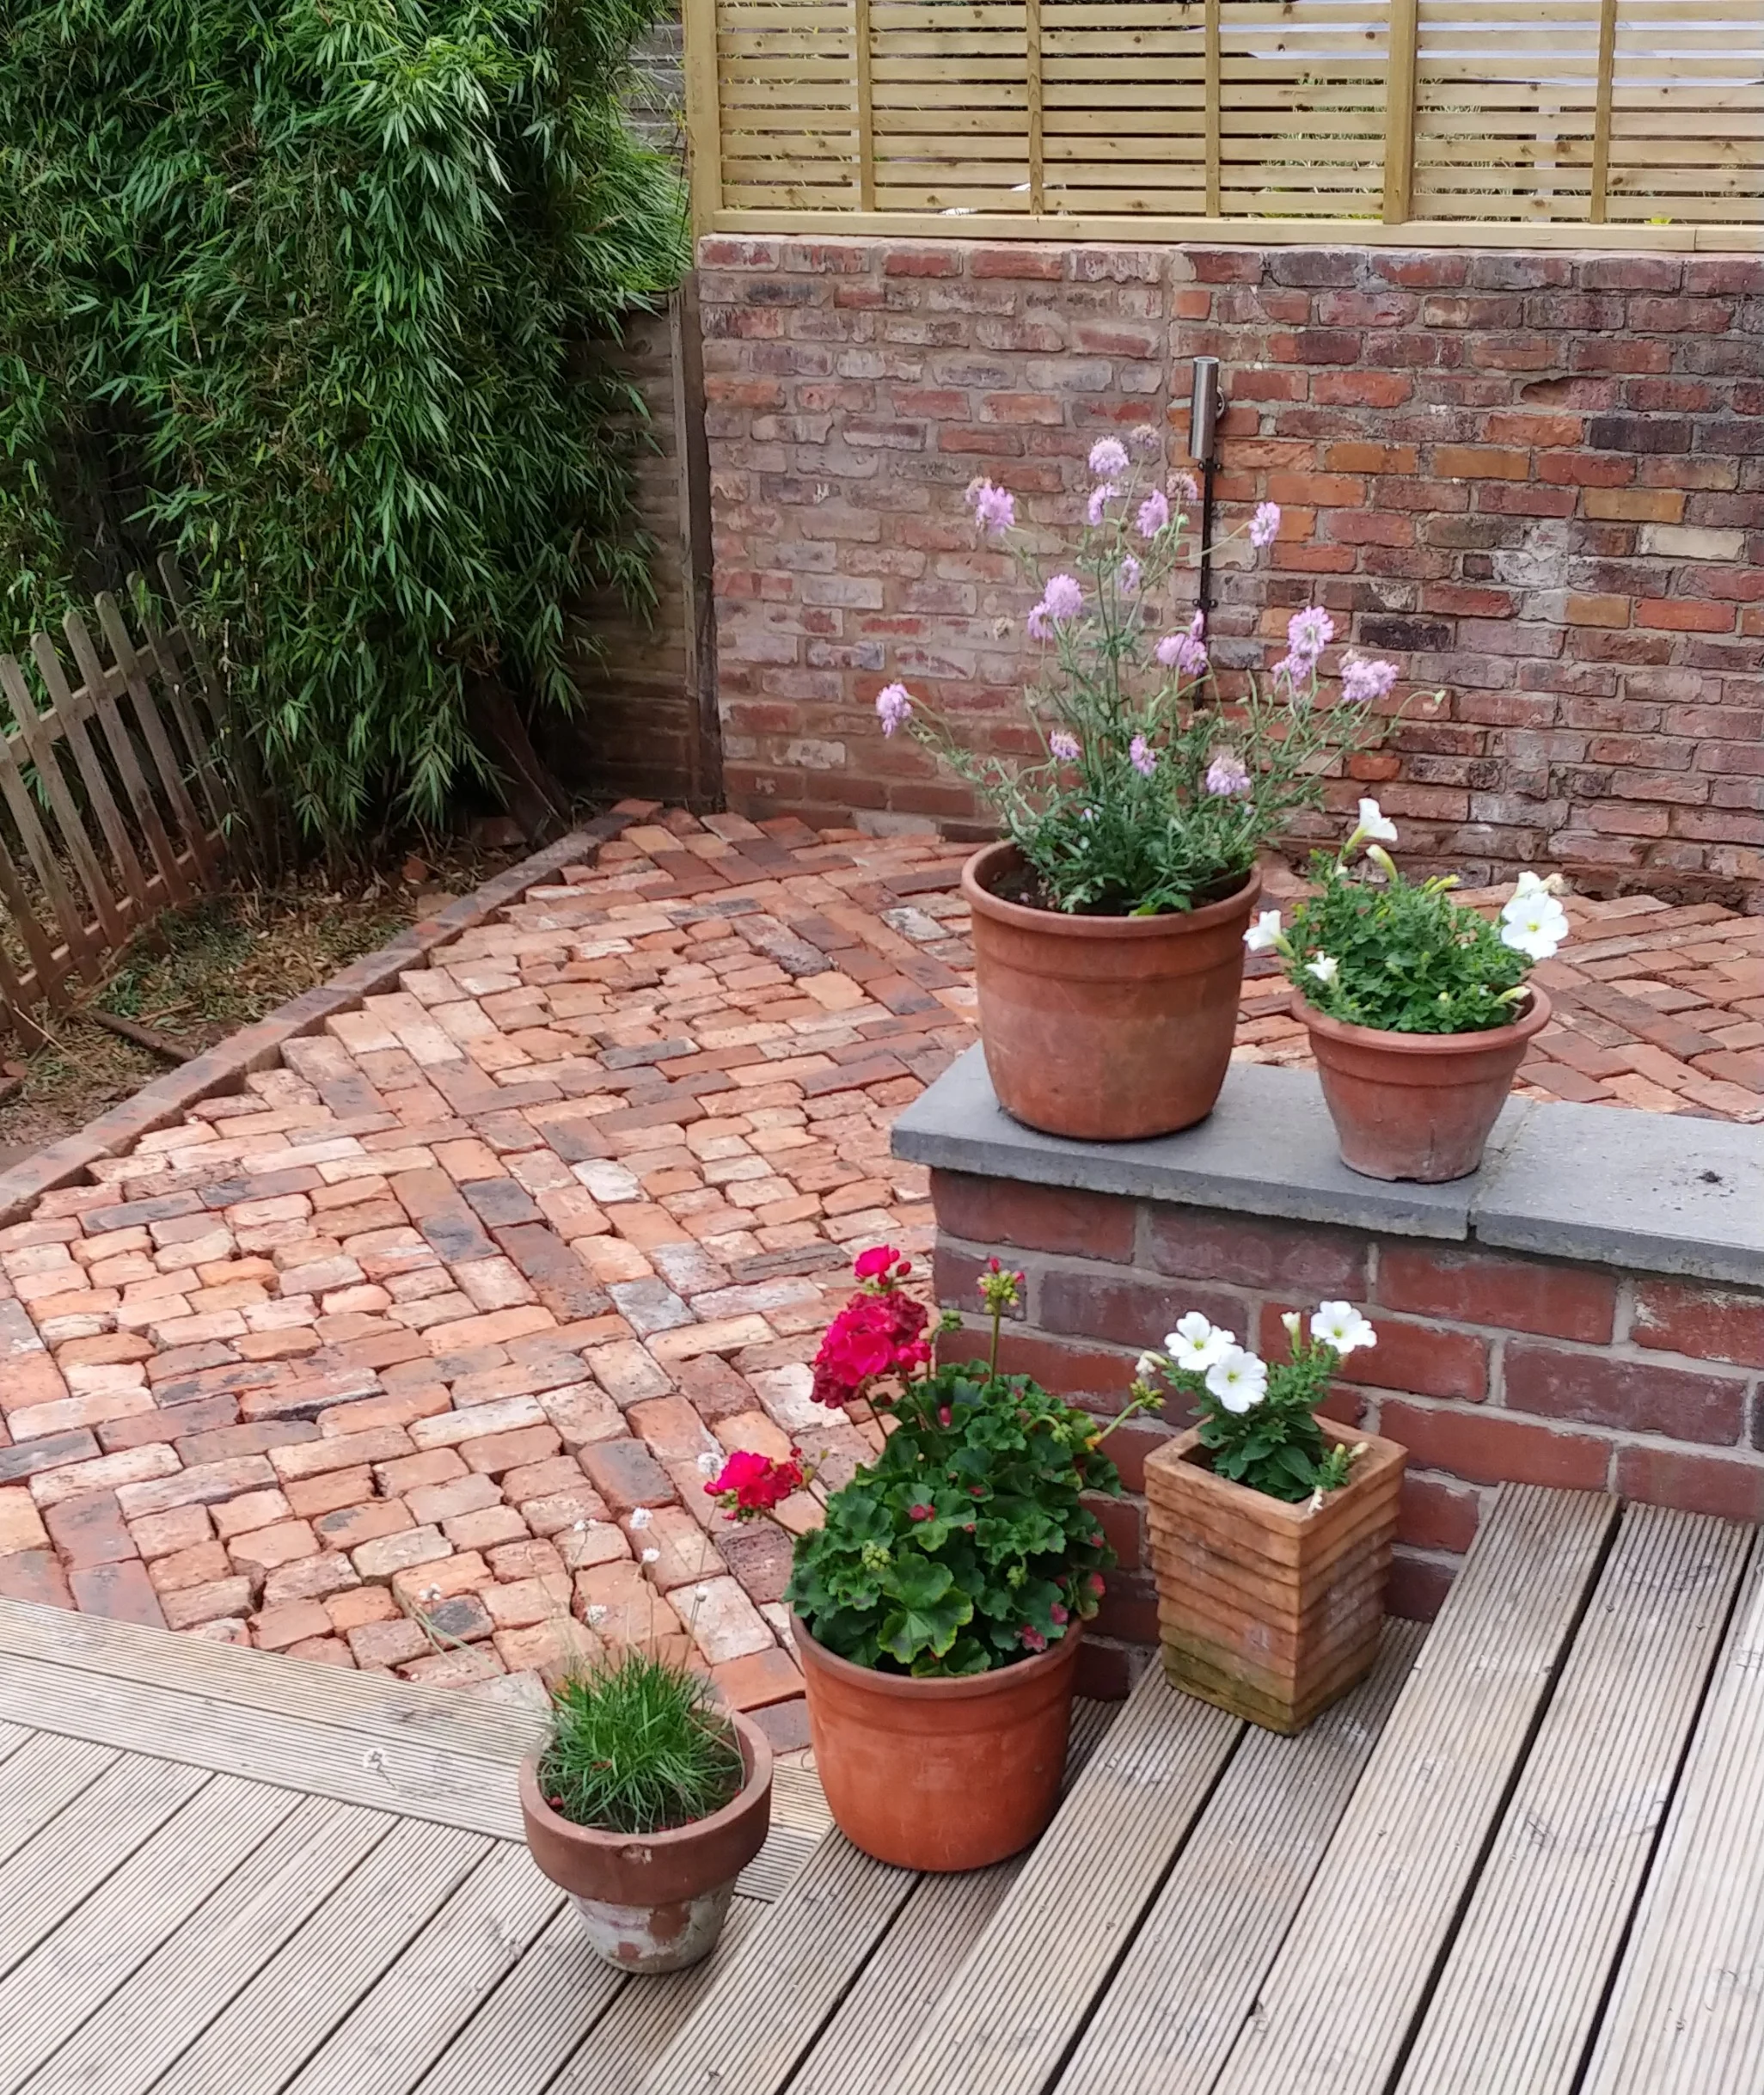
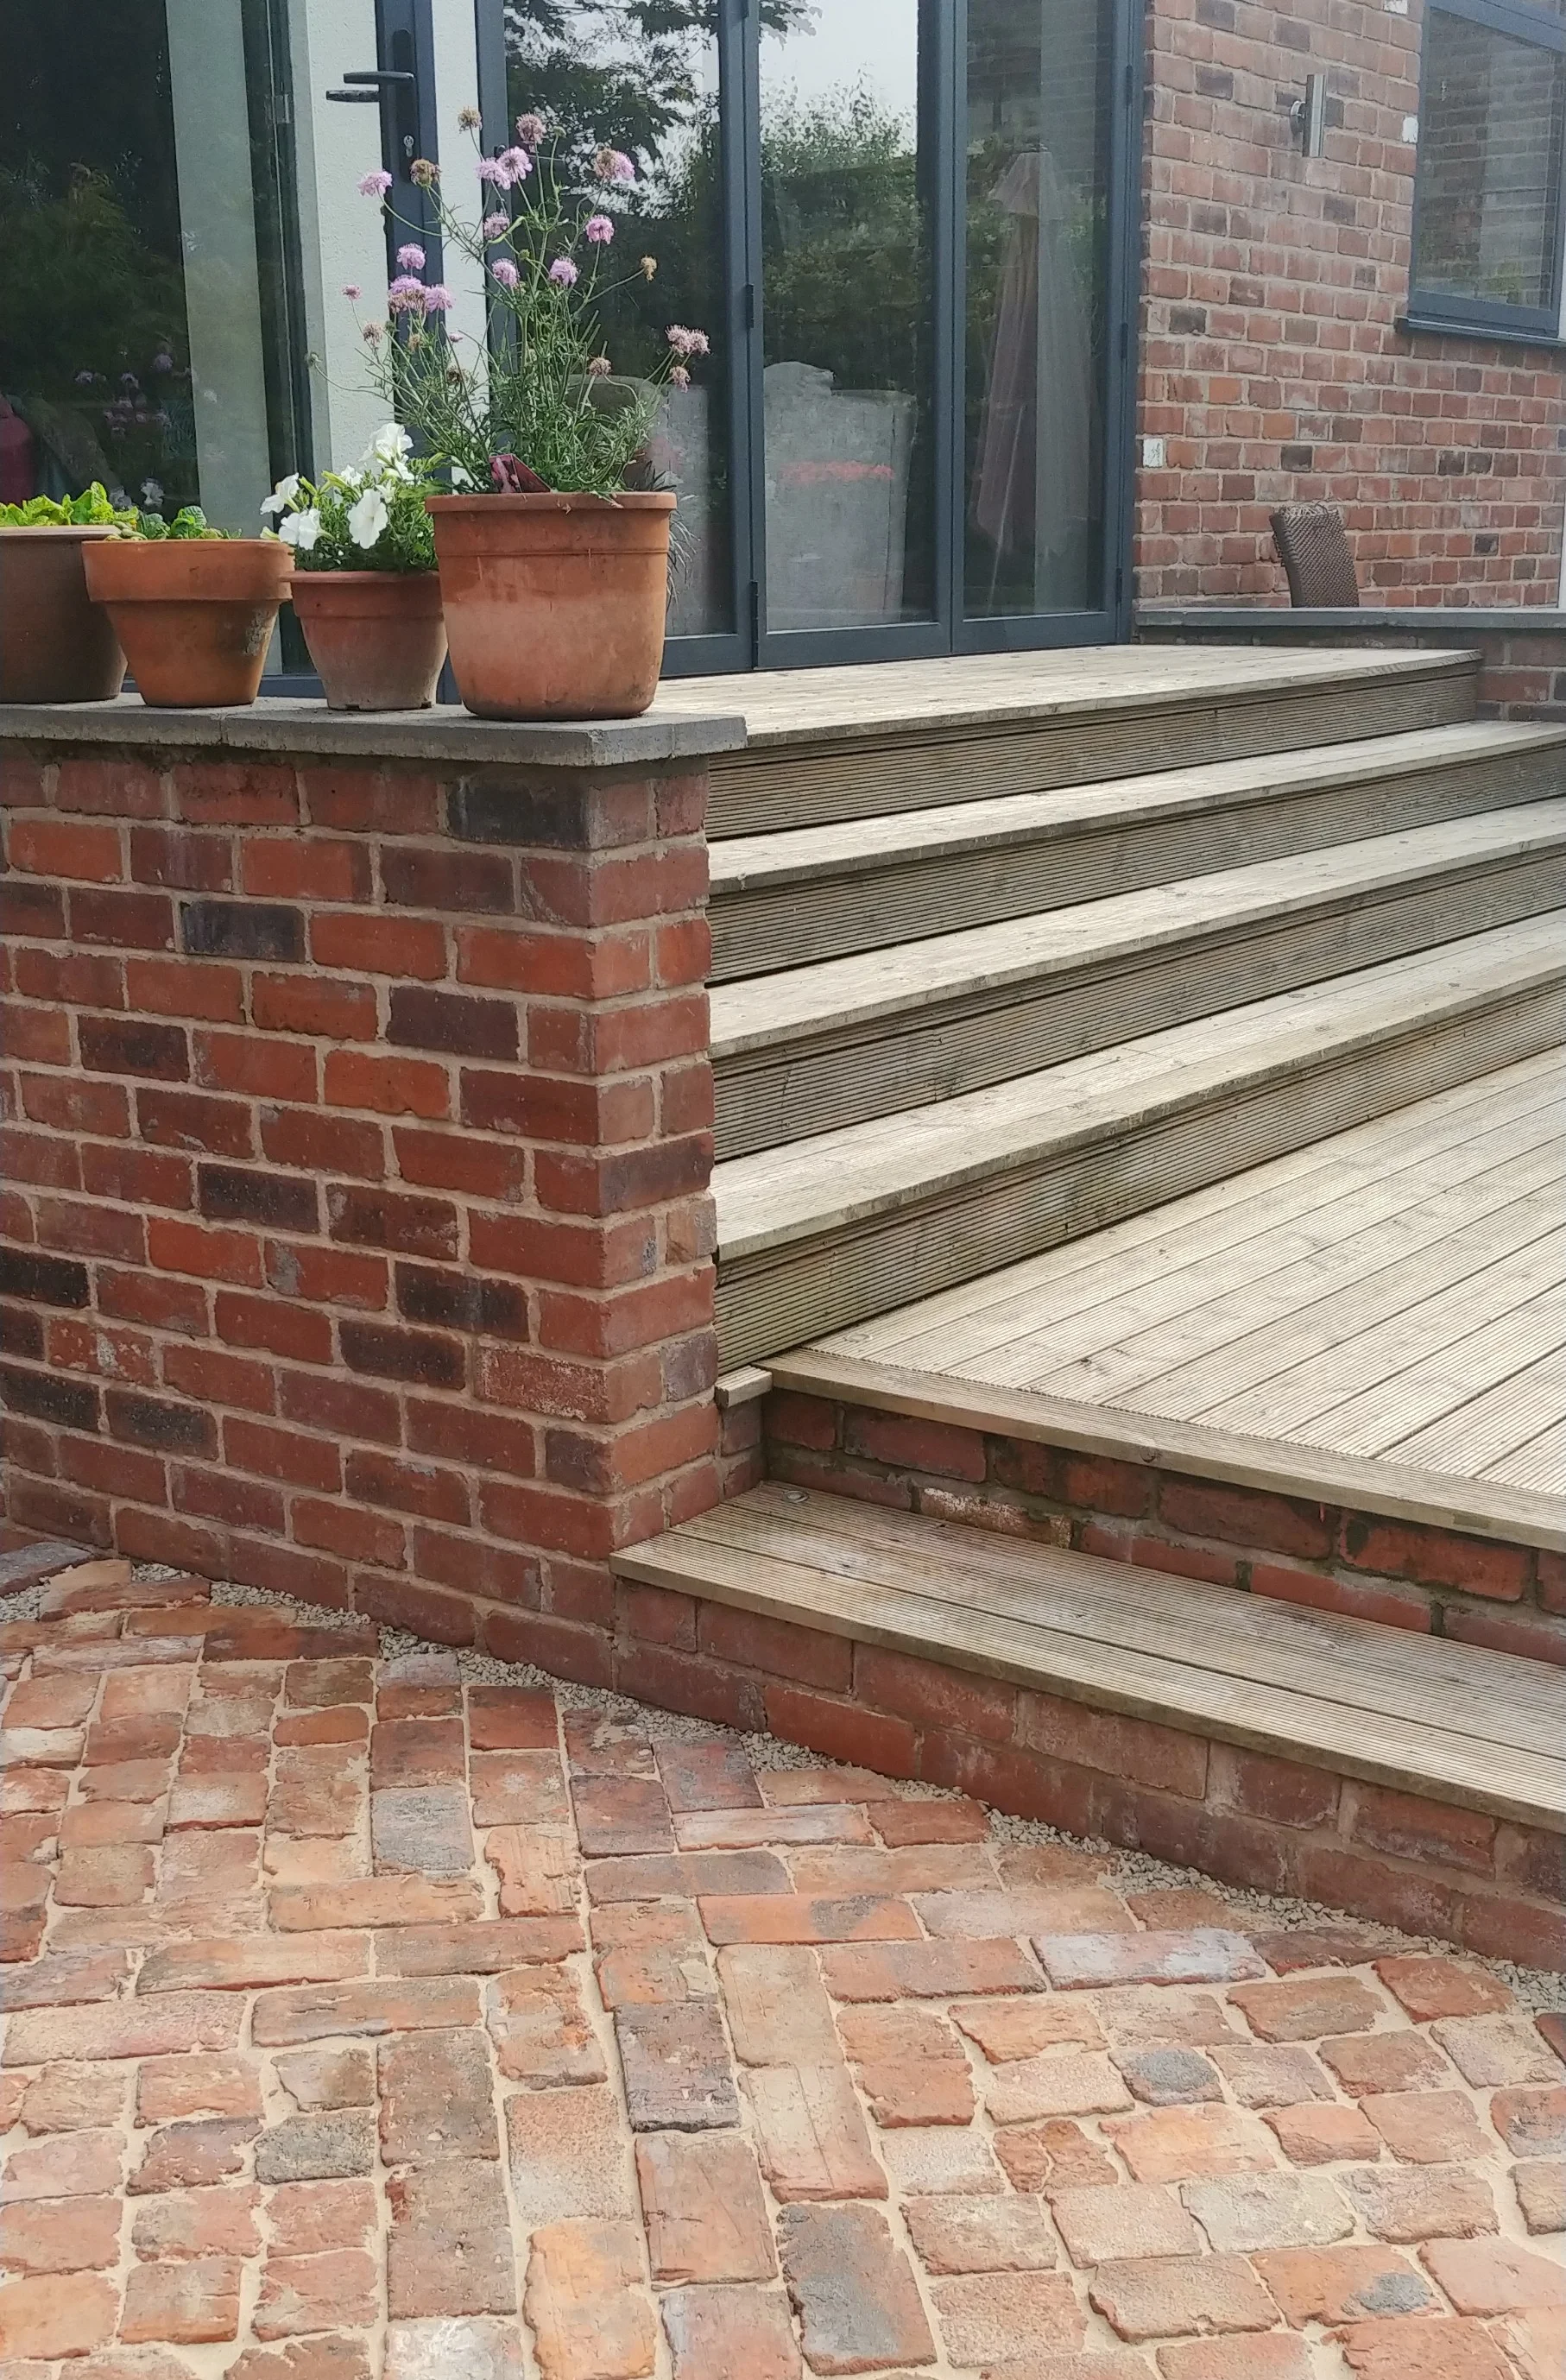
Our brick patio against our reclaimed brick wall (built by the builders) leading up to our main deck and bifolds.
What about the edges?
I basically kept laying the bricks in the pattern until I reached the edge. Sometimes a whole brick neatly touched the side - sometimes I found a suitable half-brick, or a whole brick with a corner piece missing that fitted in nicely. That’s the beauty of using a big old pile of whole and broken reclaimed bricks - there’s always one that’s the perfect size. I left a zigzag pattern around the edge, and we’ve filled it with small-sized gravel for now - let’s see how that goes.

Close up of the diagonal edge against the mortared edge. Some bricks touch, some don’t, and that’s OK.
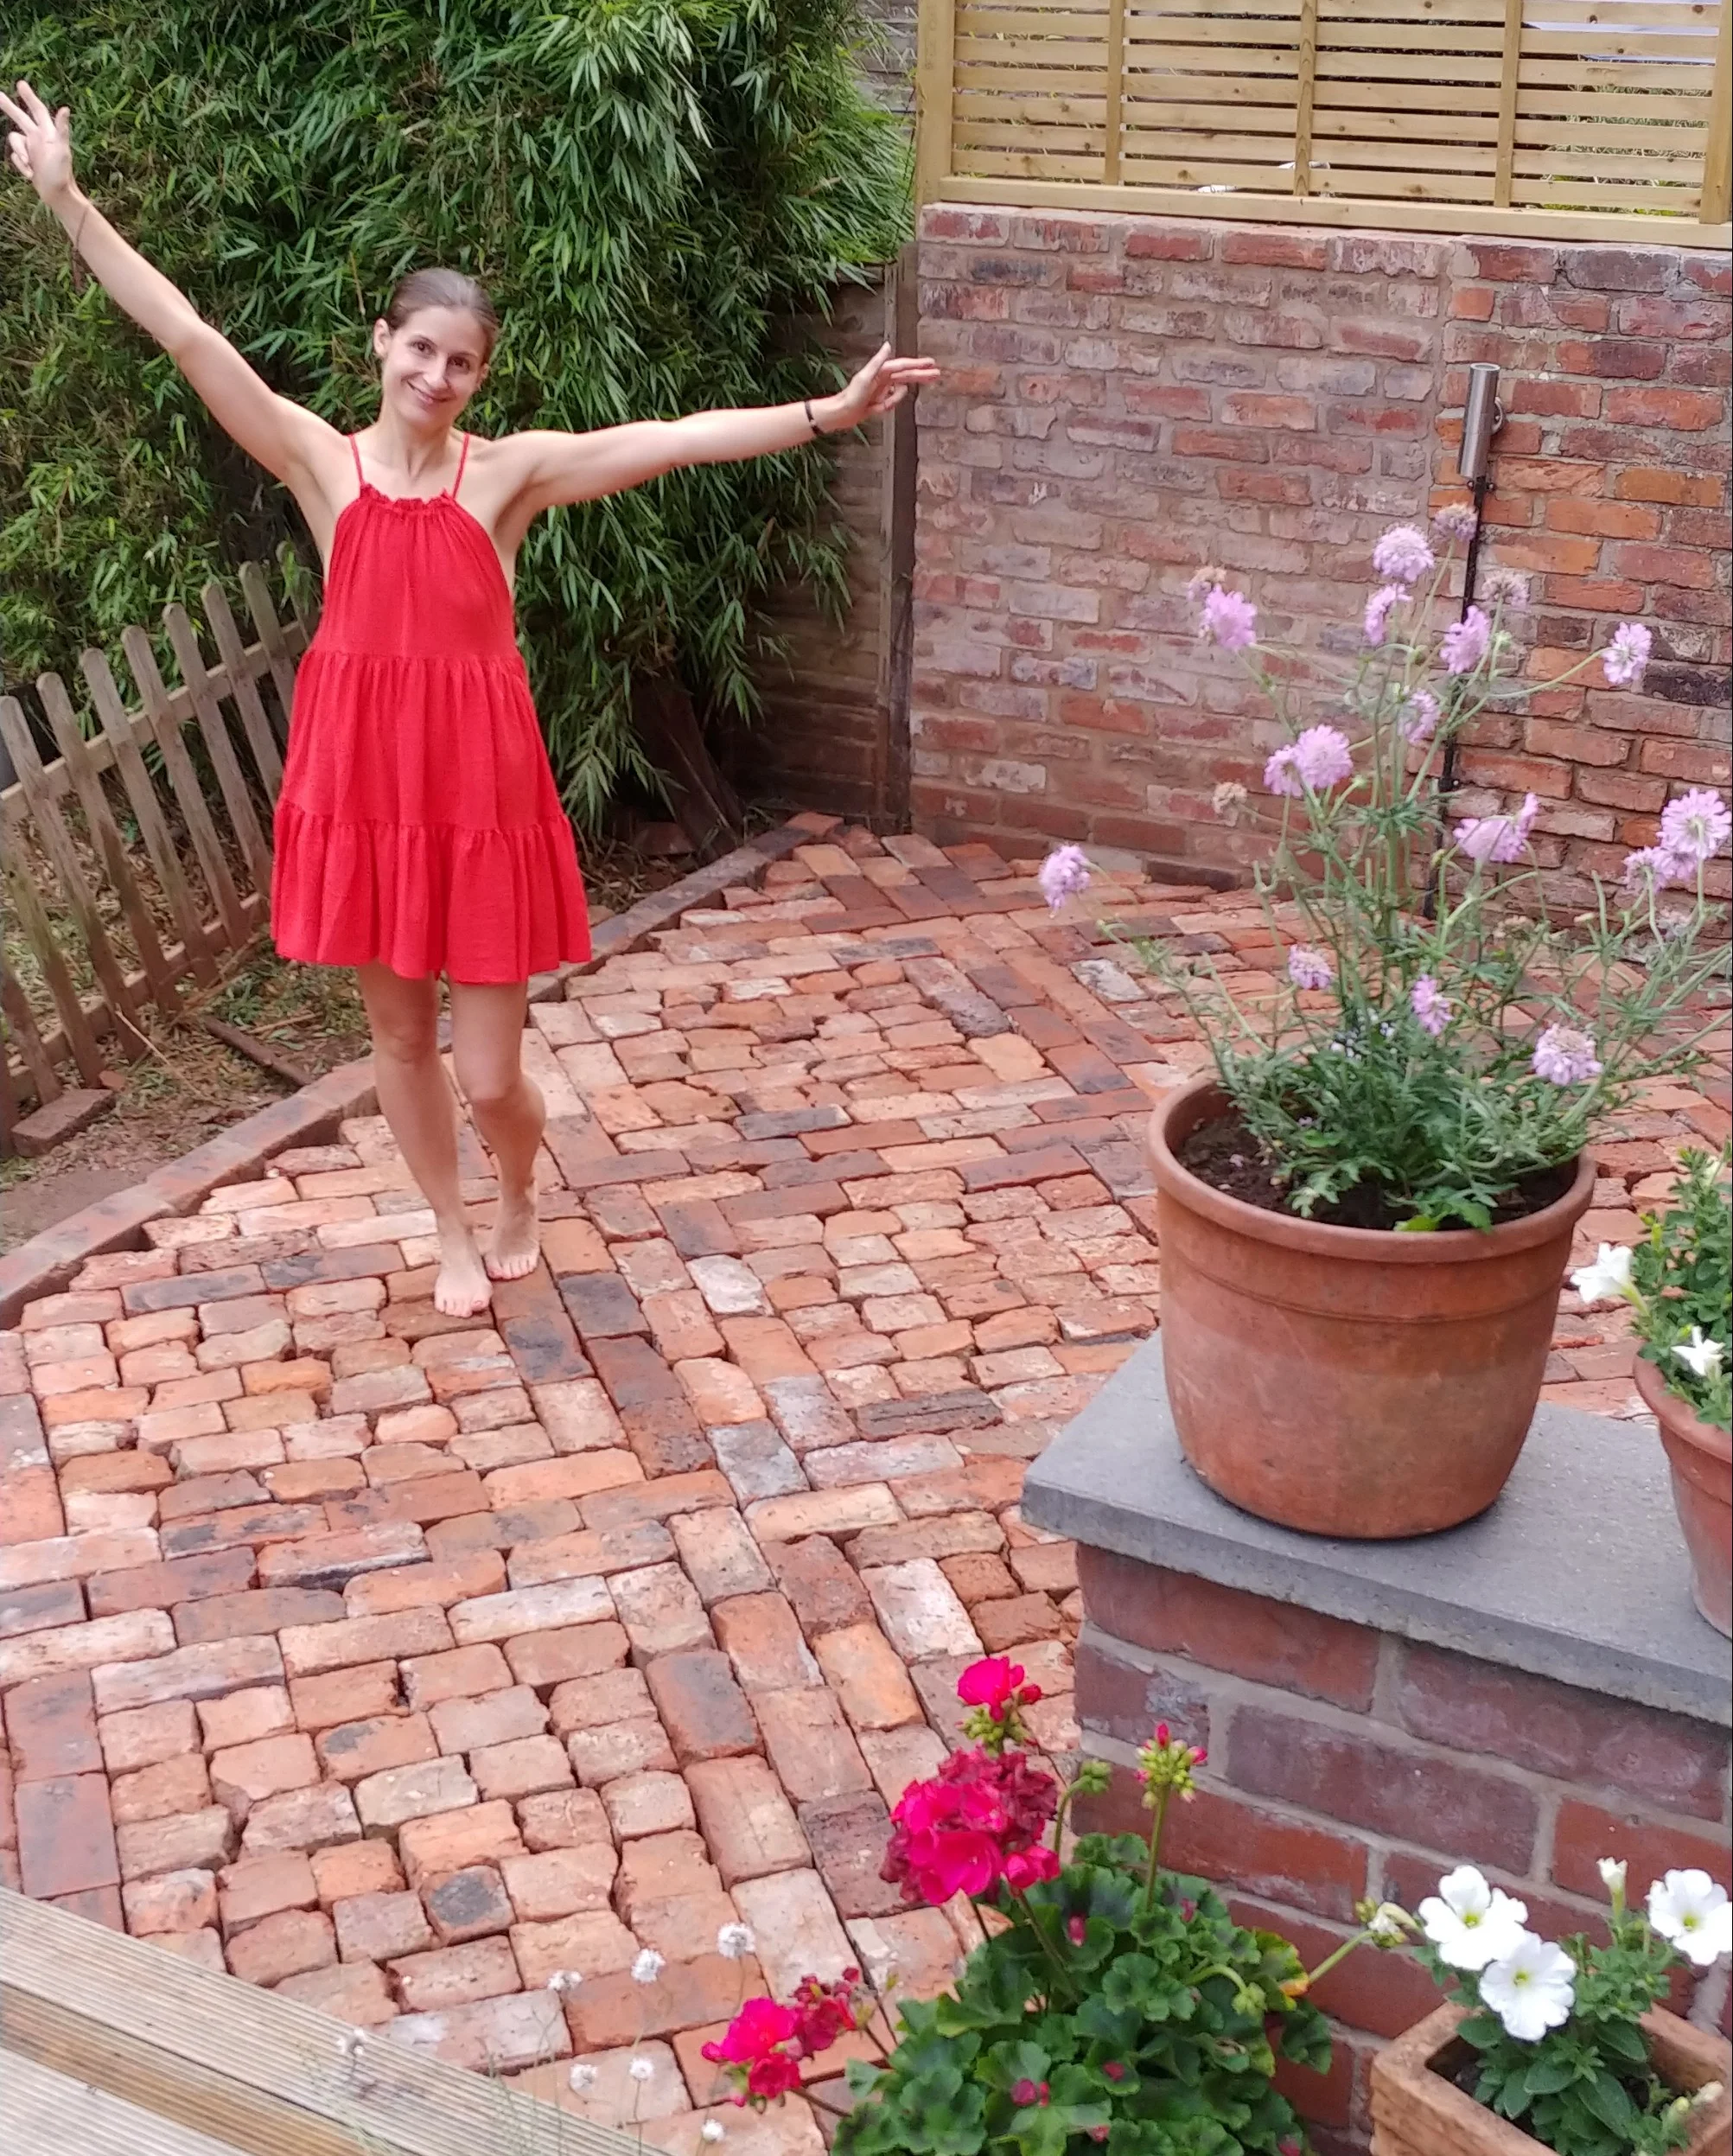
Paving sand and gravel haven’t been done yet in this picture, but I’m still jolly pleased with myself :-)
Gravel now in place.
And the paving sand brushed in. The builders made the retaining wall from reclaimed brick - and the bricks in our patio came from the original bay window at the back of the house where the bifolds are now. I think they’re happy in their new location :-)
I think that’s about it. Hope this has encouraged you to have a go yourself. It’s definitely a DIY job; it just takes a bit of determination to keep going when it gets boring, and some muscles to cart the bricks around! Any questions, please ask below.