How to Renovate a Victorian Cast Iron Bath on a Budget
There are two questions that I get asked very frequently about our house. The first: “how have you insulated your cellars?”. And the second: “does that enamel spray thing that you used on your bath actually work?!”.

Rustoleum Appliance Enamel spray in Ultra Hard Enamel gloss finish.
What a wild ride we’ve been on with the enamel bath spray thing this year. Would it work? Oh yes it does! Oh hang on, oh no it doesn’t! Gutted! Sob, wail, gnash teeth, rend garments. Try again with a different technique… OK now it works! Six months later of daily hot baths… yes, it still works!
So, here’s how to renovate an original Victorian cast iron bath on a massive budget, in the event that you don’t fancy paying £500-1k to have it re-enamelled professionally. Is it a perfect solution? No. Is it good enough? I’d say so.

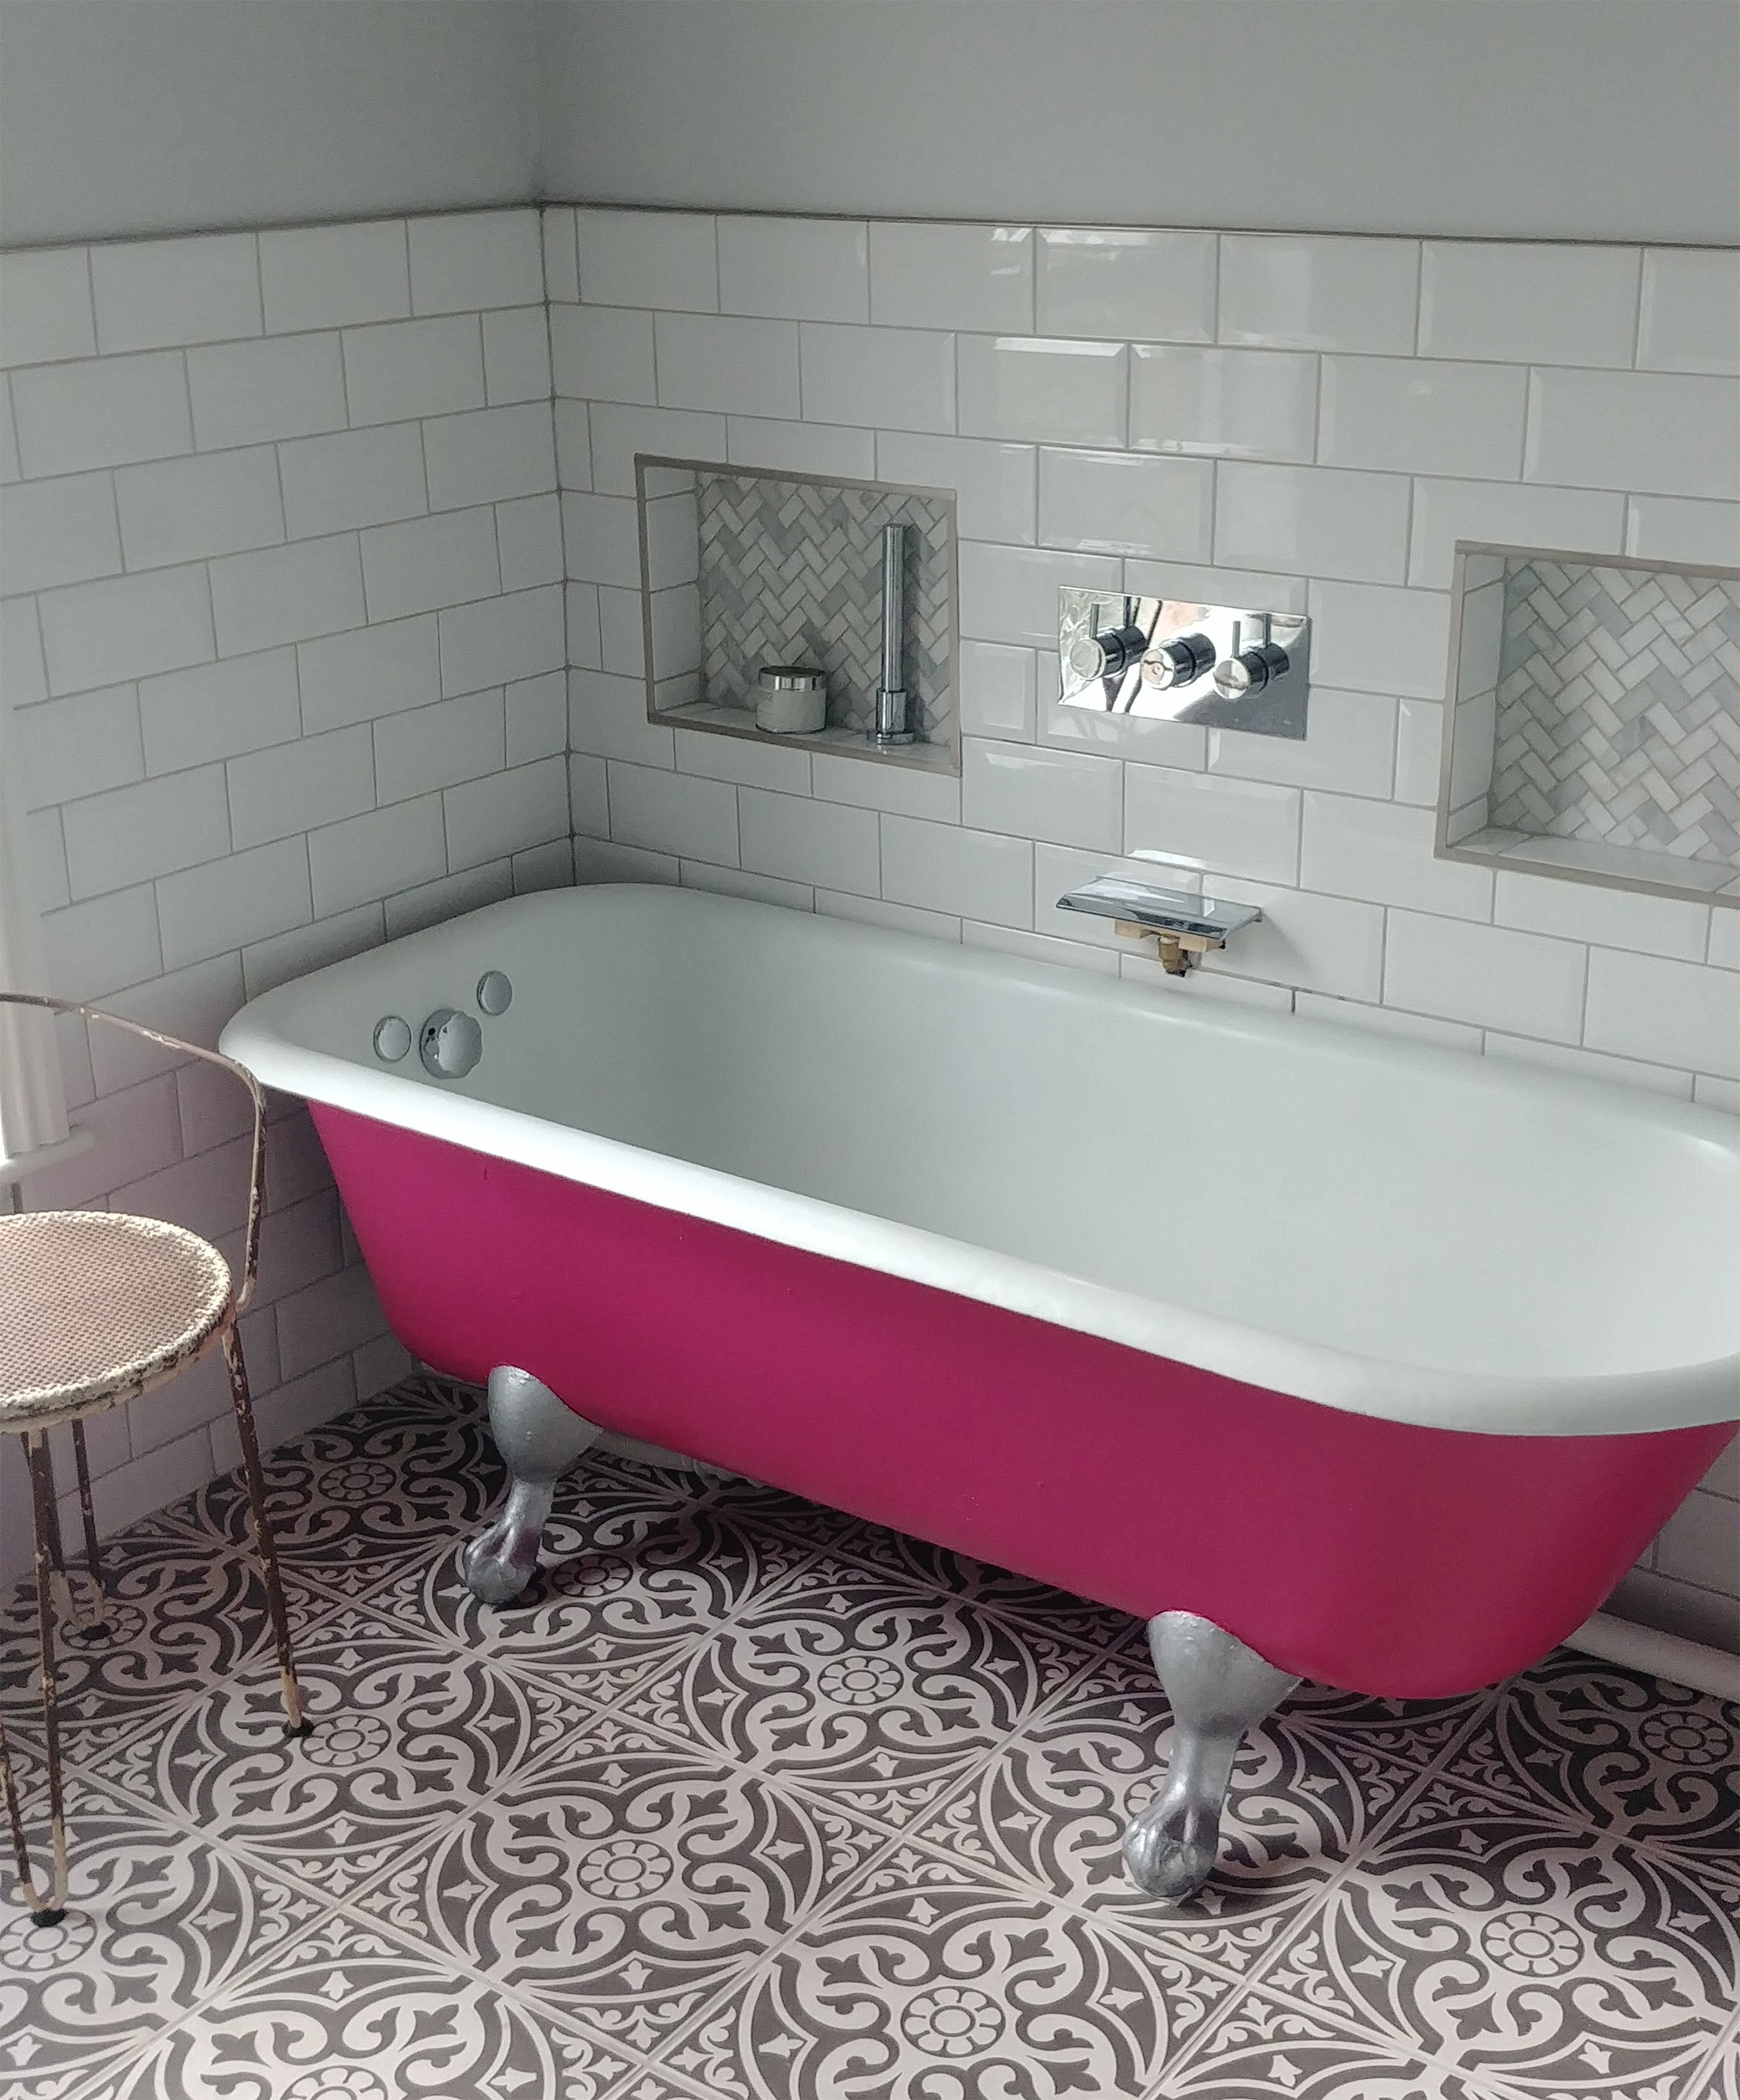
She’s just so pretty.

The turquoise starting point. Look how the claw foot is resting on a piece of rotten plywood instead of on a joist or a floorboard… oh, the things you find when you delve under the skin of your house.

Floor, wall tiles and shower surround done. Shower tiles, sink, bath and decorating yet to do.
First of all, we gingerly flipped the heavy old lady over, amid much sweating and cries of pivot, pivot. Although we did move her temporarily from the bathroom to our bedroom in order to complete the tiling, we then moved her back up to the bathroom for painting and spraying, on the basis that it would be easier to swathe the bathroom in dust sheets to protect from flying enamel spray than it would our entire bedroom. Of course *ideally* I would have renovated her in the bathroom while the room was still a mess, then moved her out, then tiled the bathroom, then moved her in, but as usual we just weren’t that organised. Such is the life of renovating with small kids around - you often end up doing things in an odd order.

The bath was a very pretty muted pink at some stage.

Like a beached walrus!
So, first I gave the exterior a good old sand. I used 40 grit plus elbow grease rather than getting power tools involved. I then moved onto 80 grit. My goal wasn’t to remove the paint, or sand down to a glacially smooth surface - I just wanted to get off the loose, flaking paint.
I then slapped a coat of primer on, using one of my favourite products, Zinsser Bullseye 123.

I primed the entire underside of the bath, including the feet.

Zinsser Bullseye 1-2-3 primer.
Next up - a couple of coats of pink Dulux satinwood (for wood and metal).

Finally I painted the claws in metallic silver paint for exterior metal, which I figured would work fine in a bathroom.

These claws were much in need of a manicure.
We righted her, moved her roughly into place, swathed the room in dust sheets, and got spraying the interior.

Dexter style decor. I also covered the sink, floor. and window.
The inside of the bath wasn’t in terrible condition. It was very grubby, but it didn’t have rust patches or chips. What it did have was a dark stain from the central tap all the way across the bath to the plughole from 100 years of dripping water. I covered this up with a couple of layers of Zinsser primer, but didn’t prime the rest of the interior. This turned out to be what I like to call a ‘good mistake’ :-)
I applied the enamel spray in short bursts over about five nights. Each spray covered the whole interior and took under a minute to apply. I wore overalls, gloves, a mask, and googles. Note - do not spray this stuff around while wearing glasses as you’ll have a nightmare getting it off your lenses.
The bath was soon gleaming white inside and looked amazing. It has a very slightly rough texture which could possibly be fixed by sanding lightly, but I didn’t bother, as a super-smooth bath is hazardous for the kids, while a teeny bit of grip is helpful. I have never noticed the texture myself while in the bath.

We waited a couple of weeks and then let the kids loose. It worked perfectly at first, but within about three months of use 5-6 times a week, the enamel layer was flaking off in patches. And surprise, surprise - really should have thought this one through - the spray stuck like glue to the strip where I’d applied the primer, but was flaking off the unprimed areas. Face palm.
So, I sanded back the flaky patches, sanded the whole interior lightly, applied two layers of Zinsser primer, and re-sprayed another four or five layers. Rather than swathe the entire bathroom in dust sheets, this time round I covered the bath in dust sheets, and then reached underneath it to spray. This wasn’t as easy as the first time, as I couldn’t really see what I was doing through the sheet, but it worked ok and was much faster to prep.
Six months later of regular use - no flaking, no chips, no patches.

At some stage we’ll work up the enthusiasm to box in that pipe, but it hasn’t happened yet :-)
So, I’m happy to recommend the enamel spray as a great way to refinish a cast iron bath on a budget, providing you use a high quality primer first.
Total cost: prices vary per supplier but roughly… 2 cans of enamel spray at around £7 each (we needed two cans as I had to re-do it), one tin of Zinsser at around £25, and one tin of Dulux satinwood at around £20. Plus sandpaper, paint brushes, dust sheets and so on.
Please ask any additional questions below, or use my Contact Me form.