How To Sand And Restore A Victorian Wooden Floor
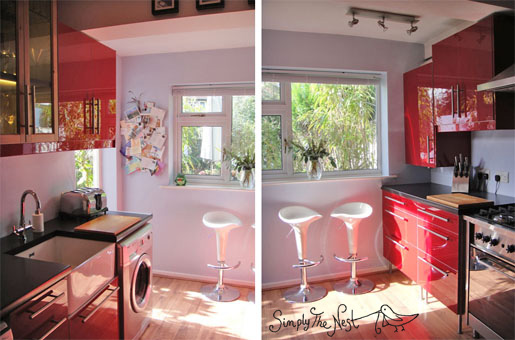
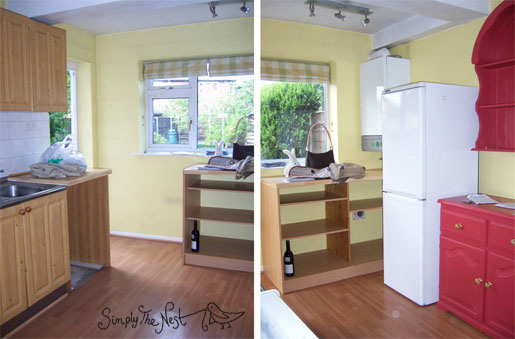
It's funny to think that less than two years ago, we didn’t have a clue how to refinish a Victorian floor. Sure, we’ve done some pretty fierce DIY projects in the past. For example, installing a scarlet gloss kitchen in our first house (that's a link to my very first blog post, by the way!) that looked like this:
(It used to look like this):
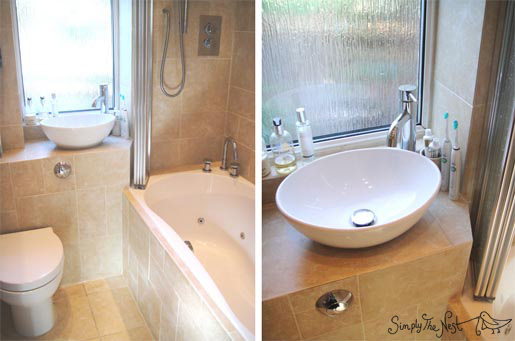
And transforming our first bathroom from this:
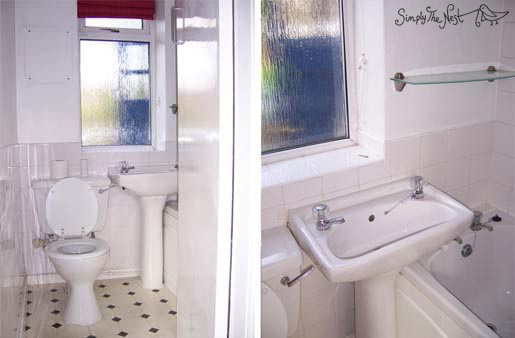
To this:
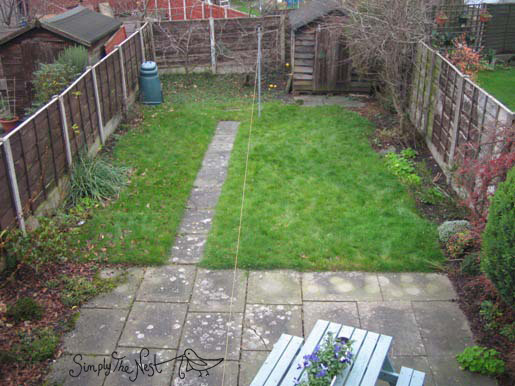
And our first garden from this:
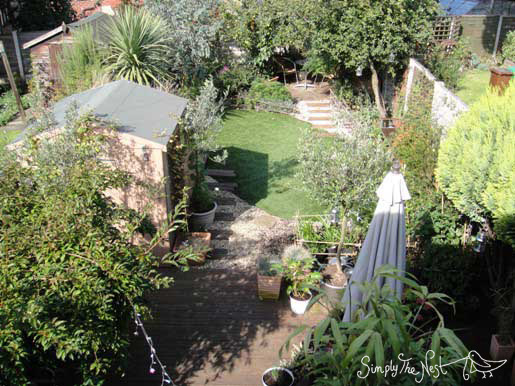
To this:
So, DIY we knew. Tiling, carpentry, plumbing, landscaping - no problem. But renovation? Sensitively and carefully restoring the elegant bones of an older property? We had no clue. I remember talking to the guy from the local hire shop about floor sanding. “D’you think we could do two rooms in a weekend?” I asked hopefully. “Depends how much prep work you need to do, love”, he replied. Err, prep work? What exactly did we need to prep?! Yeah. Clueless.
Having now restored the flooring in three decent sized rooms, plus three staircases and three landings, we’ve pretty much figured out how to do it. So, here’s the Simply The Nest guide to sanding and refinishing Victorian wooden floors that I wish I could have read two years ago. If you have any tips or advice to add, please go ahead and leave a comment!
Choose the right power tools
You have a couple of options here – either hire a floor sander from somewhere like HSS Hire, or buy your own hand-held belt sander. Here’s some advice on to decide which option is right for you.
- Are you sanding one room only, or a small number of rooms?
- Are you able to dedicate an entire weekend (or week) to getting the job done?
- Are your floors a nice even height across the room, ideally parquet or tongue and groove?
Then you should probably hire the equipment. You’ll need a belt sander and an edger.

Underage sanding assistant
Alternatively…
- Do you have quite a few rooms to do?
- Do you have kids or other commitments that make it harder to devote significant chunks of time to DIY? Is it easier to break projects down into small chunks and do a couple of hours at a time whenever you can fit the work in?
- Are your floors uneven? Our plank floors are all slightly different heights, and we found the hired belt sander only sanded an inch at a time on each side, even though the belt was nearly a foot wide.
Then you should seriously consider buying your own sander.
We initially hired a floor sander from HSS Hire, but it just didn’t work on our uneven floors. It also worked out insanely expensive – the hire charge was fairly reasonable, but we spent almost double that on sandpaper. Due to the design of the big floor sanders, the belts rip extremely easily and we got through LOADS.
So we did a ton of research and eventually bought a Makita belt sander and a DeWalt detail sander. You can read more about why we chose the Makita here. We buy sandpaper for each sander on Amazon for significantly less than HSS Hire charged us. And we can use the sanders for as long or as little as we like, with no time pressure to get the job done by the end of the hire period. To give a cost estimate, we paid around £200 to do the first pass only of two rooms. We then paid around £300 for the two sanders plus approximately £20 in sandpaper per room to finish these rooms (two more coats), do a third room, and then the entire three storey staircase. So it’s worked out much, much cheaper for us to buy our own equipment.
It’s not that dusty
Honestly, it’s not. OK, so it’s dustier than sitting on the sofa with a box of Milk Tray watching Strictly, but it’s much less dusty than the horrible mess created through brick or plaster work, or the nasty prickly dust that goes absolutely everywhere when you’re cutting Celotex insulation boards and really, really hurts when you inevitably get it in your eye. And whether you hire or buy a sander, they mostly all come with attached dust bags that contain the worst of it. Some even connect to your vacuum cleaner.
To contain the dust, all you need to do is tape off the room you’re working in. When you’re ready to start, go in the room (take a bottle of water with you, its thirsty work!), close the door behind you, and then use masking tape to tape all the way round the door-frame on all four sides (even if the gap is minimal). Tape the keyhole too, if there is one.
If you plan to repaint the woodwork on the doors or frames, then you can go ahead and use regular cheapo masking tape. If you’ve already painted the woodwork (which isn’t ideal to be honest, as you’ll inevitable ding the skirting boards while sanding, so you’re best off leaving this till last) you should use Frogtape to make sure you don’t accidentally pull the paint off when you remove the tape. When you need to leave the room for a break, wait five minutes for the dust to settle, and ideally remove dusty clothes (shoes at the very least) before leaving – and of course you’ll need to tape the door up again from the inside when you go back in.
It’s a good idea to take a bin liner inside a plastic bag in with you. When you’re finished, take the clean bin bag out of the now-dusty plastic bag, chuck your dusty clothes inside the bin bag, and carry it through the house to the washing machine. You don’t want to be wandering around in dusty clothes as they’ll be saturated with 100 year old dust.
If you’re working in an open area like a staircase or hallway, it’s probably easiest to clear the house of inhabitants for the day and tape up every single room from the outside. If you’re doing individual rooms, we find the dust is imperceptible outside the room being sanded, but of course it’s your call as to whether you want everyone out while the work takes place.
All old wood is beautiful
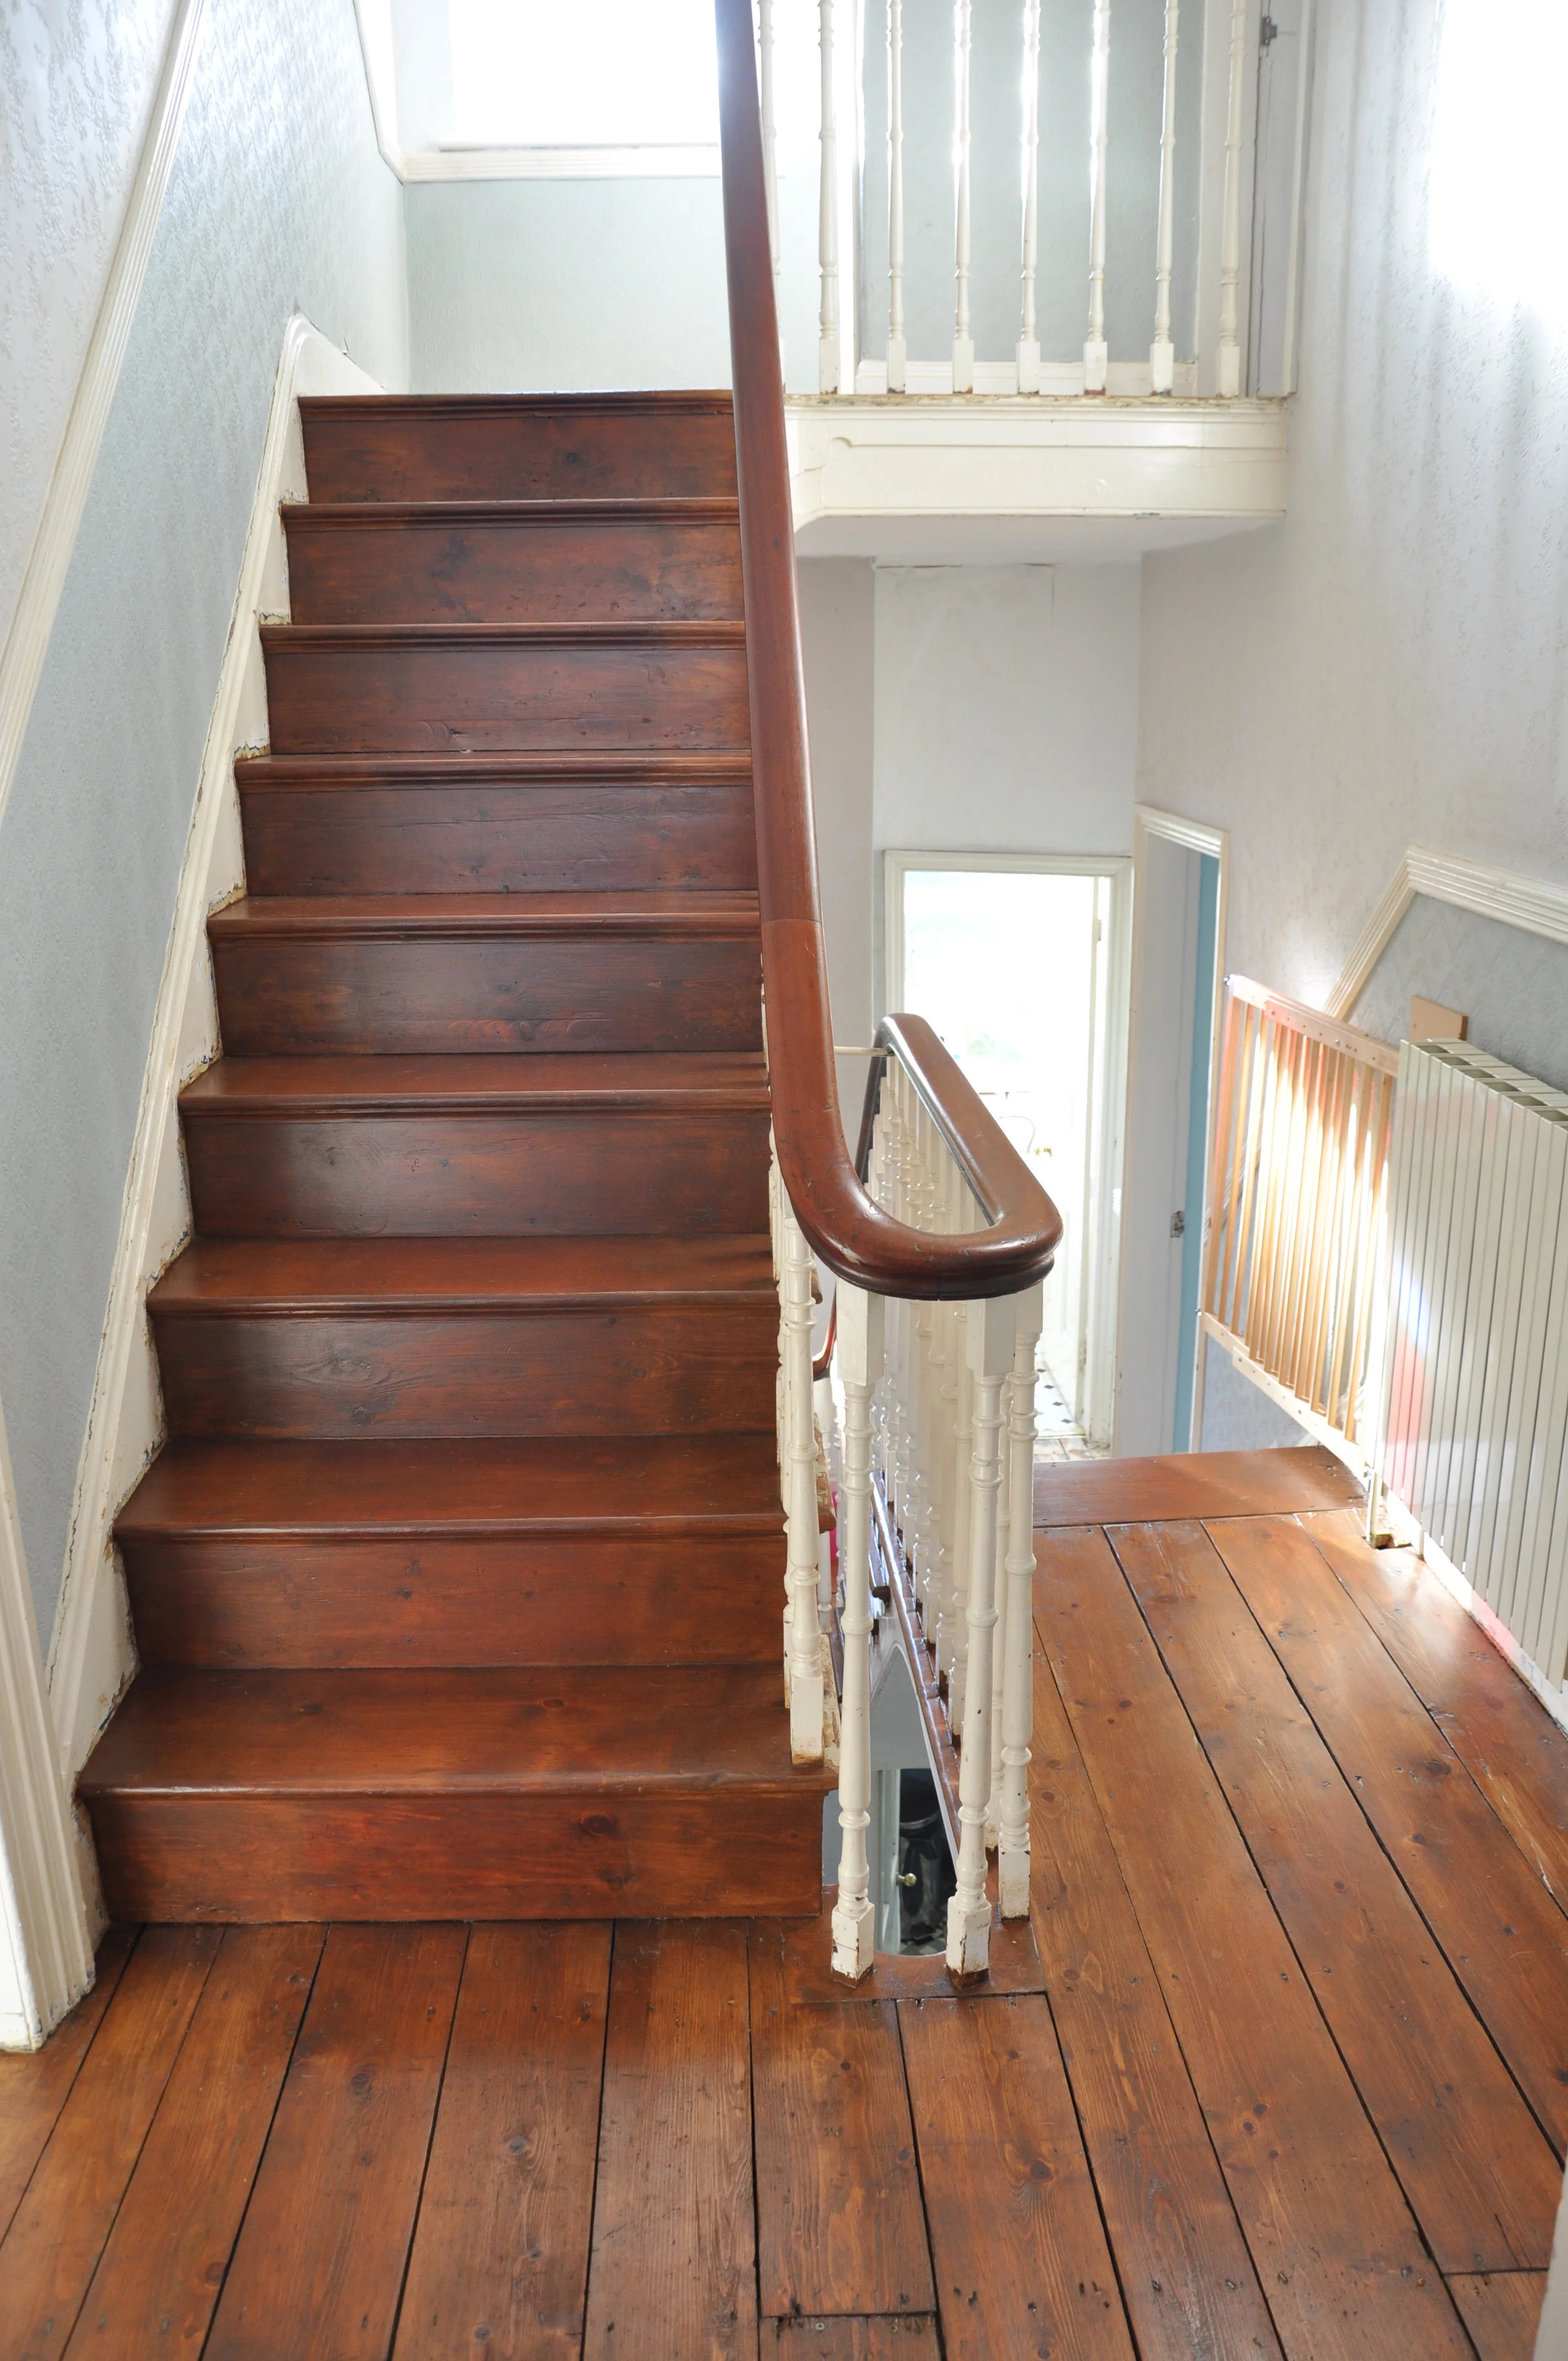
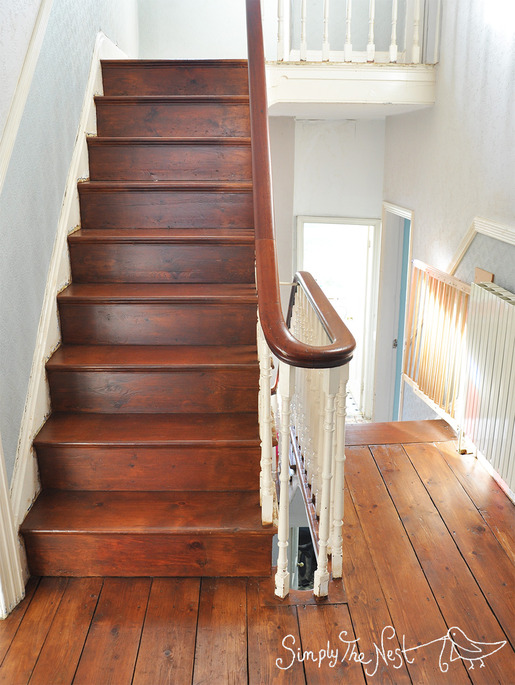
Don’t be alarmed by what you might find when you pull the carpet up. This is how our floors looked originally on the stairs:
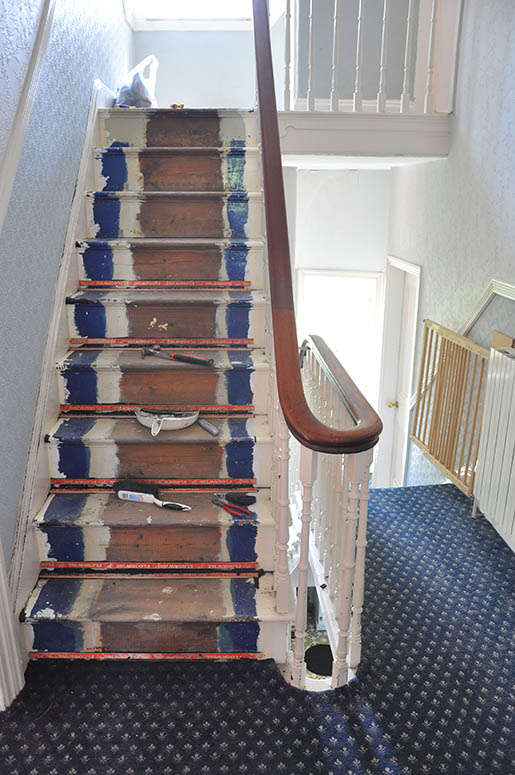
Terrifying. Yet this is how they look now:
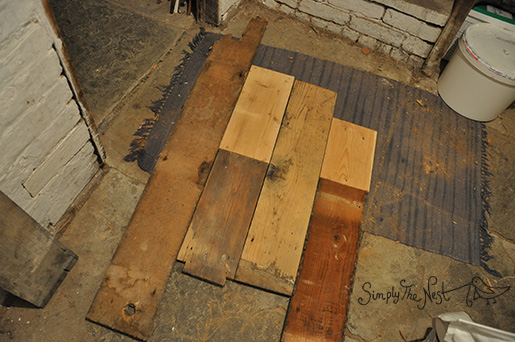
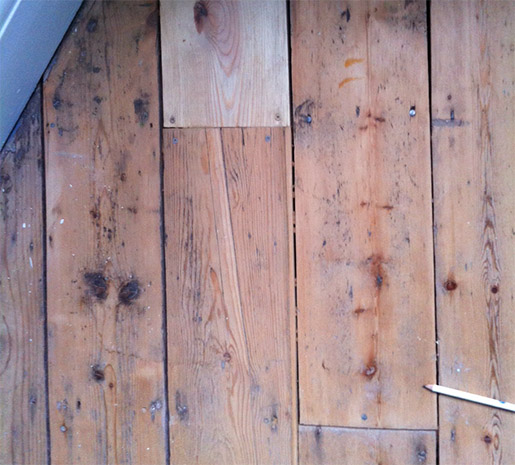
You’d think we’d laid brand new flooring. Here’s an example of a corner on the landing where we found a dodgy patch job using newer wood. We had a bunch of random reclaimed planks in the cellar – some from our floors, some we rescued from neighboring skips. I created a patchwork of planks to fit:
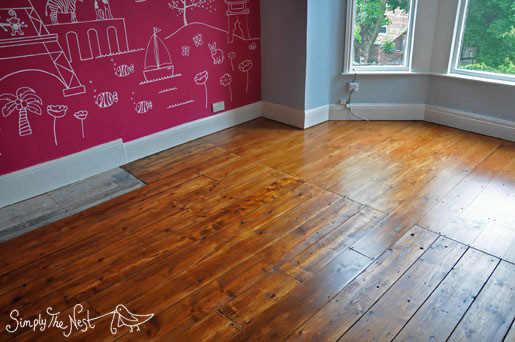
Don’t they look awful? All horrible different colors and nasty and splintery. Well, here’s how they looked after sanding:

And after oiling:
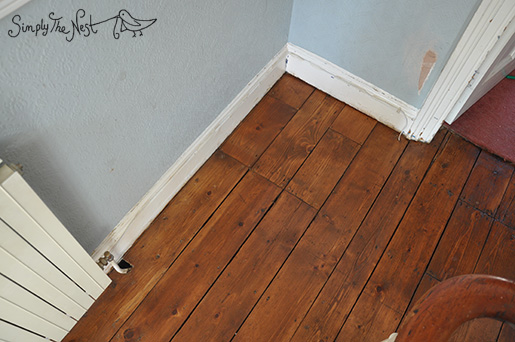
Yep, they’re beautiful. And honestly, you don’t remotely notice the different plank lengths – we have quirky patch jobs and joins all over the place, and it just adds to the charm and character. I thought we’d have to replace half the floorboards but we’ve salvaged 95% of them, even though some are cracked and chipped with knot holes (that Eva likes to post things down) and oddly spaced gaps and random cuts from when the central heating was installed. Once they’ve been sanded and oiled, they just look gorgeous.
Prep work takes a really, really long time
At least as long as the actual sanding, we find, although of course it depends on the state of your floors. Here’s what you have to do.
Remove and dispose of the current floor covering – we have carpets, underlay, carpet tack strips and in some cases, old newspaper. You absolutely must wear sturdy shoes for this (and all) floor renovation work – standing on an ancient floor nail is no fun at all, believe me.

Penny casually ignoring the shoe-wearing rule
If you find paint on the floors, whether splotches or painted planks, and your house is older than, say 1980, you’ll need to test the paint to see if it’s lead, using a simple test kit. If the paint is lead, you’ll need to use a product like Homestrip to remove it safely – sand it off, and you’ll send large amounts of poisonous (and invisible) lead dust into the air, which is extremely harmful if breathed in or ingested via skin contact, especially for children, pets and pregnant women. Seriously, don’t risk it. Using a heat gun is even worse because then you release toxic vapours throughout the house. You can read more about the dangers of lead paint here. Scraping it off safely using Homestrip will add potentially several days of effort to your project, but it’s the safest way of dealing with lead paint.
Next, pull up as many staples as you can find using a staple removing tool, and either hammer in or pull out as many nails as you can find. Our sander is powerful enough to sand the heads off nails so if you miss a few it probably won’t be a disaster, but it’s likely to rip your sandpaper and of course you risk damaging the sander. This step can take several hours – in fact we do it over the course of a few days as it’s easy to miss nails and staples depending on the light and how tired you are!
You’ll probably need to do some repair work. Squeaky planks will need to be screwed into place on the joists (you’ll be able to see where the joists are through the small gaps between the planks). Just use a regular screw (not a nail – you may need to be able get the floorboard up easily at some stage) and countersink it with a countersink drill bit so it sits flush with the wood.
You may need to glue some split planks together. We use wood glue plus plastic chocks wedged between the gaps to hold the wood in place while it dries. You can also cut new pieces of wood and glue them in place.
A repaired board in Natalia's room
Sometimes, we use wood filler. It’s not ideal because although you can oil over the top of it, it does take a bit of artistry to blend it in with the original plank. But it’s possible, if you need to fill a hole in the wood.
You may need to replace entire planks. It’s hard to find reclaimed wood that exactly matches your width and thickness, although you may find a supplier who will cut it to size. You can also plane or cut it yourself. You can replace with new planks (we did this in Eva’s room) – the oil sits on the new wood differently at first, but after a year of solid toddler-use it’s starting to look nicely dinged up, so I’d say new wood is definitely an option, although our preference now is to repair the original planks by any means possible – I find that cracked, chipped wood with odd cuts is really more beautiful once refinished than perfect new wood.
You’ll need clean out the gunk between the planks. It’s totally gross but really quite satisfying. A flathead screwdriver is good for this, or a credit card. Once you’ve got the gunk out, use a folded piece of sandpaper (40 grit or thereabouts) to sand any splinters from the sides of each plank.
And you’re done!
Time to sand
You’ll need to wear goggles, a proper respirator, ear defenders and gloves. Invest in the good DeWalt stuff – you don’t want goggles that mist up every two minutes. By proper respirator I mean the Darth Vader kind with replaceable filters, not the cheapo hospital kind. They’ll work to an extent, but having tried both I’ll never use the cheap ones again – the difference in ease of breathing and comfort both during and after is remarkable. I find my arms get shaky after half an hour or so, so I make sure to take regular breaks.

We do one pass of 40 grit, followed by one at 80, and a final one at 120. I wouldn’t really recommend going much smoother than that, or you may find yourself slipping around on the wood as if you were on an ice rink. The first pass takes the longest as you’re sanding years of grime from the floors – the other two coats are much faster. It won’t be super-smooth after 40 grit, but 80 and 120 will take care of any splinters. Use the edging or detail sander to take care of the edges, corners, and any stubborn spots that the main sander can’t deal with.

Progress on the top landing - carpets up and first pass at 40 done - edging still to do and lead paint to be removed
You don’t have to get the wood perfectly white, especially if you’re planning to use a tinted finish. In fact, a few grey patches here and there will add character once the oil’s down.
Once you’ve finished with the main and detail/edging sander, use the folded sandpaper again to sand inside the edges of the planks. You can use 80 this time, rather than 40.
Finishing the wooden planks
If you plan to use the room shortly after sanding, you need to get oil or varnish on it straight away. Otherwise, it will get dirty and you’ll need to sand it again before oiling. We let a year elapse between sanding our spare room and oiling it, and had to do another 120 coat to get the accumulated dirt off.
First, you need to clean the floor thoroughly. Vacuum every inch, ensuring you get every last speck of dust and Jack Russell hair from between the cracks and under the skirting boards. Then, use a soft brush to sweep it by hand. Then, use a damp towel to clean it. You’ll still need to re-clean each plank just before you oil it because some dust from the air settle on it, but the vacuum/sweep/wipe method will deal with most of it.
We use Osmo Polyx Oil on our floors. Accept no substitutes – this is the industry benchmark product and it’s amazing. You can read more about our love for Osmo here. We use the tinted oil in Amber 3072 – it’s a warm honey color that glows beautifully in the sunlight. We occasionally need to repair the odd patch that gets scratched by the dogs so it’s not a zero-maintenance product (although it meets the same durability standard as Ronseal varnish) – but for us, the beauty of the finished floors makes up 1000 over any inconvenience of occasional refinishing. Each tin costs around £60, but I calculated that eventually worked it at £2.50 per metre, which is cheaper than a less-expensive product that you need to use more of.
We use big Purdy brushes to apply the oil, and wear proper respirators. I prefer to have the window closed while applying oil as I find dust comes in from outside and sticks to the wet oil. We do one tinted coat followed by two clear satin-matt coats, with 24 hours of drying time in between each. It then takes a month to cure and harden fully, although I’d advise putting felt pads underneath your furniture to avoid any unnecessary scratching hazards. We do all our oiling while the kids are in the house – either with the door closed or, if working in a communal area, while they’re asleep at night with their doors closed. This is, of course, down to personal choice.
I’ve written before about the specific technique for applying Osmo oil, but effectively you need to buff it into the wood. It’s not a stain, and you don’t paint it on. If you can see brushstrokes in the oil, you’ve put too much on. I do less buffing with the clear coat, however – the color looks gorgeous when buffed in, but the clear can be painted on to a slightly greater extent.
Phew, I think that’s it. Have I forgotten anything? Any tips, advice or questions? Let me know in the comments and I’ll update the post accordingly.
Happy sanding!