A Vintage Wardrobe Project Using Annie Sloan Paint

Finally, finally, the vintage wardrobe that I bought on eBay for Natalia when she was around two months old and stored in the cellar for over a year has made its way up to her bedroom. Behold:


Here's how it looked before:
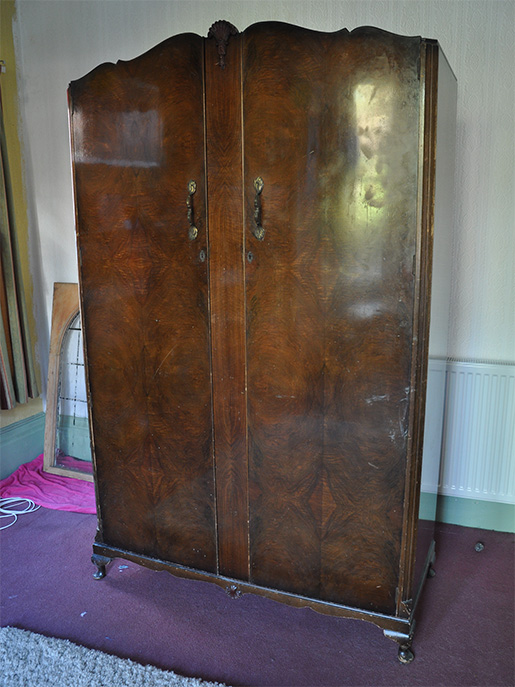
I could never bring myself to paint over quality, solid wood, but a flaky, cloudy, scratched veneer? No problemo. I used Annie Sloan paint, which I've been meaning to try for ages after hearing so many people raving about it. I chose the classic Old White paint, plus clear and dark wax to give it an aged effect.
I have to say, Annie Sloan is not a paint for beginners. After watching YouTube videos of Annie herself getting amazing results by quickly slapping paint onto an assortment of wooden items of furniture with consummate ease, you'd be forgiven for getting the impression that it was super-easy to use, especially since it supposedly cuts your work time in half by negating the need to sand and prime first.
Well, this wasn't my experience. While I appreciate there is of course a technique to be learned when using a new type of paint, I found the whole process extremely time-consuming. I initially marvelled at how the paint clung straight onto the unsanded, unprimed veneer in a nice thick layer, but then quickly realised that it dried in a very patchy way with more drip marks than I've ever seen in my life. I've been painting furniture with brushes for years and have evolved my technique to the point where I barely get a single drip mark, so I was astonished to find the wardrobe was covered with them when I checked it under natural light (I did most of the painting in the evening while the kids were sleeping - I think working during daylight would definitely help). Brushstrokes I don't mind, but drip marks are not a particularly good look, even when you're aiming for a distressed finish.
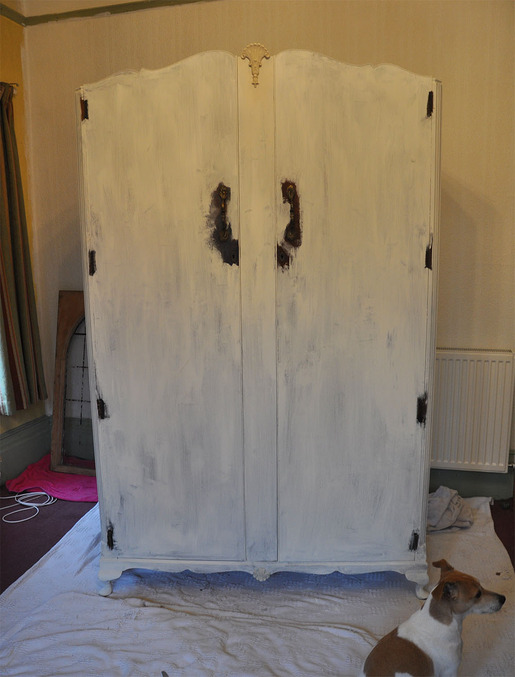
The wardrobe after the first coat
Having finally finished the paint work, I coated the whole piece with clear wax using a brush, and then buffed it off with a soft cloth. I then got stuck into the dark wax, which I'd been particularly excited to try. I can tell you that Annie Sloan dark wax is not for the faint-hearted - even I had to steel myself to brush the stuff onto my hard-won semi-perfect white paint job.
Again, I'd say it's not a technique for beginners, especially when using on top of a light paint (I imagine it would perhaps it would be easier to use on top of a darker paint where the contrast was not so extreme). I thought I'd be able to brush it on, buff it off while controlling the depth of colour, mix with the clear wax to get a lighter version in order to blend it in... nope. When you mix the two waxes together you can't use it to blend into the darker wax already applied, as clear wax on top of dark wax somehow acts as an eraser to remove the dark wax (which actually ultimately turned out to be very useful, albeit not what I was expecting).
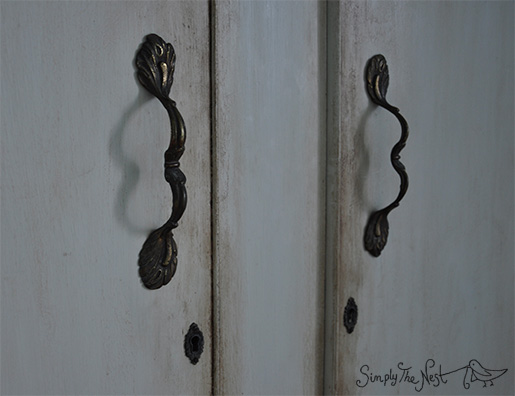
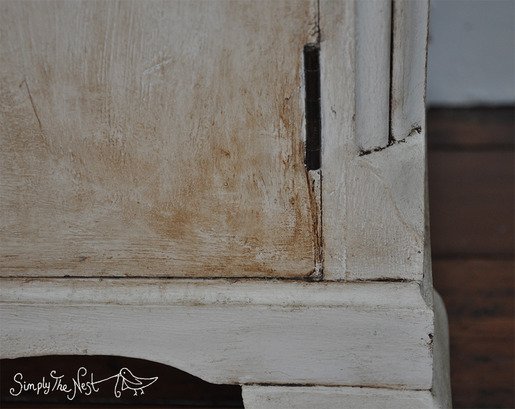
I removed the original hardware, painted underneath it, and then screwed it back into place
My plan had been to apply dark wax to the edges and then leave the middle of the doors untouched - this didn't work out, as it proved impossible to subtly blend the wax into the paint. Eventually I learned to mix up a dark/clear blend, apply it very carefully to the whole door in small areas (this is crucial), buff it off until the dark wax had nearly disappeared, and then very carefully build up the dark wax around the edges.
I started off by slapping the dark wax all over with a large brush, and soon realised that a) it dried too quickly when applied to larger areas, and b) using a big brush didn't give me enough control as once it's touched the painted surface (even when protected with clear wax first) you have to use some significant elbow grease to buff it off if you've accidentally applied it to an area where you didn't want it.

I then started using a much smaller brush, plus a cotton bud to push the dark wax into the specific areas that I wanted it to fill. I thought the wax would self-select the right parts of the wardrobe to cling to (and maybe if the wardrobe had more detail it would have done), but I found it impossible to get it to stick into, for example, the joints down the side of the wardrobe, because if I slapped enough on to get the dark line I was looking for, then I couldn't get it to buff off the adjacent parts of the wood that I didn't want it to stick to. And if I applied a lighter version then I didn't get the dark line. I soon learned to apply it as precisely as I could along the line I wanted to be filled, and then very gently wipe along it to smooth it out.
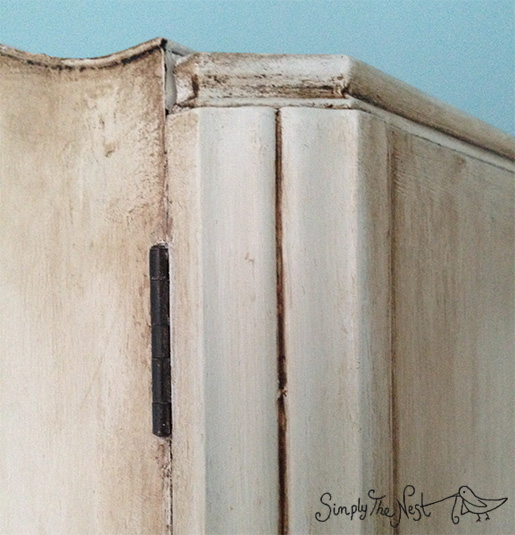
So my key to success for using Annie Sloan dark wax was to leave the dramatic slapping-on to the experts, and instead take it very slowly, applying it carefully and precisely in small areas, and gradually layering it up until I had the right look. And in terms of the paint - while I didn't like the drip marks, the obvious brush strokes that looked a bit odd pre-waxing looked really amazing once the dark wax had settled into the marks.
Normally my technique with distressing furniture is to get the initial paint work as perfect as possible, on the grounds that genuinely distressed furniture would originally have been pristine, with the patina only having been added over several decades of use - but with Annie Sloan, the more obvious the brush strokes, the better it looked once the dark wax had been applied. I'm not sure how good it would look if you only used the clear wax - I guess it could look as if you hadn't painted it properly... but if you don't want to use the dark wax, sanding the paint does give the most beautifully smooth and chalky finish.
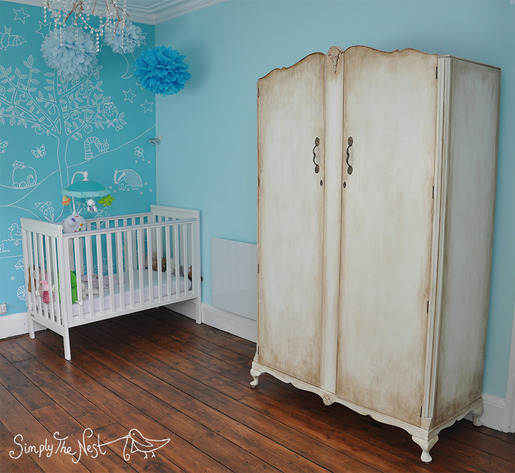
A wider view of Natalia's bedroom
Overall, I found Annie Sloan paint very interesting to use, and it definitely gave me the distressed look I was going for, more so than any other paint I've tried before. However, if you're using Annie Sloan purely because you want to skip the sanding and priming stage, my advice would be to just go down the traditional sand/prime/paint route as I found using Annie Sloan didn't take any less time; in fact, it probably took me longer than usual.
The next step with the wardrobe is to paint the interior - it's going to be a lovely sunny yellow (Annie Sloan English Yellow) with a handpainted white floral design that replicates the daisies, roses and buttercups in Natalia's mural. We're also finishing off the last bits of insulation in the cellar room under the living room - and then we get to start work on the burgundy master bedroom. Bring it on, 2014.
You can see all Natalia's bedroom projects here, and all our furniture renovation projects here.