How To Fit A Belfast Sink On An Ikea Kitchen Cabinet

One of our main objectives in designing the kitchen (in addition to covering the obvious like having actual cupboards to store saucepans as opposed to tatty cardboard boxes, an oven big enough to stuff a turkey inside, and a working triangle that didn’t involve leaving the room, crossing a lobby, and entering another room) was to remove all the little annoying niggles. So having the main prep surface next to the sink to avoid having to fling handfuls of freshly washed vegetables across the kitchen floor, dripping water everywhere. Shallow drawers for storing all our ovenware with one dish per drawer, instead of having to constantly stack and restack a heavy and unwieldy pile of Le Creuset dishes to get to the big one at the bottom. And a sink big enough to wash the oven trays in without whacking them against the sides with greasy water sliding everywhere cos you can’t fit the blooming thing under the tap. Hallelujah!

Big enough to wash your Jack Russell puppy in
We have an Ikea Bodbyn kitchen, and while Ikea do have a lovely wide 80cm Belfast-style sink, it has double bowls, giving you two slightly less functional sinks rather than one gloriously massive one. 80cm sinks are quite hard to come by, but eventually I found a beauty at Shaws of Darwen. All we had to do then was hack the Ikea Domsjo sink cabinet to fit it. Easy, right?
Actually, yes, it was pretty easy. I get asked by loads of folk on social media how we fitted it, so thought I’d provide some instructions here.
First of all, you need to measure the height of your sink. My advice is to get your hands on the actual sink itself and then measure it, because Belfast sinks tend to be handmade so can have a millimetre or two of variation from the published sizes. This is the height that you need to cut the sides of the Ikea sink unit down by. It’s easiest to cut the boards before assembling the cabinet. You’ll need to cut down the two sides and the back.
Next, you need to prepare your supporting beam. It’s important to note that a small portion of this beam will be visible underneath the curved front of the Belfast sink (unless the sink has some kind of covering lip at the front), so choose an attractive piece of wood.
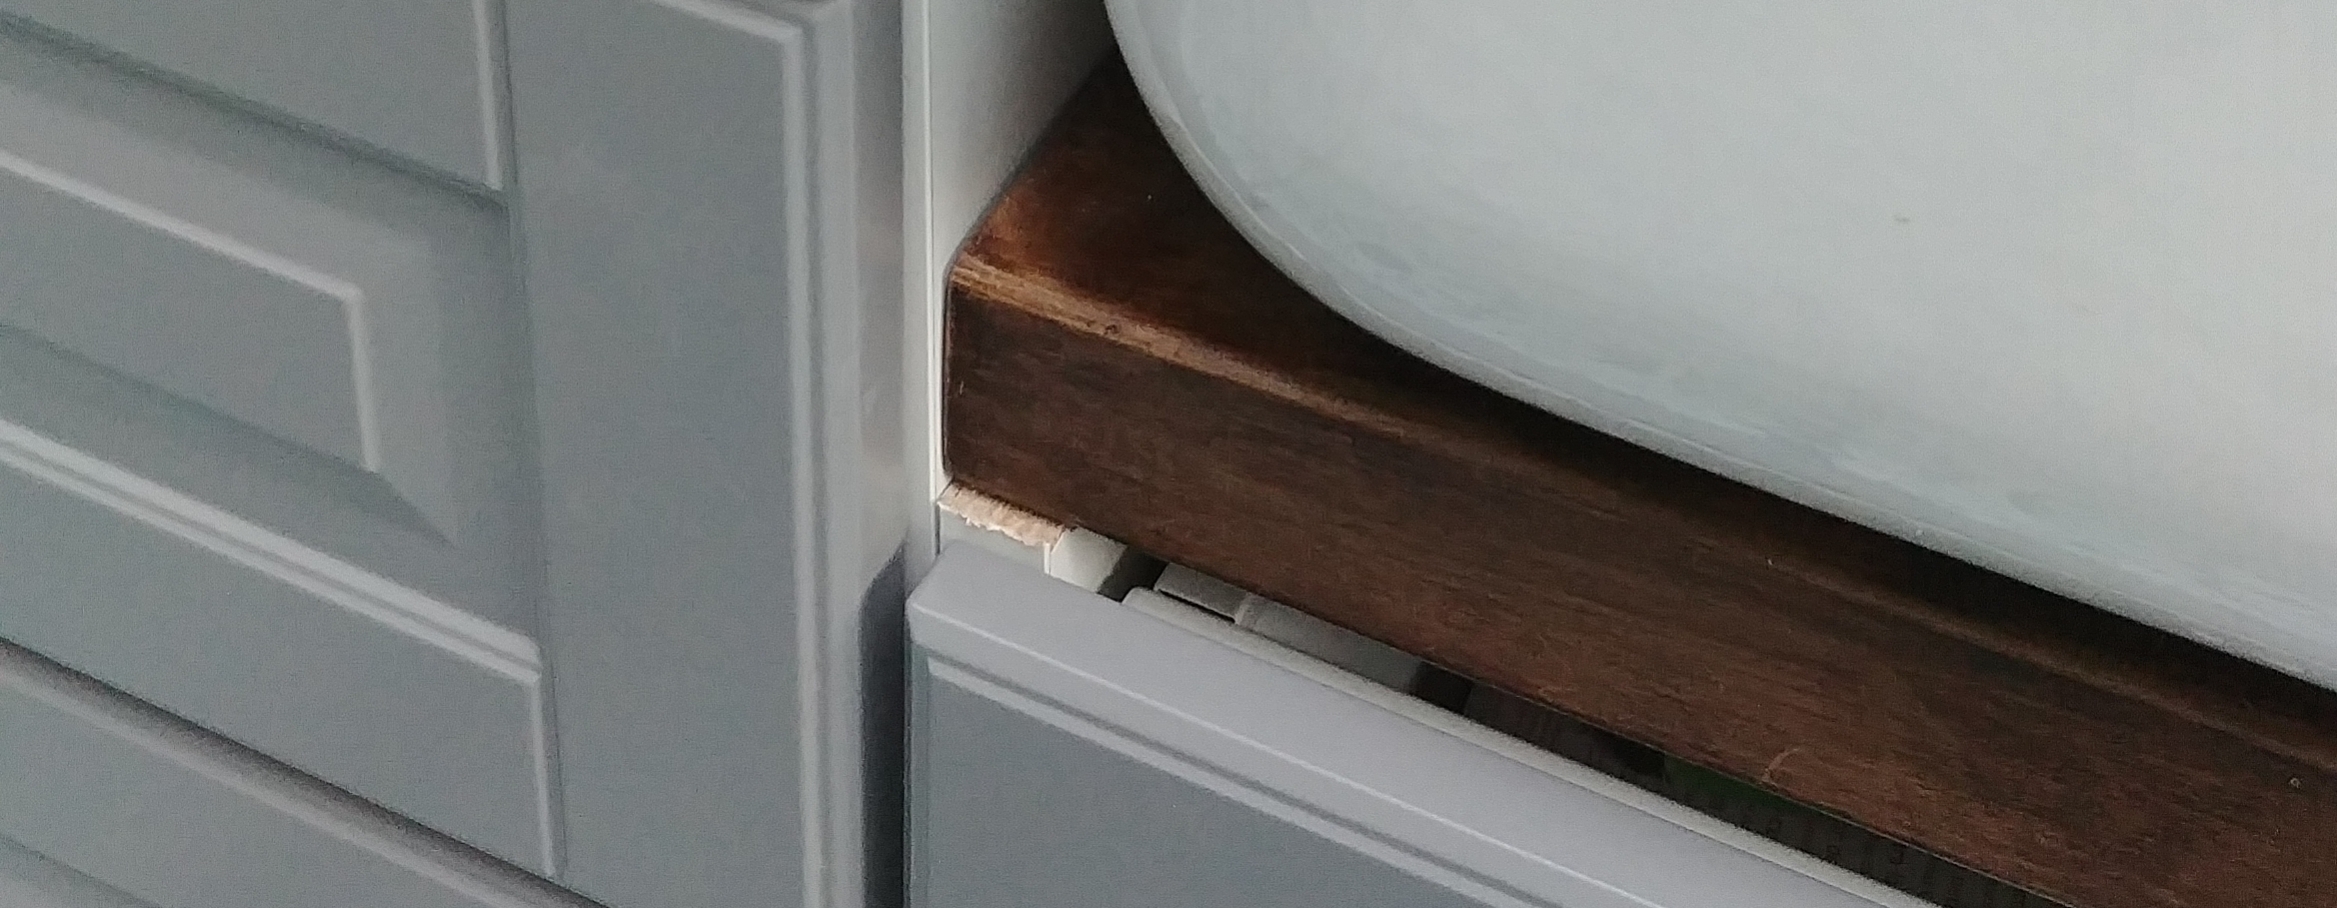
You can see the wooden supporting beam underneath the curved corner of the sink front.
We used a scaffold board to match the worktops, which we sanded smooth, waxed and buffed. I use Fiddes hardwax oil in Rugger Brown and a buff attachment for the drill to give it a nice sheen, rather than using elbow grease. Cut the beam so that it fits perfectly across the entire width of the cabinet. Then cut a dove-tail style piece out of the each side piece for your beam to slot neatly into.

We used two beams - one at the front, and one towards the back, allowing for the waste pipe. You can see here that we can an L-shaped hole at the front using our multi-tool, and a C-shaped piece at the back.
You then need add a number of other supporting beams across the depth of the cabinet. These will be invisible, so you don’t need to pretty them up first. Again, cut out dove-tail style pieces from the side pieces for the beams to slot into. Important – work out where your sink waste pipe will go and install your supporting beams to give the waste pipe enough space to drop down. We didn't screw ours into place, as with the weight of the sink and the cabinets on either side, those beams aren't going anywhere.

Close-up showing the wooden beam sitting on top of the cut-down sides of the sink cabinet. I pulled the drawer out to take this picture - normally the white drawer front and the rough edge of the cut-down side piece are covered.
Presumably you will have kitchen cabinets on either side of the sink – due to the curved nature of the front of the Belfast sink, you will most likely be able to see a small piece of the side of each cabinet. To avoid this, either use two cover panels (so your run of units would be: cabinet, cover panel, sink cabinet, cover panel, cabinet), or if you’re short on space and every centimetre counts, you can paint the sides of the two adjacent cabinets with a matching or contrasting colour.
The next question is: what kind of drawers of cupboard space can you fit underneath the sink? This depends on the height of your sink, and the height of your visible supporting beam. Our sink is 30cm deep, the beam is 3.6cm deep, and we can fit one 40cm drawer plus a hidden 10cm drawer. We had to cut a piece out of the back and base of the hidden drawer in order to accommodate the waste pipe, but it was worth doing for the extra storage space.
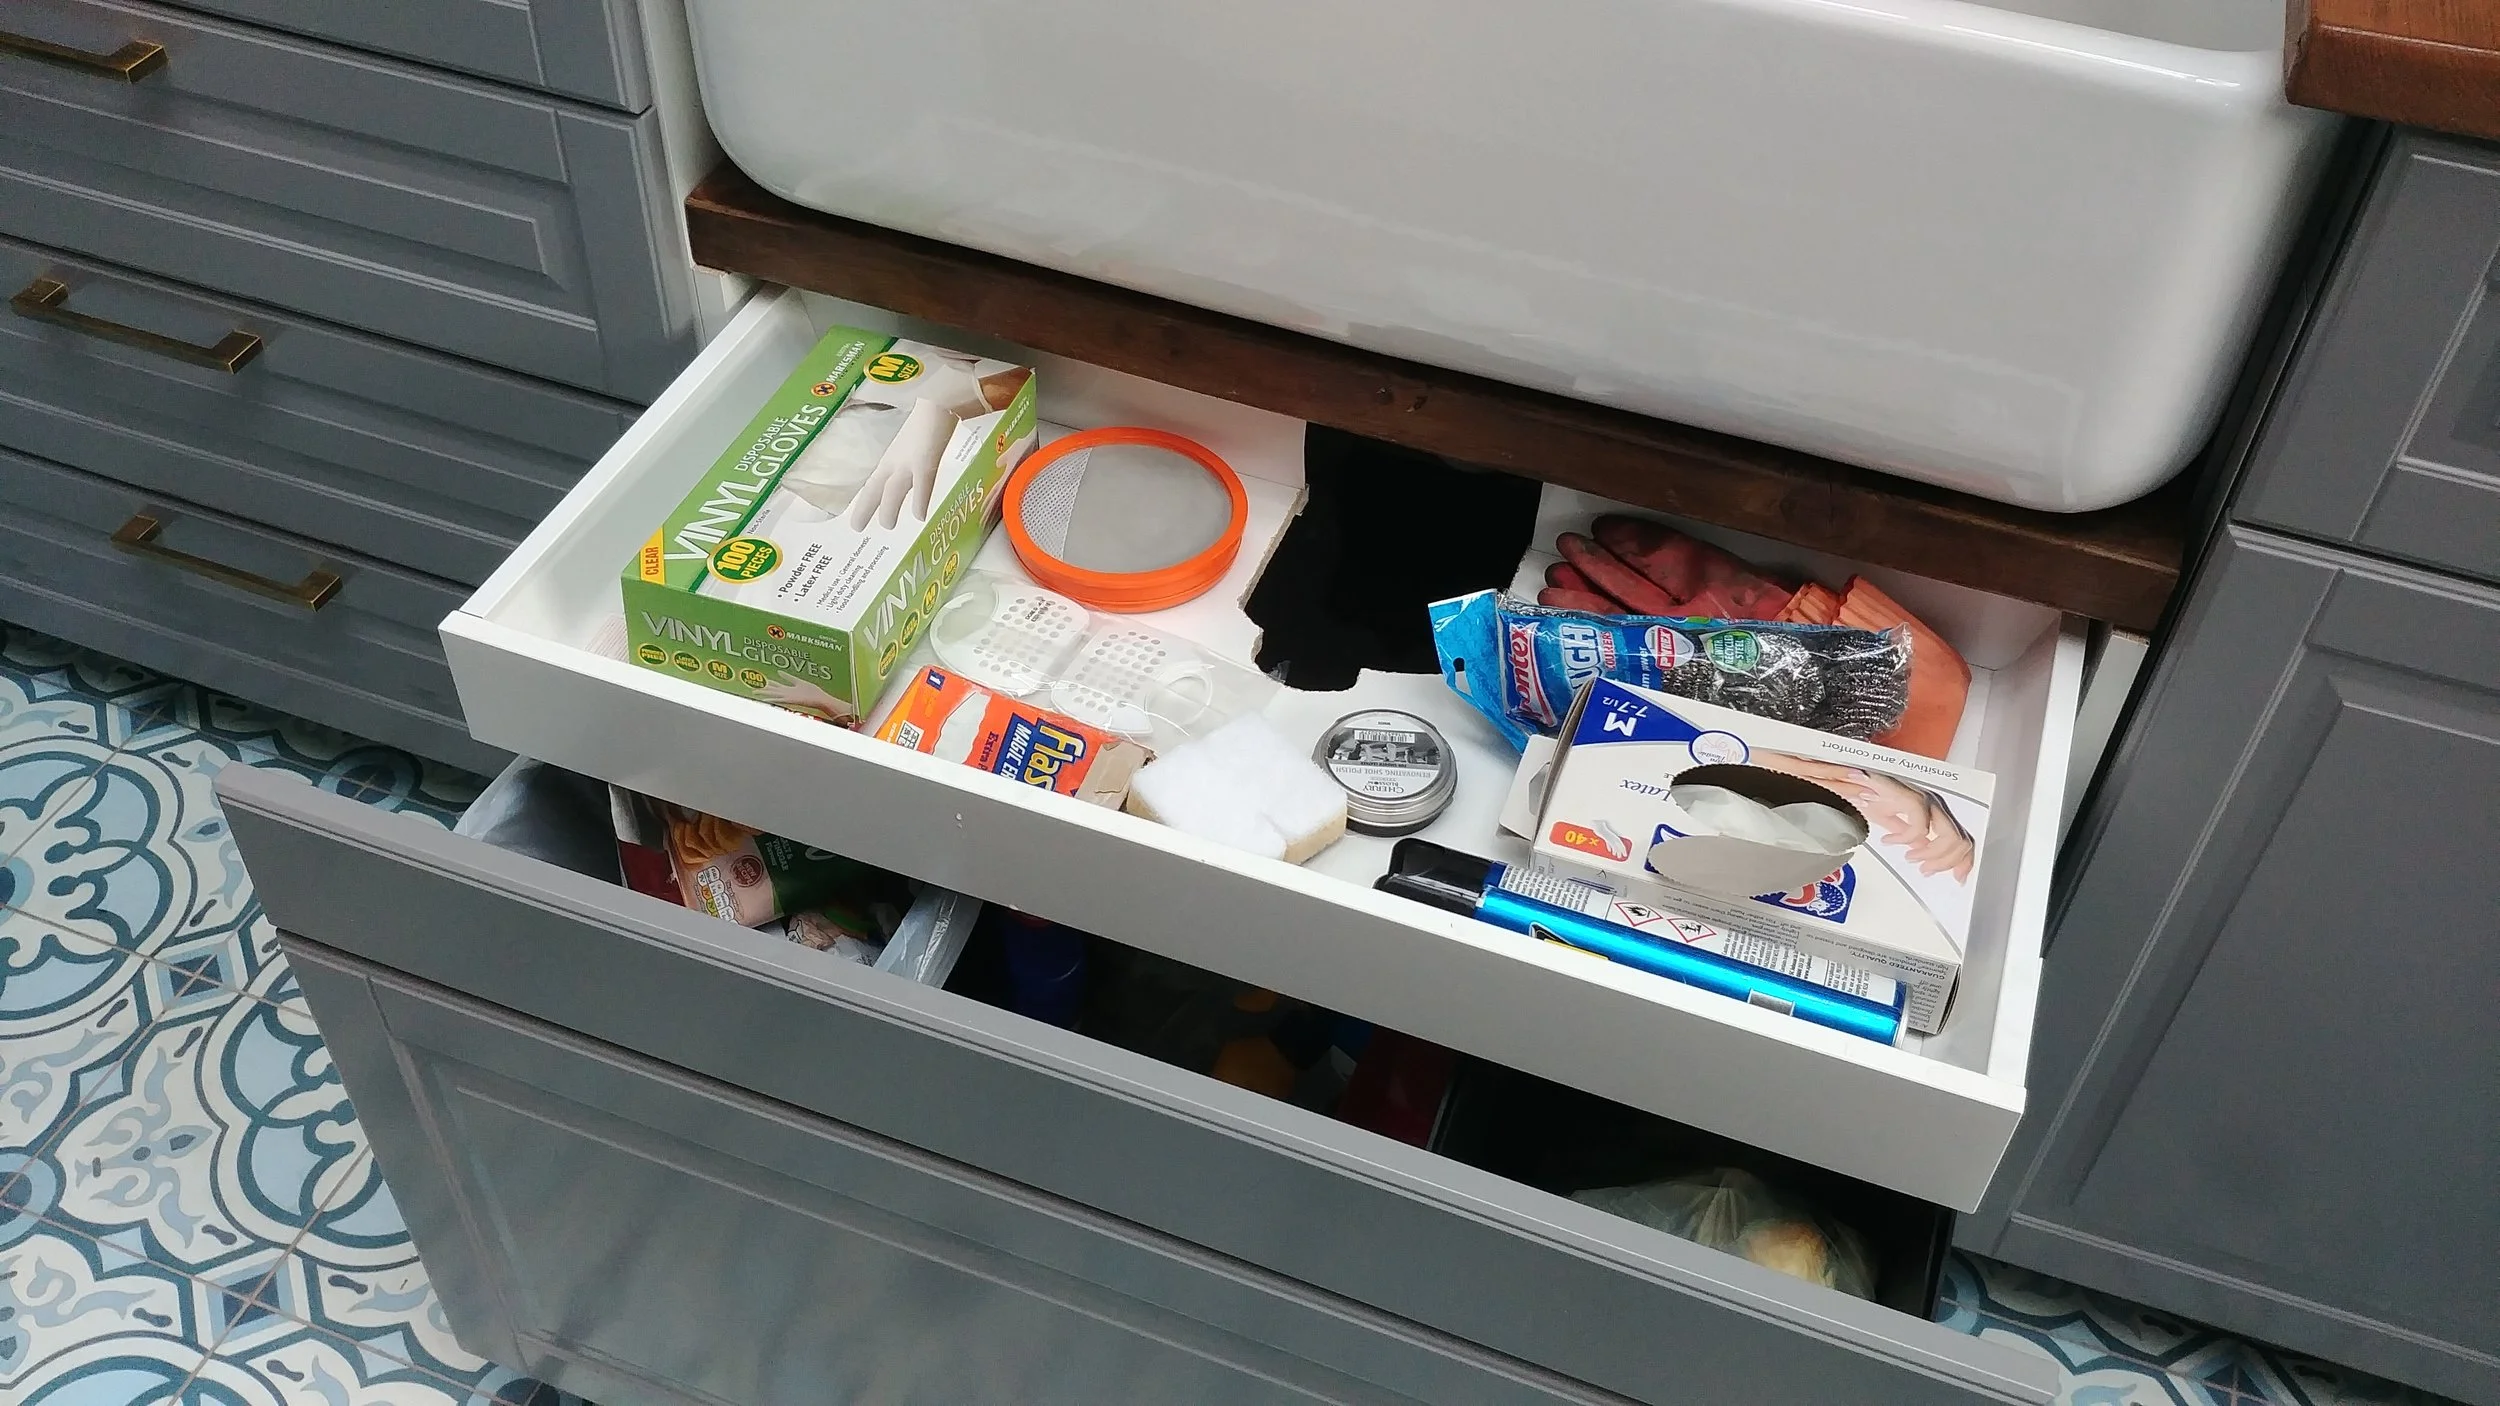
Hidden drawer with waste cutout in the middle.
We then fastened a 10cm drawer front to the 40cm drawer front using the Ikea fittings, creating a 50cm drawer front. This fits almost perfectly underneath our sink while exposing the wooden beam at the front, but if you can easily cover any gaps using either Ikea cover strips/pieces cut from cover panels, or (providing a neater finish, in my opinion), cut a piece of wood to size, sand it, and then paint with satin-wood paint colour-matched to your kitchen cabinets. The reason I prefer this approach is because when you use a piece cut precisely to size from an Ikea cover panel, you’ll always have the uncut MDF on either the top or the bottom. We still need to fit an extra strip to ours that will cover most of the wooden beam, but I haven't got round to it yet and to be honest I quite like how it looks now anyway.
We also fitted an electronic kick-opener so we can open the drawer by tapping it with a foot to access the recycling and rubbish units. Worth every penny.

And that’s it. Measure the height of your sink, cut the unit down to size, finish and install the visible beam, install an additional beam or two (leaving space for the waste), install and hack the drawers, and fit any cover strips. Finally, test the sink by washing your puppy in it.
Any questions, please comment below or message me on Twitter or Instagram.