How to Tile a Bathroom (AKA #youdontneeda todgertotile)
I’m not a tiling expert. And I’m certainly not a very competent videographer…. But what I am is someone who’s willing to give something a go, even when I’m not sure if it’s going to work or not. Earlier this year, I managed to tile our kitchen backsplash and bathroom shower surround, and the results were a lot better than I was expecting, considering I’d never done it before, and didn’t really know what I was doing.
For some reason, women generally aren’t expected to tile. Gardening, cooking, sewing and childcare (insert eye-roll emoticon) are all typically seen as female domestic pursuits. Tiling, brick-laying and carpentry? Not so much. As a mother of daughters, I’m very driven to role model to the next generation that you can have a go at doing anything (not that you can do anything), and that if you make a mistake and get it wrong, well, that’s just fine.
So, this post isn’t a detailed tutorial on how to tile a bathroom - there are lots of experts with videos on YouTube for that. What I’d like to share are some videos showing what to expect if you decide to have a go yourself, along with some tips from my own experience. Because #youdontneedatodgertotile, you just need a trowel :-)

How easy is tiling?
Generally speaking, I found tiling quite similar to icing a cake with buttercream. Getting the adhesive onto the trowel and then spreading it onto the wall uses a very similar technique to that required to get the buttercream out of the bowl and spread it on the cake.
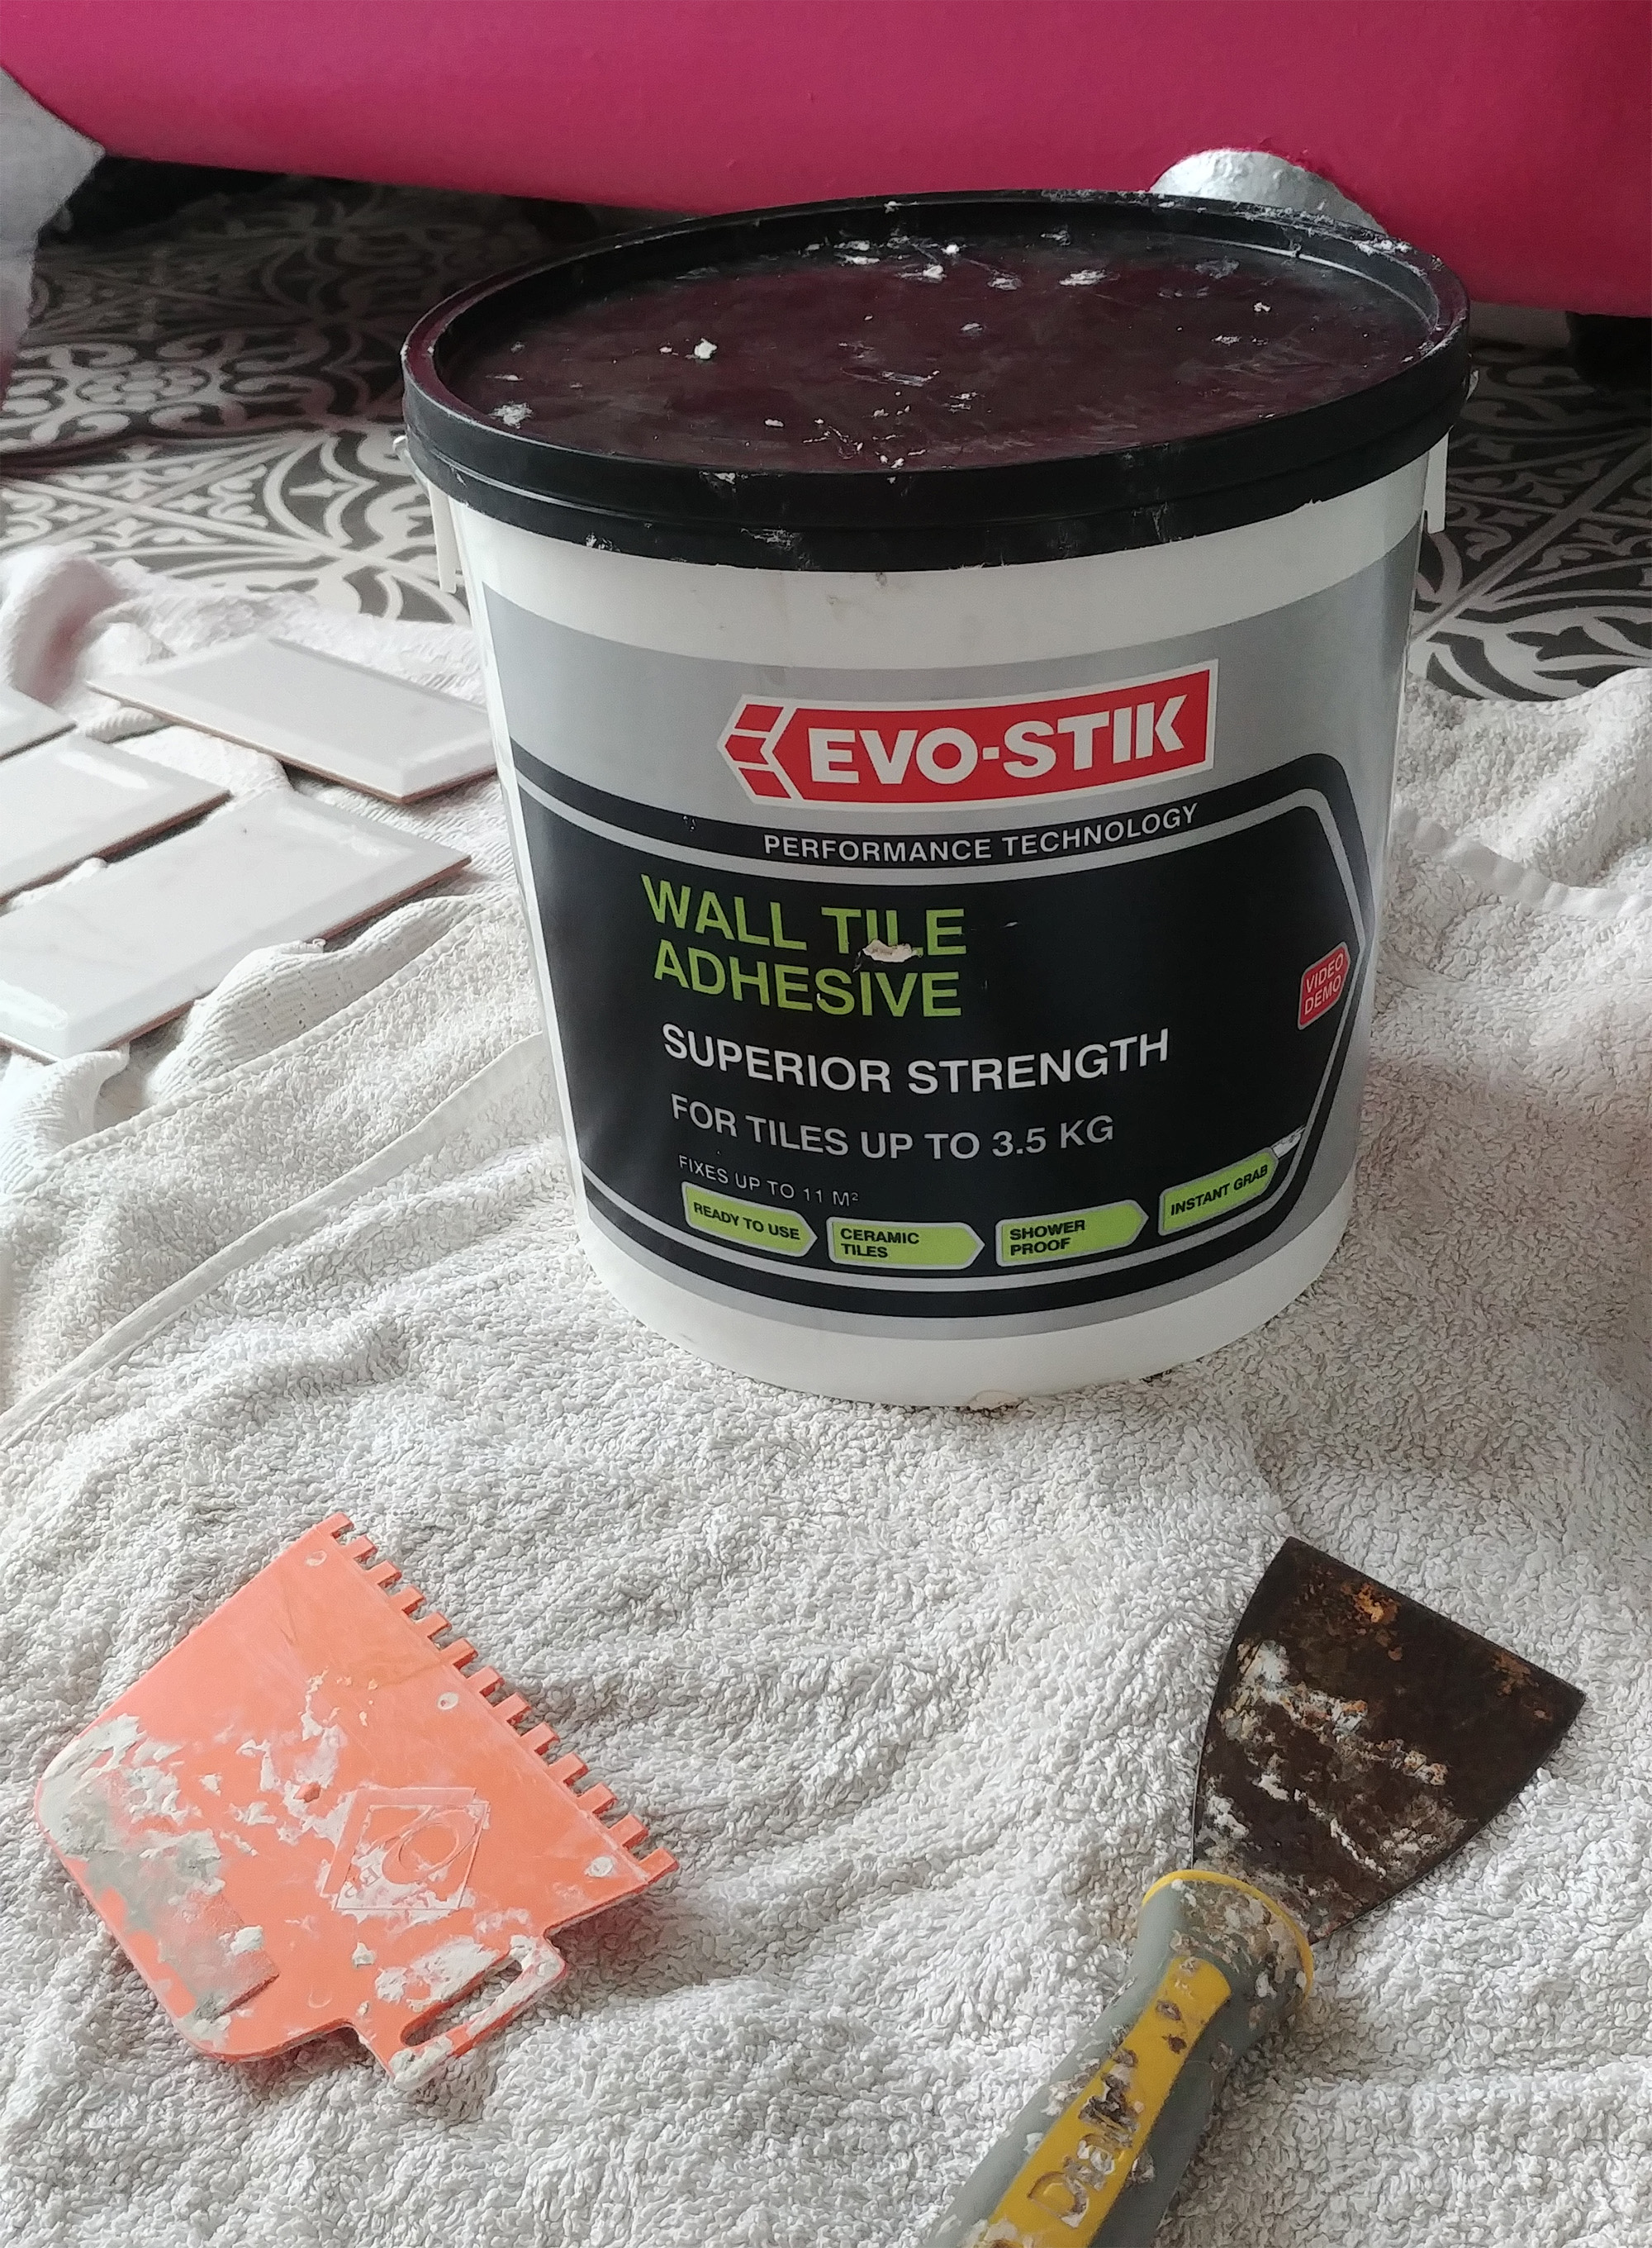
I used ready-mixed adhesive for walls - it’s more expensive than buying powder and mixing it yourself, but so much easier. Here are your tools - some adhesive, a notched plastic adhesive comb, and a trowel. Trowels come in all shapes and sizes, but the type in the picture is my favourite for smearing adhesive around (and for spreading mortar while bricklaying, come to that).
Assembled your tools? Right, let’s get stuck into that lovely adhesive.
Once you’ve got a good dollop of adhesive on your trowel, you need to spread it onto the wall. I found it easier to put adhesive on a smaller amount of the wall rather than spreading it everywhere and having it dry before you can get round to using it. In the video below, I’m using a very small amount to show you my (admittedly terrible) technique - in real life, I’d probably cover an area big enough to take 5-10 metro tiles.
Something that I hope you can see in the video above is that you don’t have to use a perfect technique. You can basically just slap it onto the wall more or less any old how, and it will probably be good enough.
It’s worth saying at this stage that tiling is jolly messy when you’re an enthusiastic amateur. I got adhesive on the floor, adhesive all over my hands, all over my clothes, in my eyebrows, and so on and so forth. Fortunately it’s easy to clean up…
Next up, you need to pull a notched plastic comb through your adhesive to make it all the same level and create little tracks. This part is very satisfying.
Once your adhesive is combed and ready, you can put your tiles in place. I used a laser spirit level to beam a straight red line onto the wall in order to put the tiles on nice and straight. Alternatively, you can use a normal spirit level and rule a line onto the wall with pencil - the adhesive will cover it up at first, but once you comb it through it will reveal enough of the line below so that you can align your tiles against it (see below).

You will need to use little spacers to ensure the tiles are an equal distance from each other. I’m using 2mm spacers in these videos.
It takes a few minutes for the tiles to set. You can still pull them off the wall at this stage if it’s gone horribly wrong, but equally they should be nice and sticky if you’re happy with the position.
You can then go ahead and scrape out the leftover adhesive from in-between the tiles, using your spacer as a handy tool. This will create a gap for you to grout in later.
Finally, give your tiles a wipe with a damp cloth to remove all the smears of adhesive. It’s about a hundred times easier to do this as you go along rather than wait until you’ve finished the whole wall and find the adhesive has hardened past the point of being easy to wipe off.
The last thing you need to do is grout. You basically spread it on across the cracks, and then wipe off the excess. Easy peasy.
What about tile design?
Working out where you’re going to put your tiles is an art in itself, and it’s one that - dare I say it - some professionals don’t really bother about, choosing instead to just start in the bottom left-hand corner and keep tiling across and upwards until they’re done. The result? Most likely you’ll end up with some tiny 1cm tile pieces at the ends, or have to cut them in odd places to accommodate taps and so on. What I prefer to do is work out the design in advance to ensure that this doesn’t happen. In our kitchen, for example, I designed the space between our kitchen base units and worktops below and the open shelving above to be a space precisely engineered to take exactly seven rows of tiles plus 2mm of grout per tile layer.
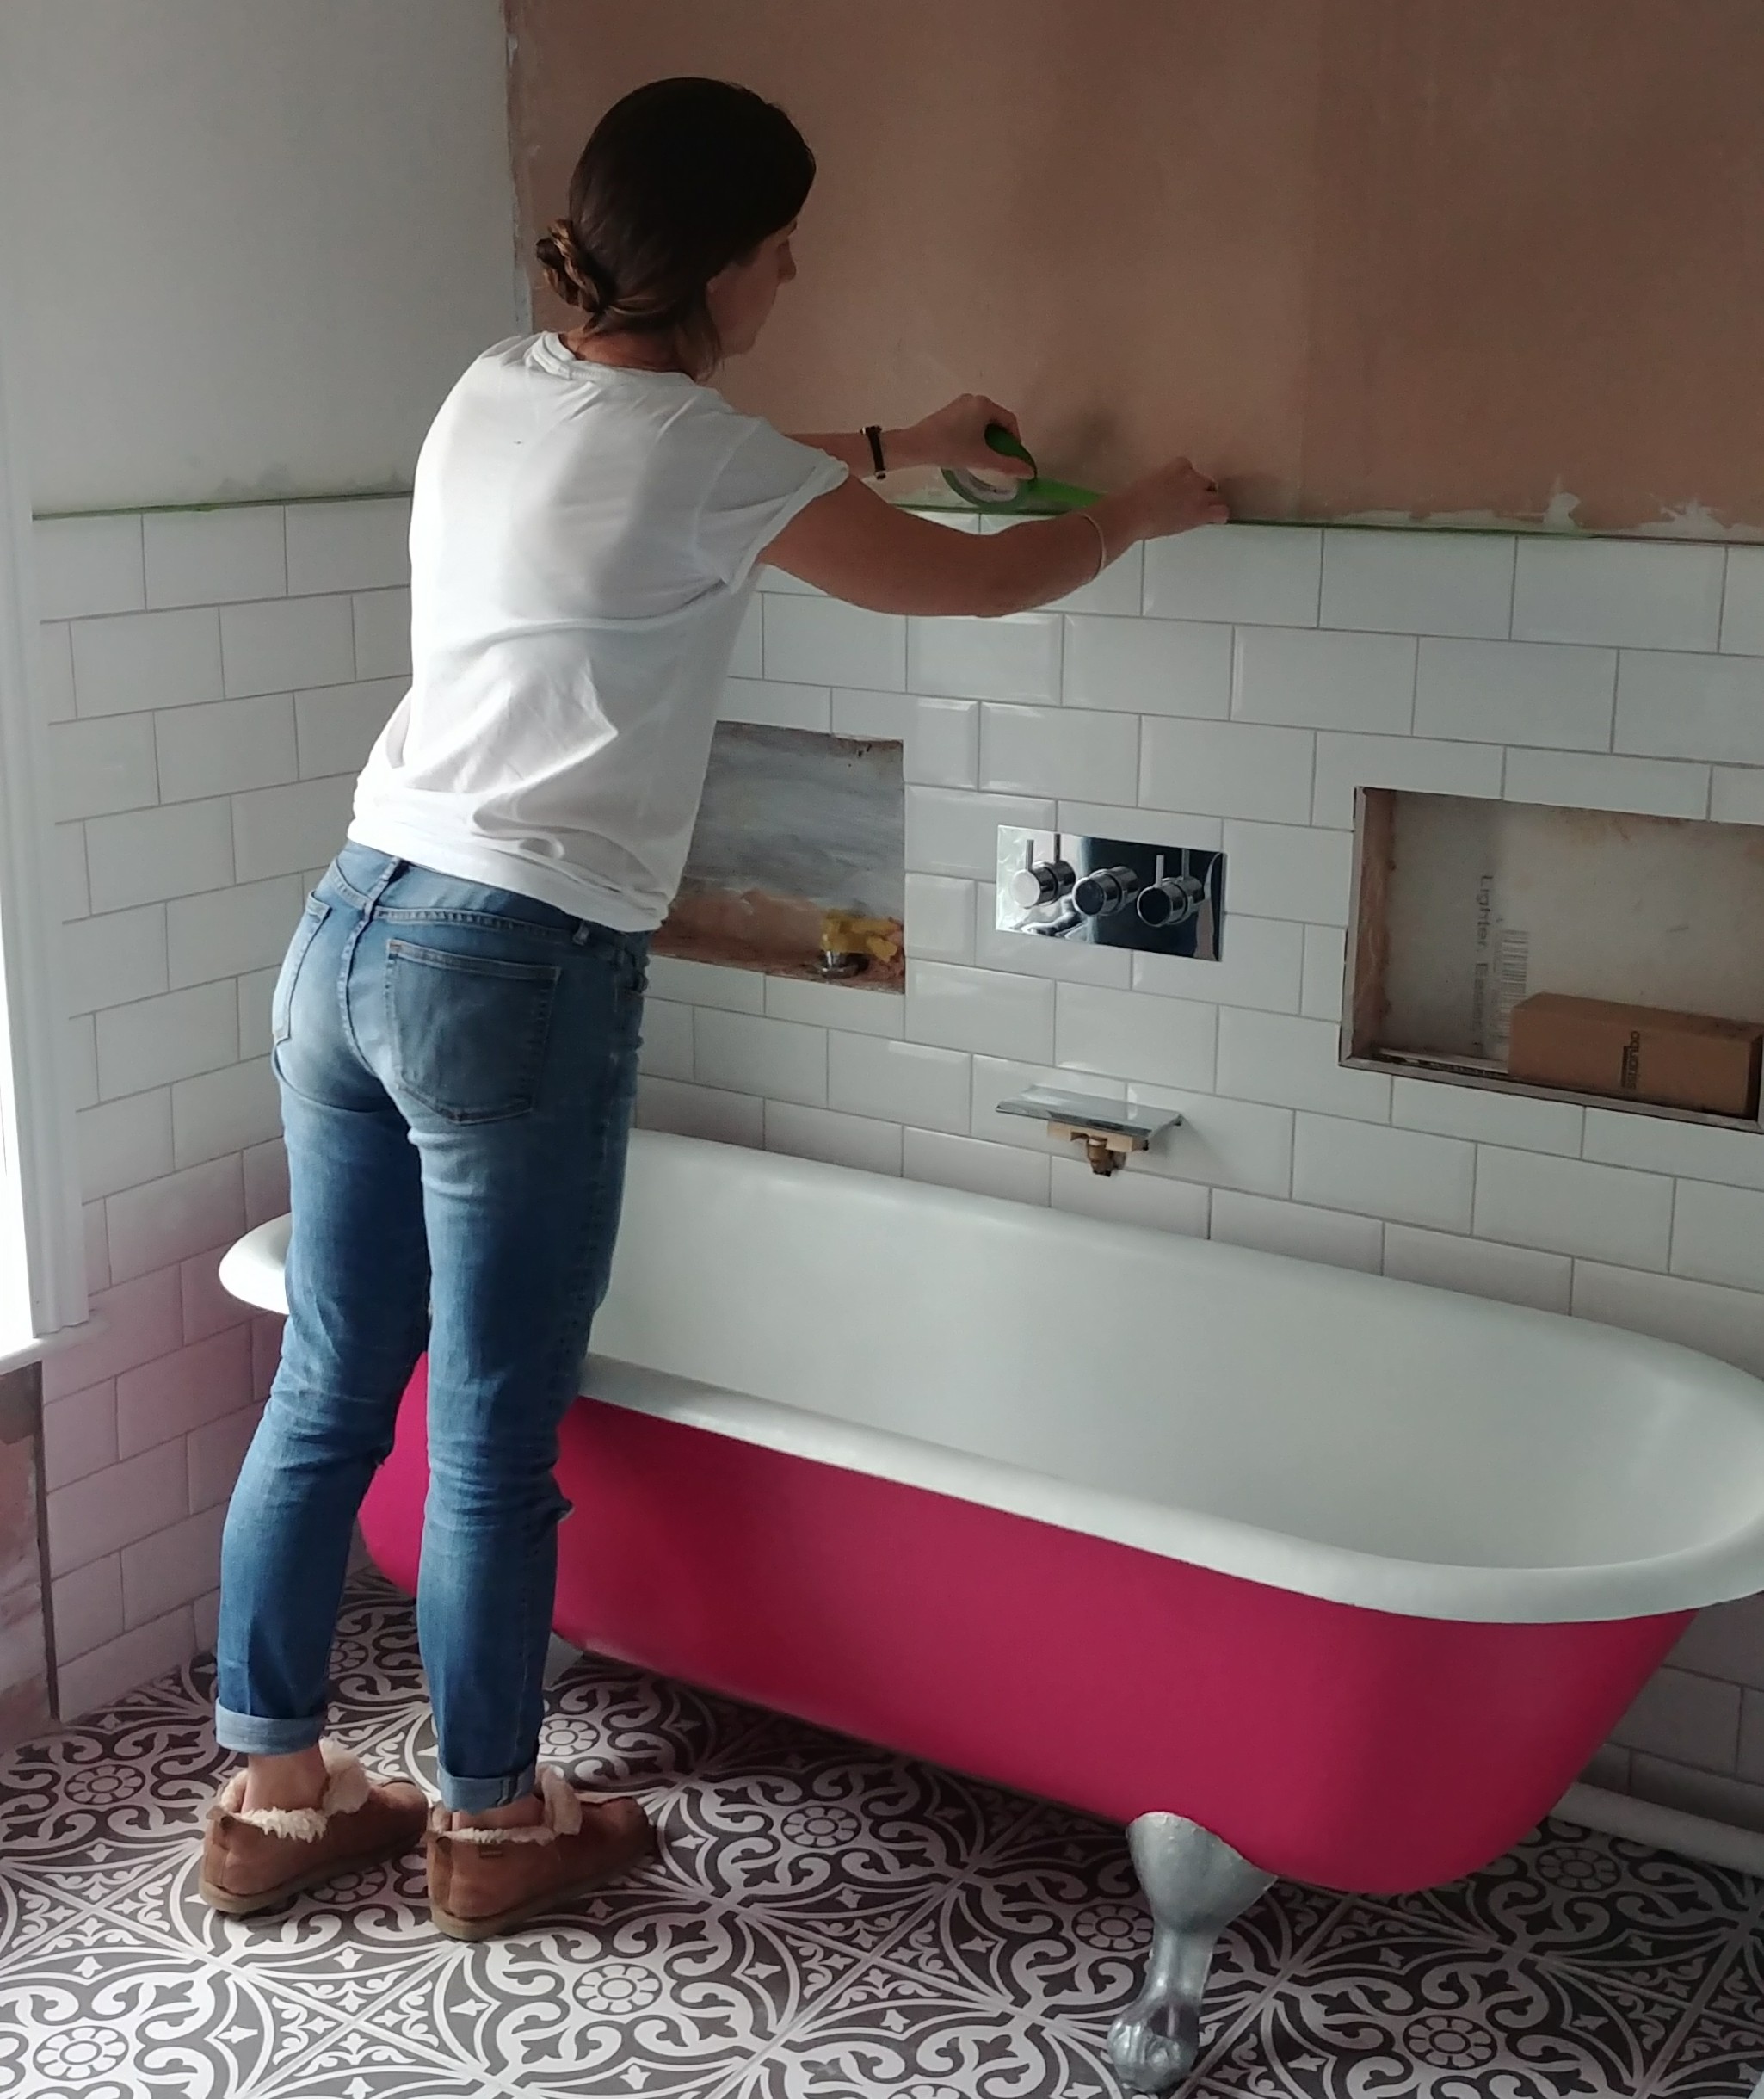
You can see in the photo below that I designed the placement of our metro tiles so that a) we wouldn’t end up with little scrappy pieces of tiles on the right-hand side, and b) the position of the shower plumbing would fall in the middle of a tile/along a join rather than off to the side. It takes a bit of fiddling around to work out the best plan - in our case I started with a 10cm tile cut down to something like 6cm in order to achieve a nice balanced look on either side of the shower surround.

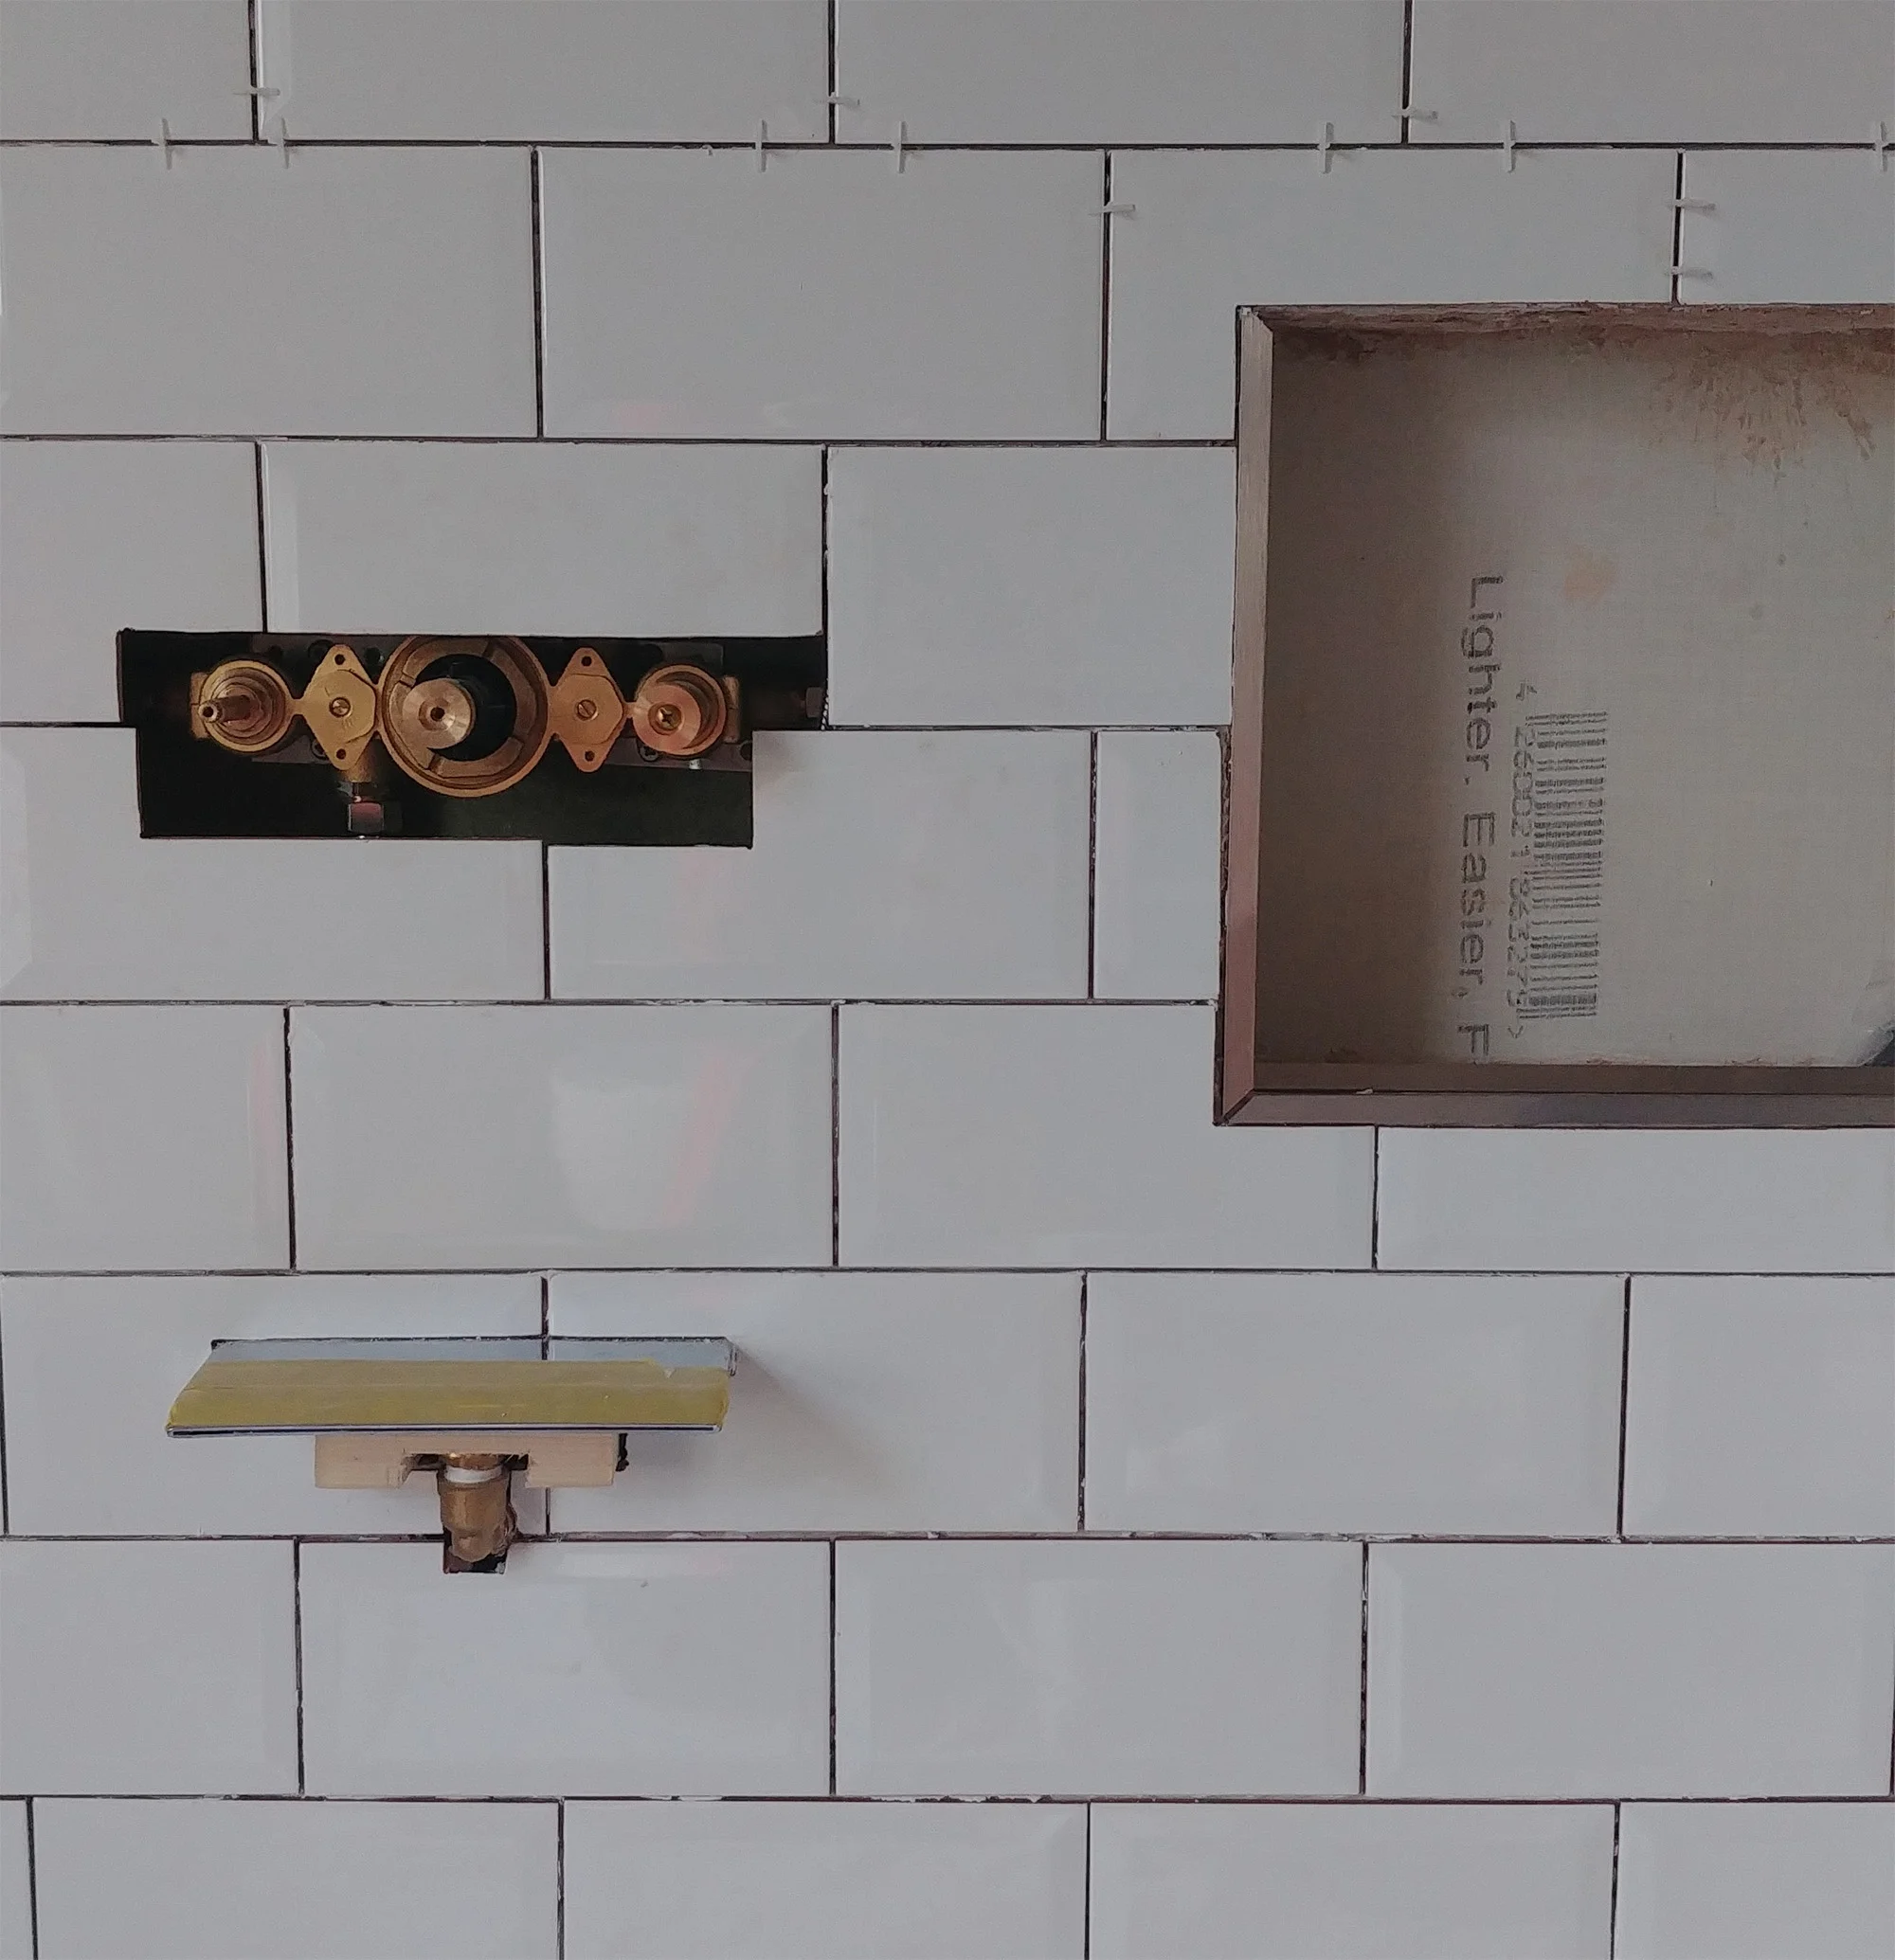
You can see in the photo below how I designed the placement of the tiles on the bathroom wall to fit neatly around the alcoves without having any weirdly sized tiles. This meant selecting the placement of the alcoves (we DIY’d the whole bathroom) to fit around the tiles. You can also see the placement of the plumbing to fit between two tiles, meaning cutting the tiles to accommodate the plumbing was easier (three tiles needed rectangles cutting off the corners, and the fourth needed about 2cm cutting off all the way across the bottom).
If you’re using faux marble or other faux tiles that have been printed to resemble stone, I recommend laying them all out on the floor and then grouping them by the pattern repeat. I think there were about 20 different printed patterns for these tiles, and I didn’t want to end up with identically patterned tiles right next to each other.
What about cutting tiles?
It was the thought of cutting tiles that put me off the most when I was considering whether to tackle the bathroom tiling myself. What if I cut them wrong?! Well, err, in that case you pick up another tile and have another go… that simple, really. Make sure you order some spares to accommodate this.
I used our ancient wet tile cutter, which is very messy (it spatters water everywhere) and loud, but works just fine. I recommend having a play with a spare tile to get the hang of where to stop the tile if you don’t want to cut it completely in two.

Sometimes when you’re cutting a tile, you need to cut out a shape rather than cut it in half. You can do this using a tile cutter like ours by cutting lots of lines close together and then snapping them off manually. It’s crude, but it works.
I think that’s about it. My overall advice - just have a go. If you use good adhesive, the tiles won’t come off the wall. And if you hate the results, you can just chip them off and have another go. I recommend having a try with a small project first - a simple back-splash behind a sink, for example, using a few tiles. Once you’ve played around with the adhesive, tools, and tile cutter, you’ll increase your confidence and feel able to take on a bigger project. Good luck! Please feel free to tag me in your pictures and use the tag #youdontneedatodgertotile - I love seeing your projects.