A Plan For Insulating Our Draughty Old Victorian Cellar Ceiling

It's a huge learning curve, owning a Victorian house. Our first house was built in the fifties and we didn't really worry about anything related to the construction - we just got on with renovating it. But our current place has required hours and hours and hours of research to figure out how to do things appropriately, from safely removing lead paint to sanding and refinishing 130 year old floorboards.
Our latest project is insulating our dreadfully cold and draughty ground floor by insulating the cellar ceiling below. Did you know that old houses need to retain a certain level of ventilation (read: draughts) in order to prevent the bricks from getting damp and the wooden joists from rotting? Me either. Seems kind of nuts that when you're trying to prevent draughts, you need to ensure that you still have draughts. But if you stick a load of insulation in the floor of an old house (or in the ceiling of the room below, as we're doing) and don't ensure you retain adequate air flow around those old wooden joists, condensation will pretty much inevitably start to form in the cavity where cold cellar air meets warm living space air and your joists will start to rot. Eeek.
So, here's our plan, based on lots and lots of research including taking advice from fellow DIY bloggers Kimberly, Charlotte and Christine, poring over Jack's extremely detailed (and frankly terrifying) account of his 18-month endeavour to insulate his Victorian living room, and several conversations with insulation experts. If any of you lovely readers have any thoughts or suggestions, do please let me know in the comments.
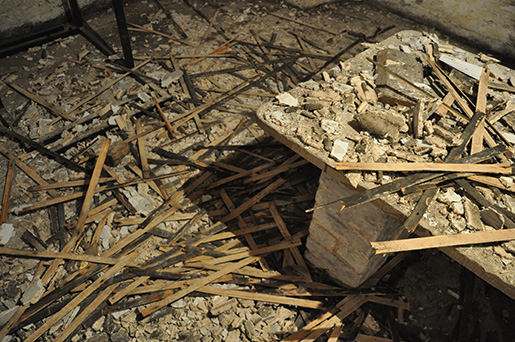
Our first step was to clear out the cellar room underneath the living room. From this:

To this. Behold, Aslan's stone table... actually, it's the original Victorian cold meatslab that I'd completely forgotten was there as it's been covered in piled up boxes since we moved in. If you discovered a giant piece of 130 year old stone lurking on your property, what would you do with? The table at the moment is too low to be a workshop table, although we could raise it... Maybe we could use it in the garden?

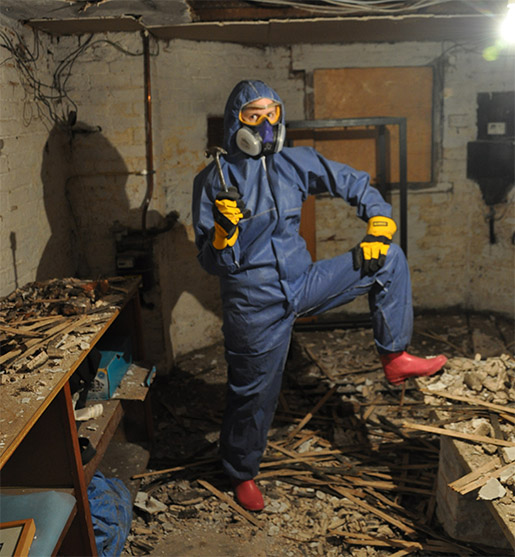
The next step was to remove the plaster and lath ceiling. We purchased matching coveralls, suited up with goggles, dust masks and claw hammers, and got to work. It's like the DIY version of Breaking Bad in our cellar at the moment, complete with pink accessories.
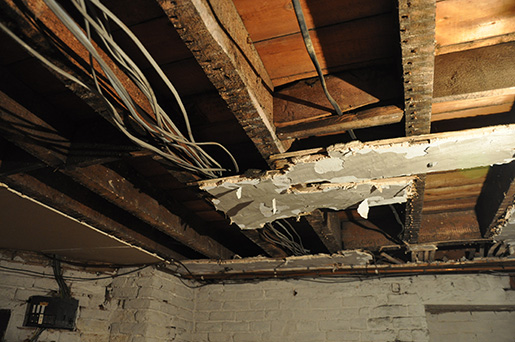
This is the cellar ceiling before:

And here's the plaster and lath coming down. P&L is basically a whole bunch of thin timber strips nailed across the joists and then covered with limestone plaster (limestone is breathable, which allows air to get to the joists). I love the idea that all those years ago, some Victorian guy spent hours in our cellar meticulously nailing bits of wood to other bits of wood. I actually felt kind of bad about ripping it all out, but the other option of insulating from above by lifting the floorboards isn't an option because we've never managed to take up a floorboard without damaging it in the process. I plan to gather up a few handfuls of the lath pieces (laths?) and use them for some kind of as-yet-unspecified decor project.
It creates a lot of mess, and a lot of dust. Coveralls, goggles and masks (proper masks with filters, not the rubbishy disposable kind) are absolutely essential as it all comes showering down on your head from above, and you end up covered in the stuff. The good news is that so far we've taken down about three quarters of the ceiling, and the joists are in great condition so far - no signs at all of damp, mould, woodworm or decay in any form.
You have to be careful when doing this step, as you'll find a whole bunch of random wires and pipes in and around the ceiling. Andre knows his electrical and plumbing stuff (having done lots of this kind of work in Johannesburg, where it's normal for householders to do things like this themselves) and was able to easily distinguish between lighting cables, sky cables, the main gas pipe, network cables and so on, in order that we can tidy it all up. Otherwise we'd probably need to bring in an electrical contractor to do this work for us. Running cables through insulation seems to be a big no-no and best avoided. I believe that running cables within the cavity underneath the insulation is acceptable - more on this shortly.
We've chosen to use Celotex PIR boards as these seem to be the market-leading option, much more effective than the fluffy mineral wool, for example. We chosen Celotex over Kingspan (the products seem pretty much identical) as we found Celotex to have a more clear product range and a better customer service team, making it easier to come to a decision on which specific board to choose. We eventually decided on using Celotex XR4000 boards (designed for use in suspended timber floors) in 150mm which, according to our calculations, will more than meet building regs requirements for U values (the official measure for heat loss in building components). Our joists are 200mm, so this leaves a 50mm cavity for air flow.
So, the plan is to cut the Celotex boards to fit and wedge them tightly between the joists, pressed up against the floorboards, with the unprinted foil side facing down into the cavity. I've heard people complaining that they can see the shiny reflective foil through the gaps in their floorboards - I came across one guy who solved the problem by covering the top of the boards in black sugar paper - any other ideas? Maybe tape all the way across each gap from below? I asked Celotex if they had a solution to the problem and they said no one had ever reported it as an issue, but they wouldn't recommend creating any kind of seal under the floorboards other than the insulation, so I guess we'll have to see how it looks first and then make a plan if necessary.
To fix the boards in place, we're planning to use wooden battens screwed along the length of joists so the insulation boards can rest on them where necessary. Ideally we'll be able to cut the boards tightly enough to fit that we can just wedge them in without needing battens, but we'll see. Celotex recommend using a special branded Celotex saw to cut the boards, but we're planning to try using the saws that we already own - if it doesn't work particulaly well, we'll invest in the Celotex branded one. Celotex also make insulation clips designed to attach boards to wooden joists, but they seem intended to fit boards flush with the bottom of the joists (leaving a cavity above between the insulation and the floorboards), whereas we're planning to push the boards up against the floorboards, leaving a cavity below.

Take a break from all this boring insulation talk and admire Penny the Jack Russell sitting up like a meerkat.
I spoke with someone from Celotex's technical team who recommended stuffing mineral wool into any small gaps that may occur between the insulation boards and the joists, and using expandable foam to fill any larger gaps (which may be caused by any significant unevenness in the joists, or against the brick wall). Personally I'd have thought mineral wool for large gaps and foam for small, but there you go. We'd prefer to have the option of removing the boards just in case we need to make any changes to the pipes or wires when we come to install the new kitchen, so would rather avoid installing the boards in a way that would risk damaging them if we did have to remove them... Again, I think we'll have to see how easy the boards are to install neatly and then decide on the mineral wool/foam issue.
Once the boards are in place, we'll leave it at that for a while. Ultimately this cellar room will become our workshop, and will need a plasterboarded ceiling, but we've got more pressing things on the to-do-list right now.
A quick note - you can buy insulation with plasterboard attached, and then put the whole lot underneath your joists, but this wouldn't work for us as it would reduce the headroom in the cellar too much.
When the time does come to do the plasterboarding, we'll need to install a number of air bricks that will sit on the main external wall within the cavity between the insulation and the plasterboard. The room currently has air bricks but they're much lower down the wall and won't be any use for maintaining air flow around the joists once the plasterboard's up. Instead of knocking out bricks and installing air bricks, we're contemplating the possibility of drilling holes through the brick (at an angle, to prevent rain getting in) and then covering the hole inside with some kind of mesh (to prevent insects and bugs from getting in). So far I haven't come across anyone on the internet who says you can't do this (even the dudes on DIYnot seemed amenable to the idea when an OP suggested it), so if anyone reading thinks it's a terrible idea then by all means speak up now :-)

Take another break and ponder what on earth is Enrique, the world's largest and fluffiest Jack Russell, crossed with?
We have joists running in both directions (the main ones run in one direction, but there are some additional ones running in the opposite direction - some to support the weight of the hearthstone in the living room above; others down the middle of the room). Therefore, in order to maintain air flow underneath and around all of them, we're going to attach the plasterboard to the joists with small wooden spacers in between. If we didn't do this,the air flow from the air bricks would get blocked by the joists running the opposite direction, and we'd also have to install or drill air bricks between every single joist. We have lots of joists located quite close together so we'd need a lot of air bricks (14 in total for a 6m long space), certainly more than required by building regulations, and I think it would be more of a chore to install extra air bricks than to use spacers between the plasterboard and the joists (in addition to being overly draughty).
As I mentioned above, we've found a lot of wiring inside the plaster and lath ceiling. Andre's going to tidy everything up and remove any unnecessary old wires (we've found a few that have been disconnected and are no longer in use but have been left dangling inside the floor cavity). The remaining wires will be grouped neatly and will ultimately run in the cavity between the insulation and the plasterboard.
So there you have it - our plan to insulate our Victorian cellar ceiling and ground floor floorboards. Any comments, suggestions, or thoughts on potential uses for a unusually large rectangular piece of Victorian stone, please let me know...