How To Sew A Bean Bag With Handmade Piping
In between layering the last few coats of oil on the stairs, ripping down the plaster and lath ceiling in the cellar, and single-handedly carrying a six foot stack of enormous Celotex insulation boards into the house BALANCED ON MY FREAKING HEAD because the delivery guy left them on the driveway in the rain, I managed to sew a bean bag for Natalia.


I made bean bags for Eva about 18 months ago using the same technique
, but at the time I just posted photos of the final product rather than a tutorial because it was reasonably easy and I figured I wouldn't need a reminder of how I did it when I came to sew more.
But then Natalia arrived and declined to sleep in her comfortable moses basket or her comfortable cot, preferring instead to snooze purely on a parental being, and I lost over 1000 hours of sleep in the first year of her life which apparently killed off the brain cells that were storing the bean bag how-to information, because when faced with the leftover fabric from her curtains and her chair I could vaguely remember that I had to sew the former to the latter but beyond that I was fairly clueless. So, future self, in the event of any future bean-bag making requirements following short-term memory loss, this tutorial's for you.
When I made Eva's bean bags I bought flanged cord (also known as inset cord, or piping) to sew the pieces together. This time round I decided to make my own. I think there's sometimes a bit of a misconception that the purpose of DIY is to save money - and while this is certainly true in many cases, in others (including this instance), it's more about the enjoyment of learning a new skill and creating something completely custom that can't be bought in the shops. By the time I'd bought the 5mm plain cord, a couple of metres of silky blue material, and the matching thread, I'd probably spent about the same per metre as I did buying the ready-made cord I used for Eva's bean bags. Making the cord also took four hours of my life that I'm not getting back, but it's good to know how to do it for future upholstery projects where I may wish to use the same fabric to both upholster a sofa and make the piping, for example.
To make the flanged cord, I first of all made sixteen metres of bias tape. You need to make bias tape (cut diagonally against the grain of the fabric) as opposed to straight-cut tape as it makes the piping more flexible and able to bend round corners. You can, of course, cut dozens of diagonal strips of fabric and sew one to the other, over and over again - or you can follow this fantastic tutorial for making continuous bias tape.
A few additional notes on the tutorial:
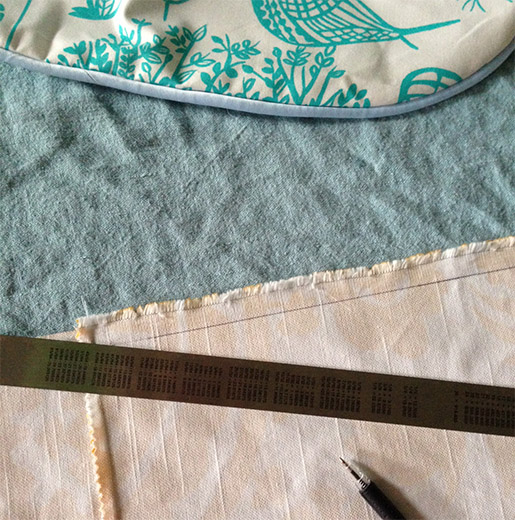
You need to draw your lines on the reverse side of the fabric.
To calculate the required width of bias tape, multiply the diameter of your cord by 3.14 to calculate the circumference. Then add the required width of the hem/edge, multiplied by 2. For my 5mm cord with a 1.5cm hem, I calculated that I needed 4.6cm wide strips, so I used 5cm to make it easier to measure.
My advice would be to draw your diagonal lines as precisely as possible. If they end up with slightly uneven widths it's still manageable - but you'll have to improvise slightly when you come to cut your continuous bias strip, and more problematically, you'll end up (as I did!) with piping that has an unevenly sized hem, which makes it harder to sew onto things.
So my fabric started off like this:
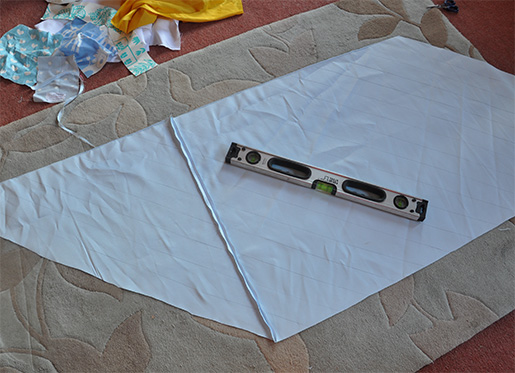
And then looked like this:

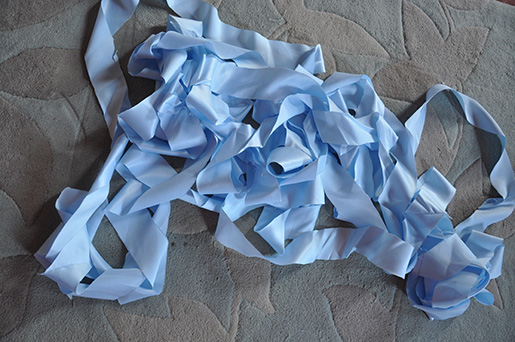
And once I'd cut it, which felt like it took forever, it looked like this:
Next, I had to turn the continuous bias into piping. This step wasn't difficult - I just folded the cord in between the fabric strip, matched the edges together, and used my sewing machine to sew as close to the cord as I could, sandwiching it inside the fabric - but it took around two hours to sew 16 metres, mostly because I could only sew a short stretch of fabric before I had to reposition the cord to make sure it was pushed firmly into the middle of the fabric.
Here's the finished product - and also the cautionary tale of introducing non-machine washable rugs with pale colours into a house packed full of children and dogs. As in, don't do it. The rug is not looking pretty. Washable rugs and wooden floors all the way for us from now onwards.

Bean bag sewing time! I used this tutorial with the following notes.
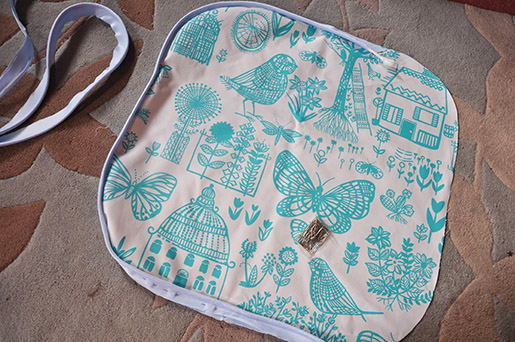
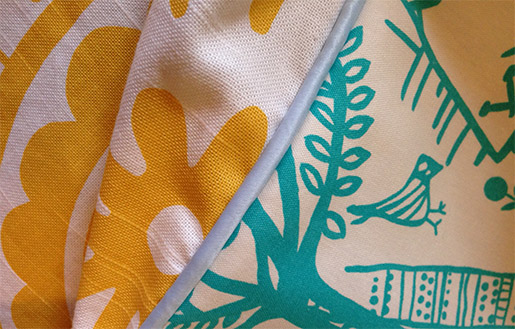
I used a paper template to draw two 60cm wide squares with rounded corners from the same turquoise fabric as Natalia's curtains. This made the two seat pad pieces. Then, I carefully cut round them, adding a 1.5cm hem (the same width as my piping hem). I pinned the piping all the way round onto the printed side of the fabric (not on the reverse), aligning the edge of the piping hem with the edge of the seat pad fabric.
To join the two ends, I folded them across each other using as close to a right angle on each one as I could manage.
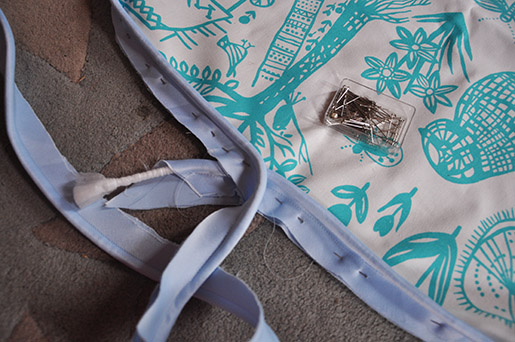
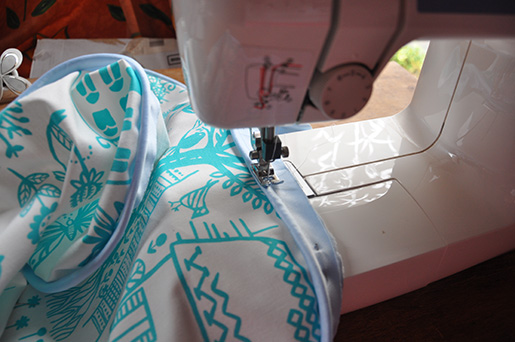
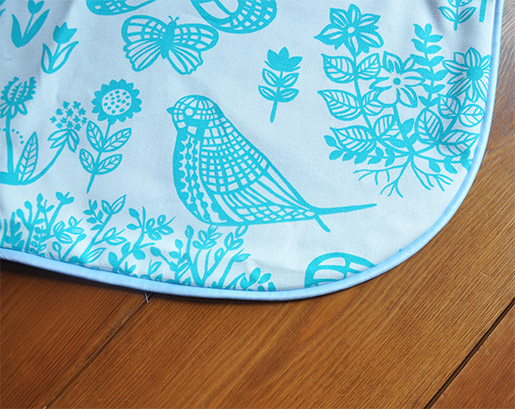
Then, I sewed the piping onto the first seat pad, following the same line that I used to stitch the cord inside the piping (in some cases, where I hadn't quite sandwiched the cord tightly enough inside the continuous bias strip, I sewed inside the line to rectify this).
Ta da!
Next, I cut the side piece. I didn't have enough material leftover from upholstering Natalia's chair to get the width that I needed in one continuous piece, so instead I cut six shorter pieces that were the right width and sewed them together. Even though the suzani print didn't match up from one piece to another, it's a busy enough pattern that you don't even notice the join. I ended up with a 2.5m long piece that was 28cm wide (25cm deep with a 1.5cm hem along each edge). This time, I marked the hem all the way along, top and bottom, with a pen. I also sewed a neat folded hem on either end.
I flipped my first piece of turquoise fabric over, and pinned the yellow fabric all the way round, starting in the middle of one side (where I wanted the opening to be for inserting the removable hollowfibre filling), and making sure that my pen line matched up to the line I created on the other side when I sewed the piping to the turquoise fabric. If your piping has an evenly sized hem (which mine didn't), this is a simple task of matching up the edges.

I made sure to leave at least a 20cm overlap with the yellow fabric, pinning it over the top.

Here's the clever part - you sew the (yellow) side piece onto (turquoise) seat pad from the seat pad side, by following the line you just created when you sewed the piping to the seat pad, even though it feels like you're sewing blind because you can't actually see what you're sewing.

But look! It works perfectly :-)
Repeat the steps above to sew the side piece onto the other seat pad.
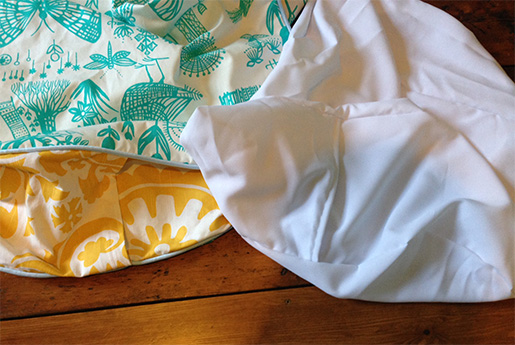
Then, because I need to be able to wash the bean bag covers, I made a simple fabric liner using the same measurements as the beanbag, to contain the hollowfibre filling.
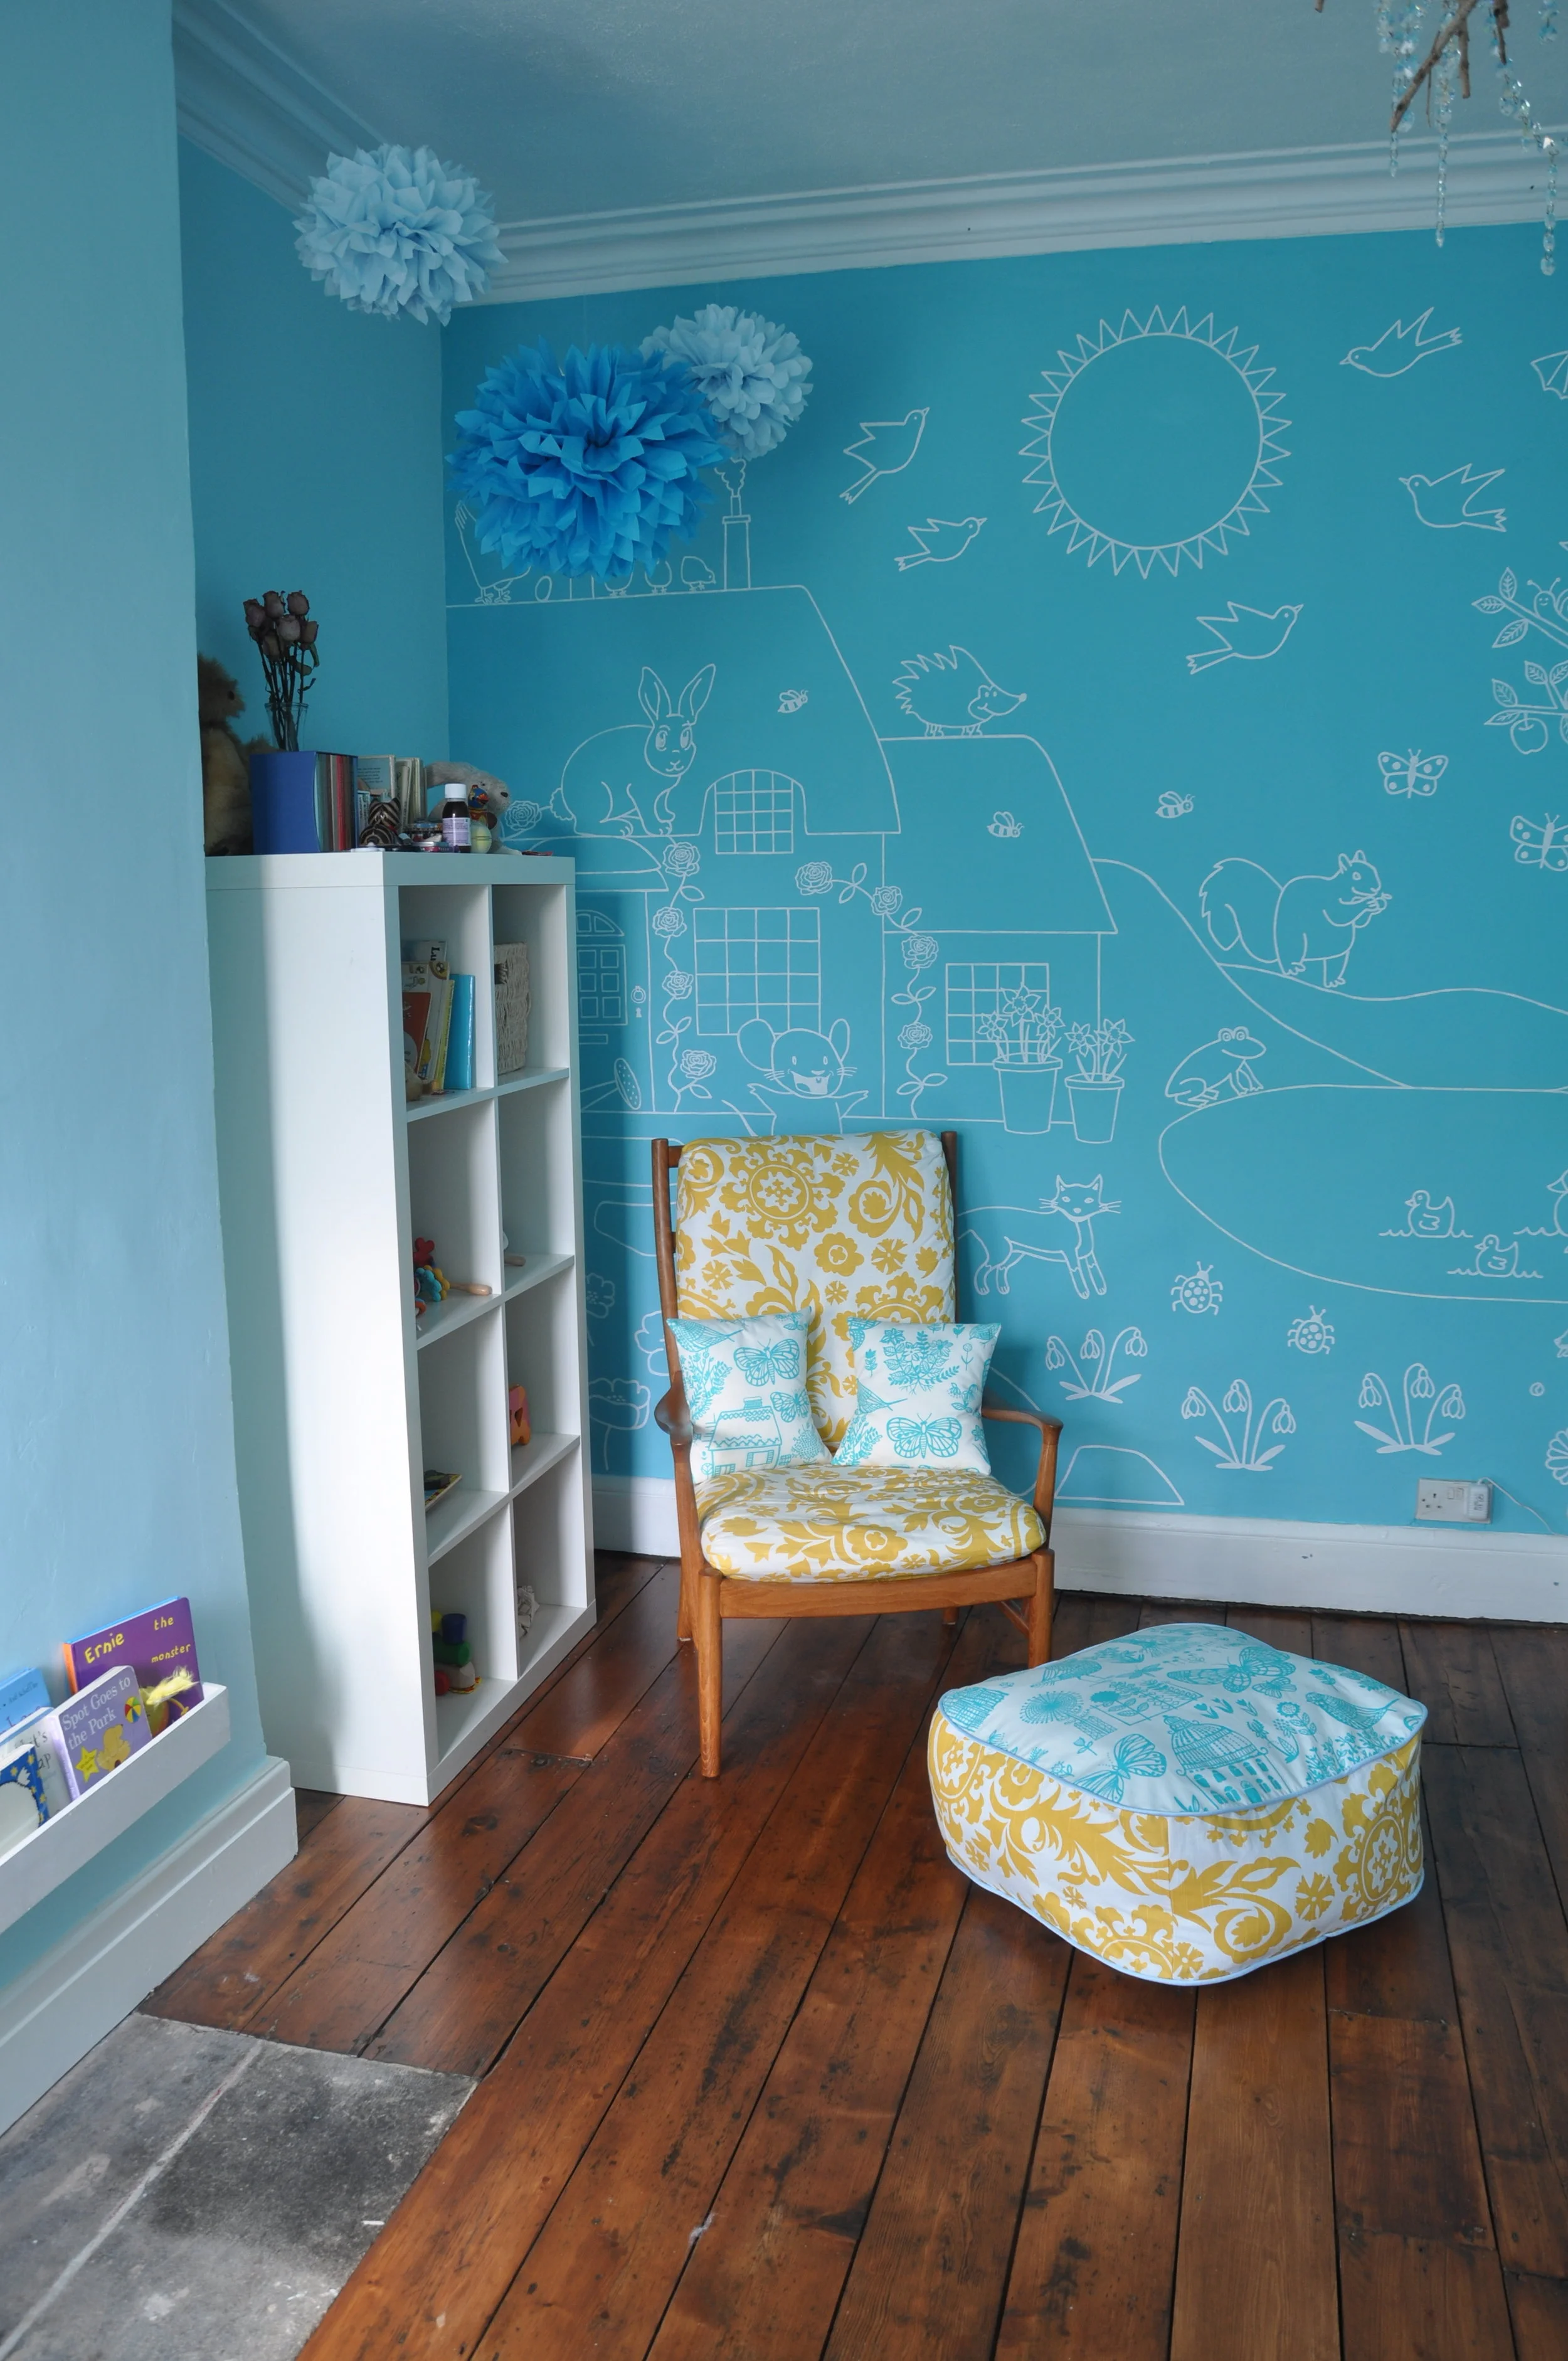
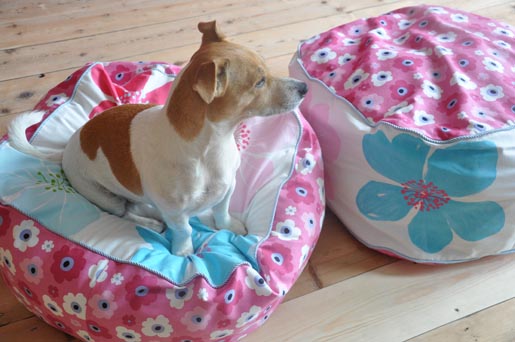
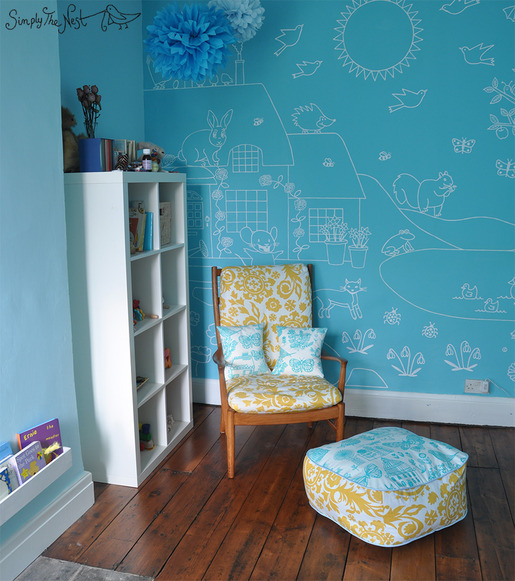
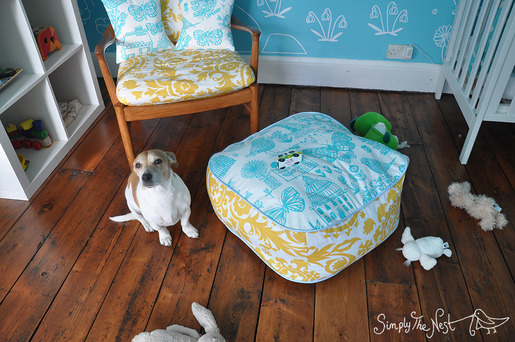
The final product - I love, love, love the turquoise, yellow and pale blue fabrics together.
And the same scene three seconds later, once the girls and the dogs got into the action:
I have one more bean bag to make, this time using the turquoise fabric on the side pieces and some new blue and white floral fabric that has taken me over a year to choose - hopefully it will not take me over a year to make it...!