Our Staircases - Before And After (Yes, They're Finished!)

When you're renovating with small children around, the timing of certain (usually dusty) projects is dependent upon the availability of childcare. We usually get all our renovation work done on weekends by tag-teaming the DIY projects and the daughter-wrangling responsibilities between us.
So when a very kind friend ACTUALLY OFFERED TO HAVE BOTH GIRLS FOR A COUPLE OF HOURS (this is ridiculously exciting for us because it happens so very rarely, in fact it's only ever happened once since Natalia was born - we left the girls with a couple of other very kind friends, ran to the Met, got drunk, ate cake and ran back again to collect them) - well, we jumped on the opportunity like pigeons on chips. Not to sample the Met's excellent cake selection this time, but to get those blooming stairs sanded once and for all.
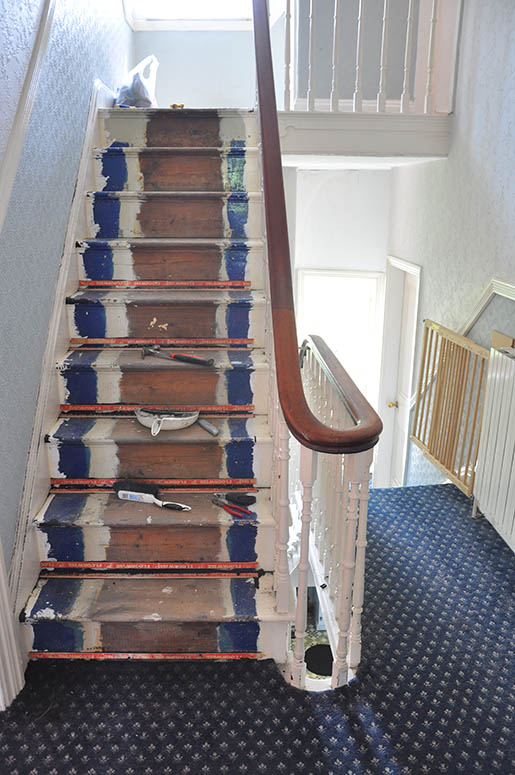
Here's the work in progress:
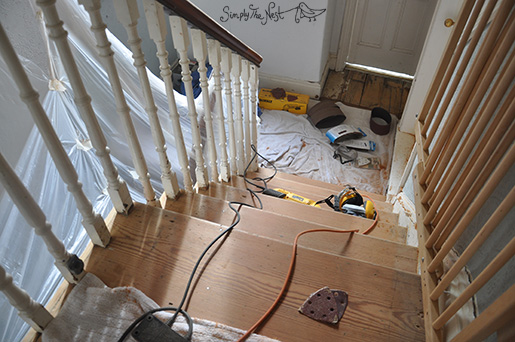
Once the sanding was finished (it took the whole day), it was time to oil. This was a very slow progress (what a shocker!) as the stairs and risers required at least three coats of tinted Osmo Polyx oil to hide the strange cannot-be-sanded-scraped-or-scrubbed-off runner shadow, followed by two coats of clear satin-matt oil. And because we needed to be able to get up and down the stairs in the meantime, I had to oil every other stair so we could still walk on the alternate ones, meaning the whole process took twice as long again.
Totally worth it though. Would you like to see? Come on in...
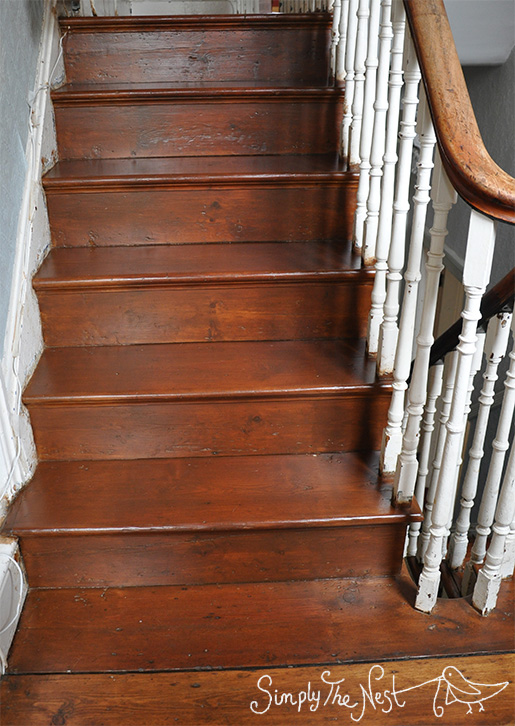
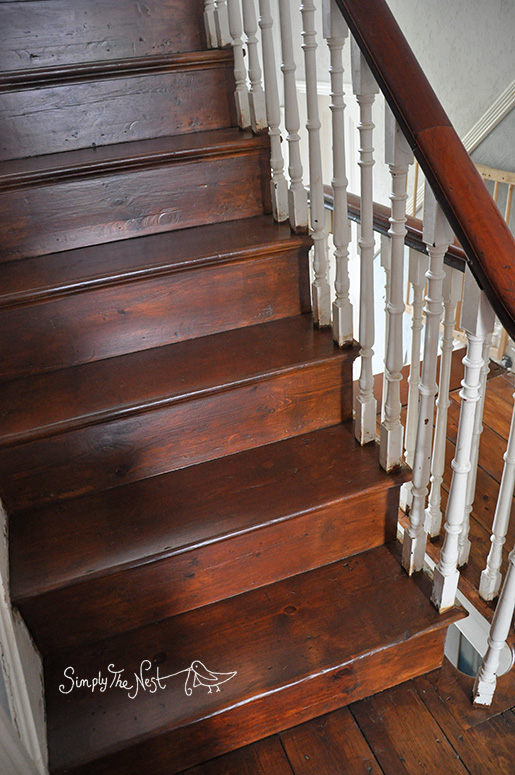
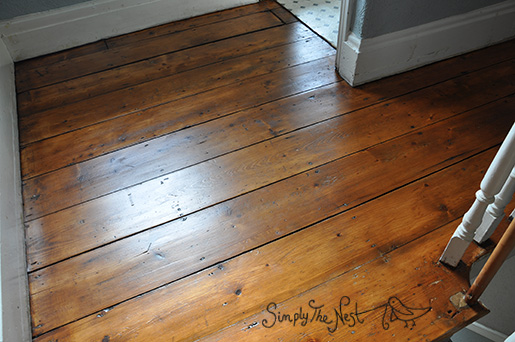
Here's the main staircase from the hall to the first landing.
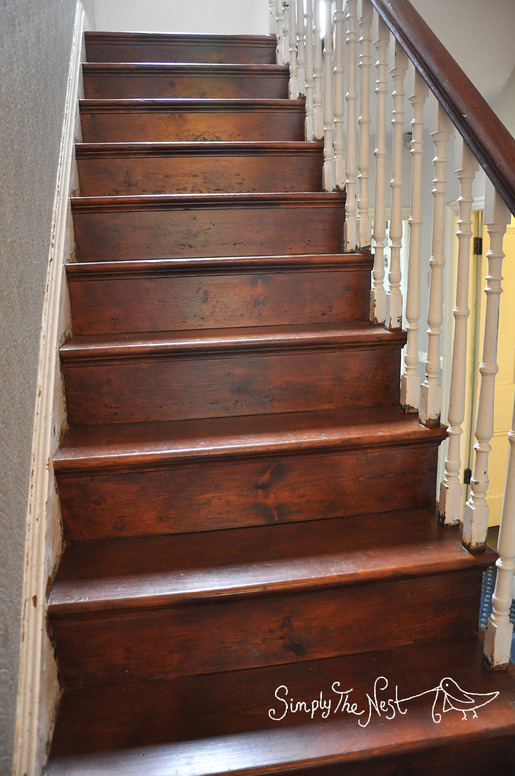
Doesn't the wood just glow?
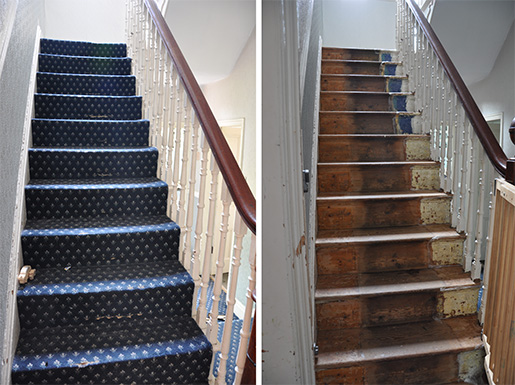
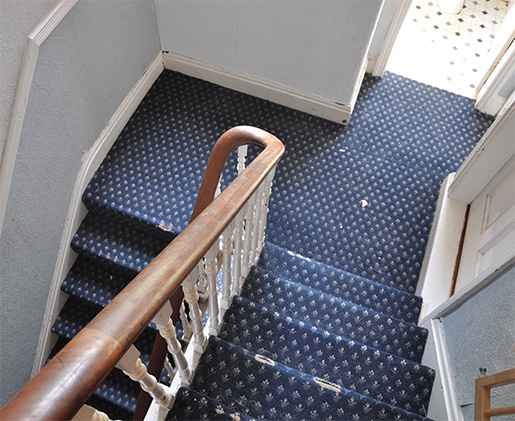
And here's how it used to look - aargh!
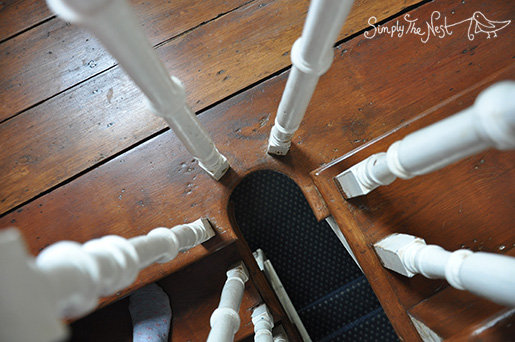
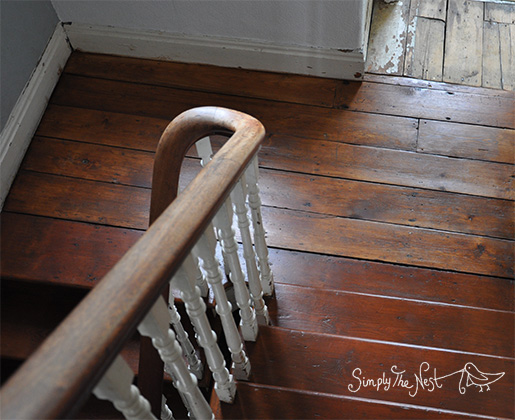
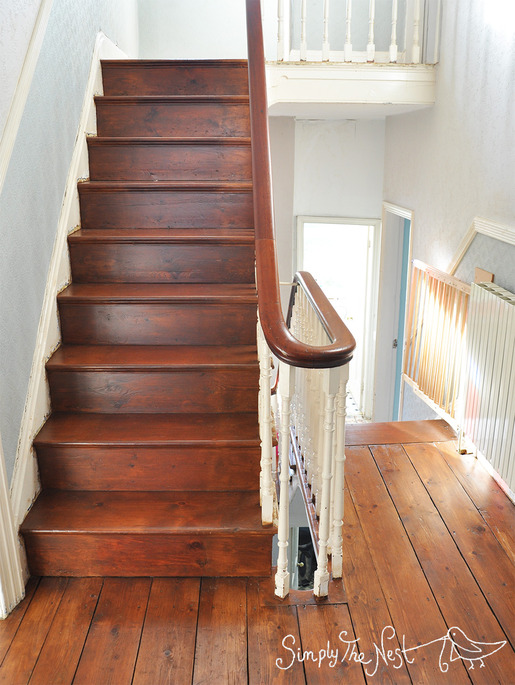
Let's go up the stairs to the first landing and take a look at my favourite part of the entire staircase renovation - the beautiful curved wood around the stairwell.
A quick peek through our stained glass window (although please don't look too closely at the terrible state of the wood):
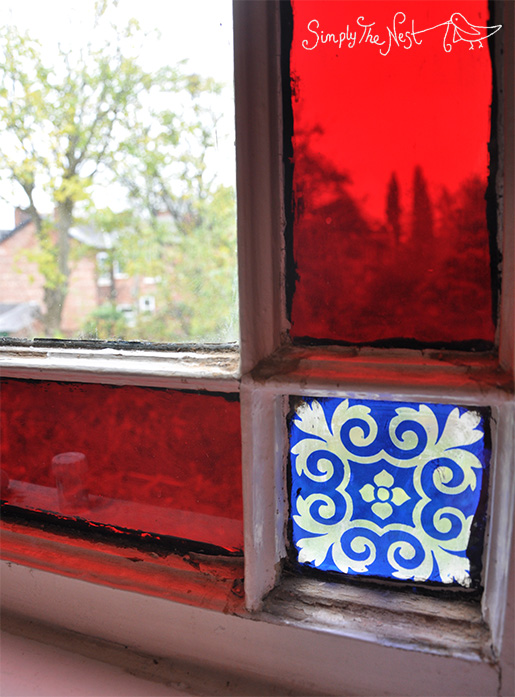
And then up the second flight of stairs, up to our bedroom and Eva's bedroom. This photograph gives the best indication of the true colour of the oiled wood, as it has lovely natural light from the south-facing stained glass window we just saw.
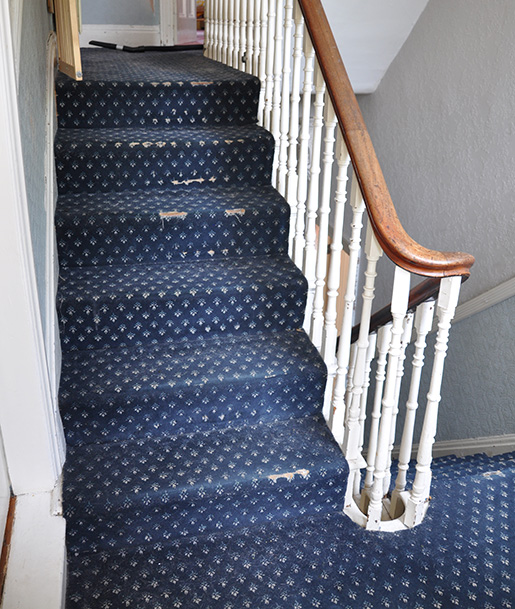
And here's how it used to look. I can't believe we lived with those dreadful carpets for so long.
Let's head up the stairs, and then turn round and look back down to the first landing:
And how it looked before:
Finally, here's the top staircase, up to the turquoise bathroom and the guest bedroom. I had to take the photo from a slightly different angle to the before picture in order to get the best light as it's quite gloomy today, and the landing light helpfully stopped working a couple of days ago when we replaced the fuse box in the cellar.
And how it used to look (mid-carpet removal).
UPDATE: We've had some lovely sunshine in the past few days so here's a new photo with the same angle as the original 'before.' Just a tad prettier than the lovely blue carpet and lead paint-encrusted stairs :-)
And here's the top landing:
And the view into the guest bedroom.

Isn't it pretty? Now, we just have to sand, prime and paint a mere seventy-one spindles, sand, prime and paint about fifteen metres of skirting board, and sand and oil a similar length of bannister. Oh, and the newel post, too. And then we'll be DONE! And I'll share a full project time (at least 300 hours so far...) and cost breakdown. In about twenty years. Ideally, of course, we'd have sanded the woodwork at the same time that we sanded the staircases, but with the kids to take care of, the only practical option is to break our projects down into smaller phases.
You can see more before pictures of the stairs here, and read about how we removed the lead paint here.