How To Design A Child's Mural

Eva's pink paradise of a bedroom (and mural) was one of the nine finalists in the Home Love competition! And the overall winner drawn out of the hat was Hannah from Away With The Fairies - you can see her lovely vintage-inspired bedroom here.
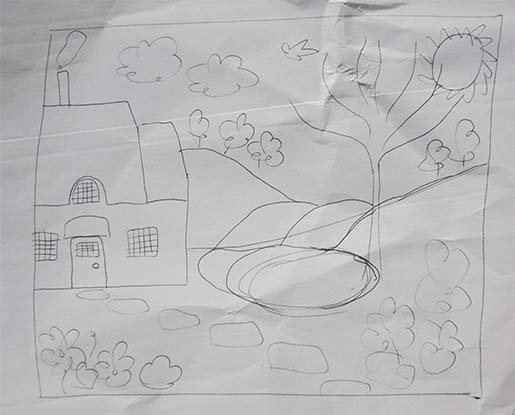
I'm happy to say that I've *finally* started on Natalia's 'English country garden' themed mural. I've had the design in my head for months now so it's immensely satisfying to get the first brush strokes up there on the wall. To get to this stage, I followed the same steps that I took with Eva's mural. First of all, I drew a very (very!) rough sketch of the design showing the main features - a cottage, a pond and a tree. I also made a list of everything I wanted to include, from watering cans and plant pots to ladybirds, foxes and owls.
I then switched from paper and pen to the tinternet (not least because any paper that gets left lying around is pounced upon and cut into tiny pieces by Eva, who has just learned to use a pair of scissors and is highly delighted with herself). Using Google Images, I downloaded simple line drawings of all the different elements.
Finding the right images took a little effort - for example, to find a suitable hedgehog I had to search for "pencil drawing hedgehog", "simple drawing hedgehog", "kids drawing hedgehog", "child pencil sketch hedgehog", "cute drawing hedgehog", "hedgehog drawing -sonic" and so on. Google Images also has an option to search for line drawings only.
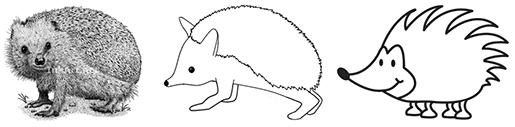
The following images are all returned by the search term "hedgehog line drawing" - the one on the left is far too detailed, the middle one is nice and simple but isn't cute enough! And the one on the right is perfect :-)
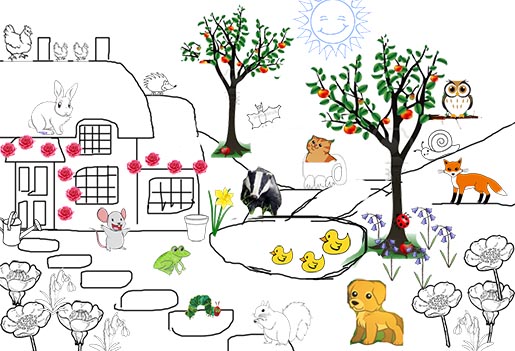
Next, I measured the wall and created a new blank image in PhotoShop with the same measurements (scaled to a manageable size). One by one, I added all the different elements, each with their own layer. In most cases I had to erase the background of the individual image with the magic and background eraser tools so I could layer it on top of the others without obsuring the ones at the back. I also used the brush tool to add some rough lines for the cottage (I searched and searched but could not find a suitable line drawing of a cottage so had to use a photograph instead), pond and hills.
Here's the finished design. My aim at this stage is just to work out roughly what to put where - chickens on the roof, bluebells at the foot of the tree, and so on. I find it easier to add the detail straight onto the wall without drawing it all out precisely in advance.
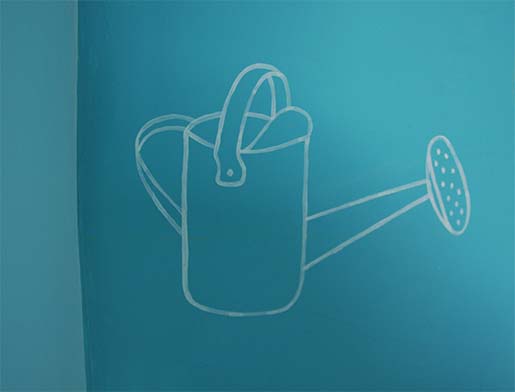
I printed off the design, drew grid lines onto it, and then replicated them in chalk on the wall. And finally, working from the main design to get the right location and a larger image of the item itself, I painted on the first element - the watering can on the left.
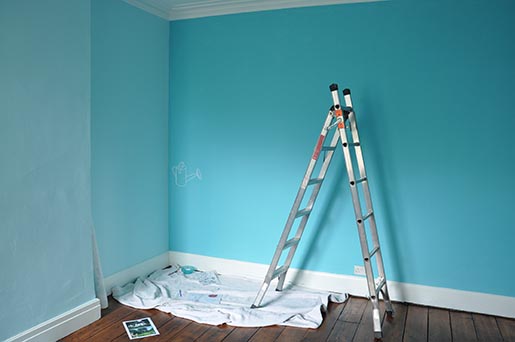

The paint is going on with quite a chalky finish so I'm to have to go over it a couple of times to get the right contrast.
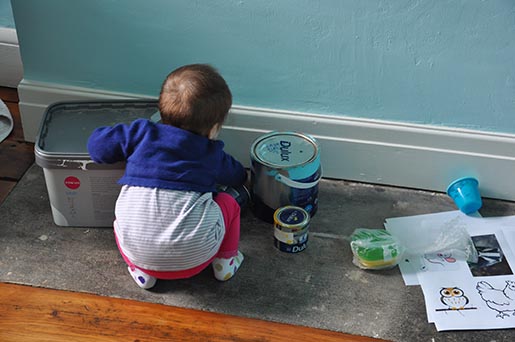
Natalia woke up from her nap just in time to supervise progress. Apparently the paint I'm using met to her satisfaction.
I hope you enjoyed this little behind the scenes peek at how things get started around here. And now it's time for beef stew, homemade limoncello (well, why not!) and Netflix. See you again soon!