How to Make Kitchen Worktops from Scaffold Boards

I get asked about our DIY scaffold board kitchen worktops a lot so thought I'd share a post about how we made them.
Years ago when I was collecting images of kitchen inspiration, this was one of my favourites. I loved the chunky old reclaimed wood and was determined to have something similar when we eventually got round to installing our dream kitchen.
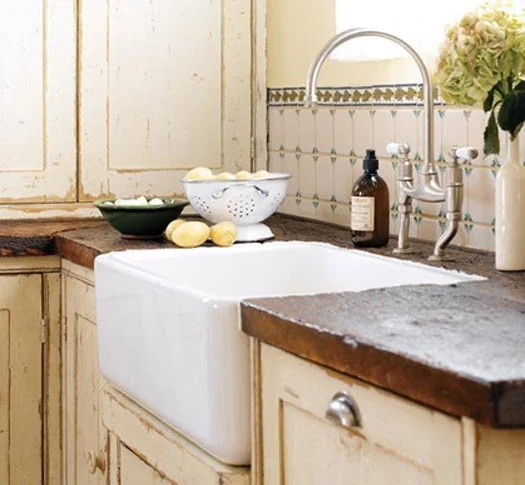
Turns out reclaimed kitchen worktops are hard to buy off the shelf, probably because old battered wood isn't necessarily that practical a work surface as flour dust and so on and so forth gets stuck into the tiny crevices of the wood. So we decided to make our own.
I could have bought big old chunky timber beams or butcher block and used those, but having measured the distance of cabinet legs plus cabinet height plus precisely seven tiles plus grout lines (I hate random 1cm slivers of tiles) plus three evenly spaced shelves with enough space to hold my carefully measured jugs and vases, I knew I couldn't fit in a worktop any taller than 4cm. So scaffold boards it was.

We bought ours from Cheshire Scaffolding. From my research, there appear to be three main types of board: new, new seconds, and used. New seconds seem to be the cheapest - these are brand new boards that don't quite meet the standard specification, sometimes because they're not quite deep or wide enough, or because they're bowed. We used this type of board to make the shelves in our reading room.
I knew I wanted something with a bit more character for the shelves and the worktops in the kitchen, so after much googling I tracked down a local firm that sold used boards. I guess it makes sense that they would be hard to come by, because if an old board is still fit for purpose (to be used as an actual scaffold board or for DIY) ie not cracked or bowed, then as a builder or scaffolder you'd just keep using them, wouldn't you? Anyway, Cheshire Scaffolding came through - I requested used boards that weren't damaged and they delivered a load to our hallway for a total cost of about £200. We left them there for a bit to dry out (although they didn't seem damp) and acclimatise to the house.

Sanded and fastened in place but not yet treated with worktop oil. I can see looking at this picture that the bottom edge looks a bit rough so this photo must have been taken before I did a final hand sand.
My advice on calculating amounts is to work out the design for your worktop first. Scaffold boards come in 3.6 metre lengths (among others), which means if you want a particular design of certain lengths, you'll have to work out how many 3.6 metre pieces you need, and whether any of the wasted pieces can be used elsewhere. For example, our big peninsula includes 5 pieces of 150cm long wood, meaning 3 x 3.6 metre pieces would be required in order that we could use entire 150cm pieces. I also knew we'd be dovetailing them in at the corners, and worked out how long each piece would be. The number of boards you ultimately need will likely be different when calculated this way compared with calculating square footage. Or just do it that way and then add a few extra boards, that's probably easier :-)
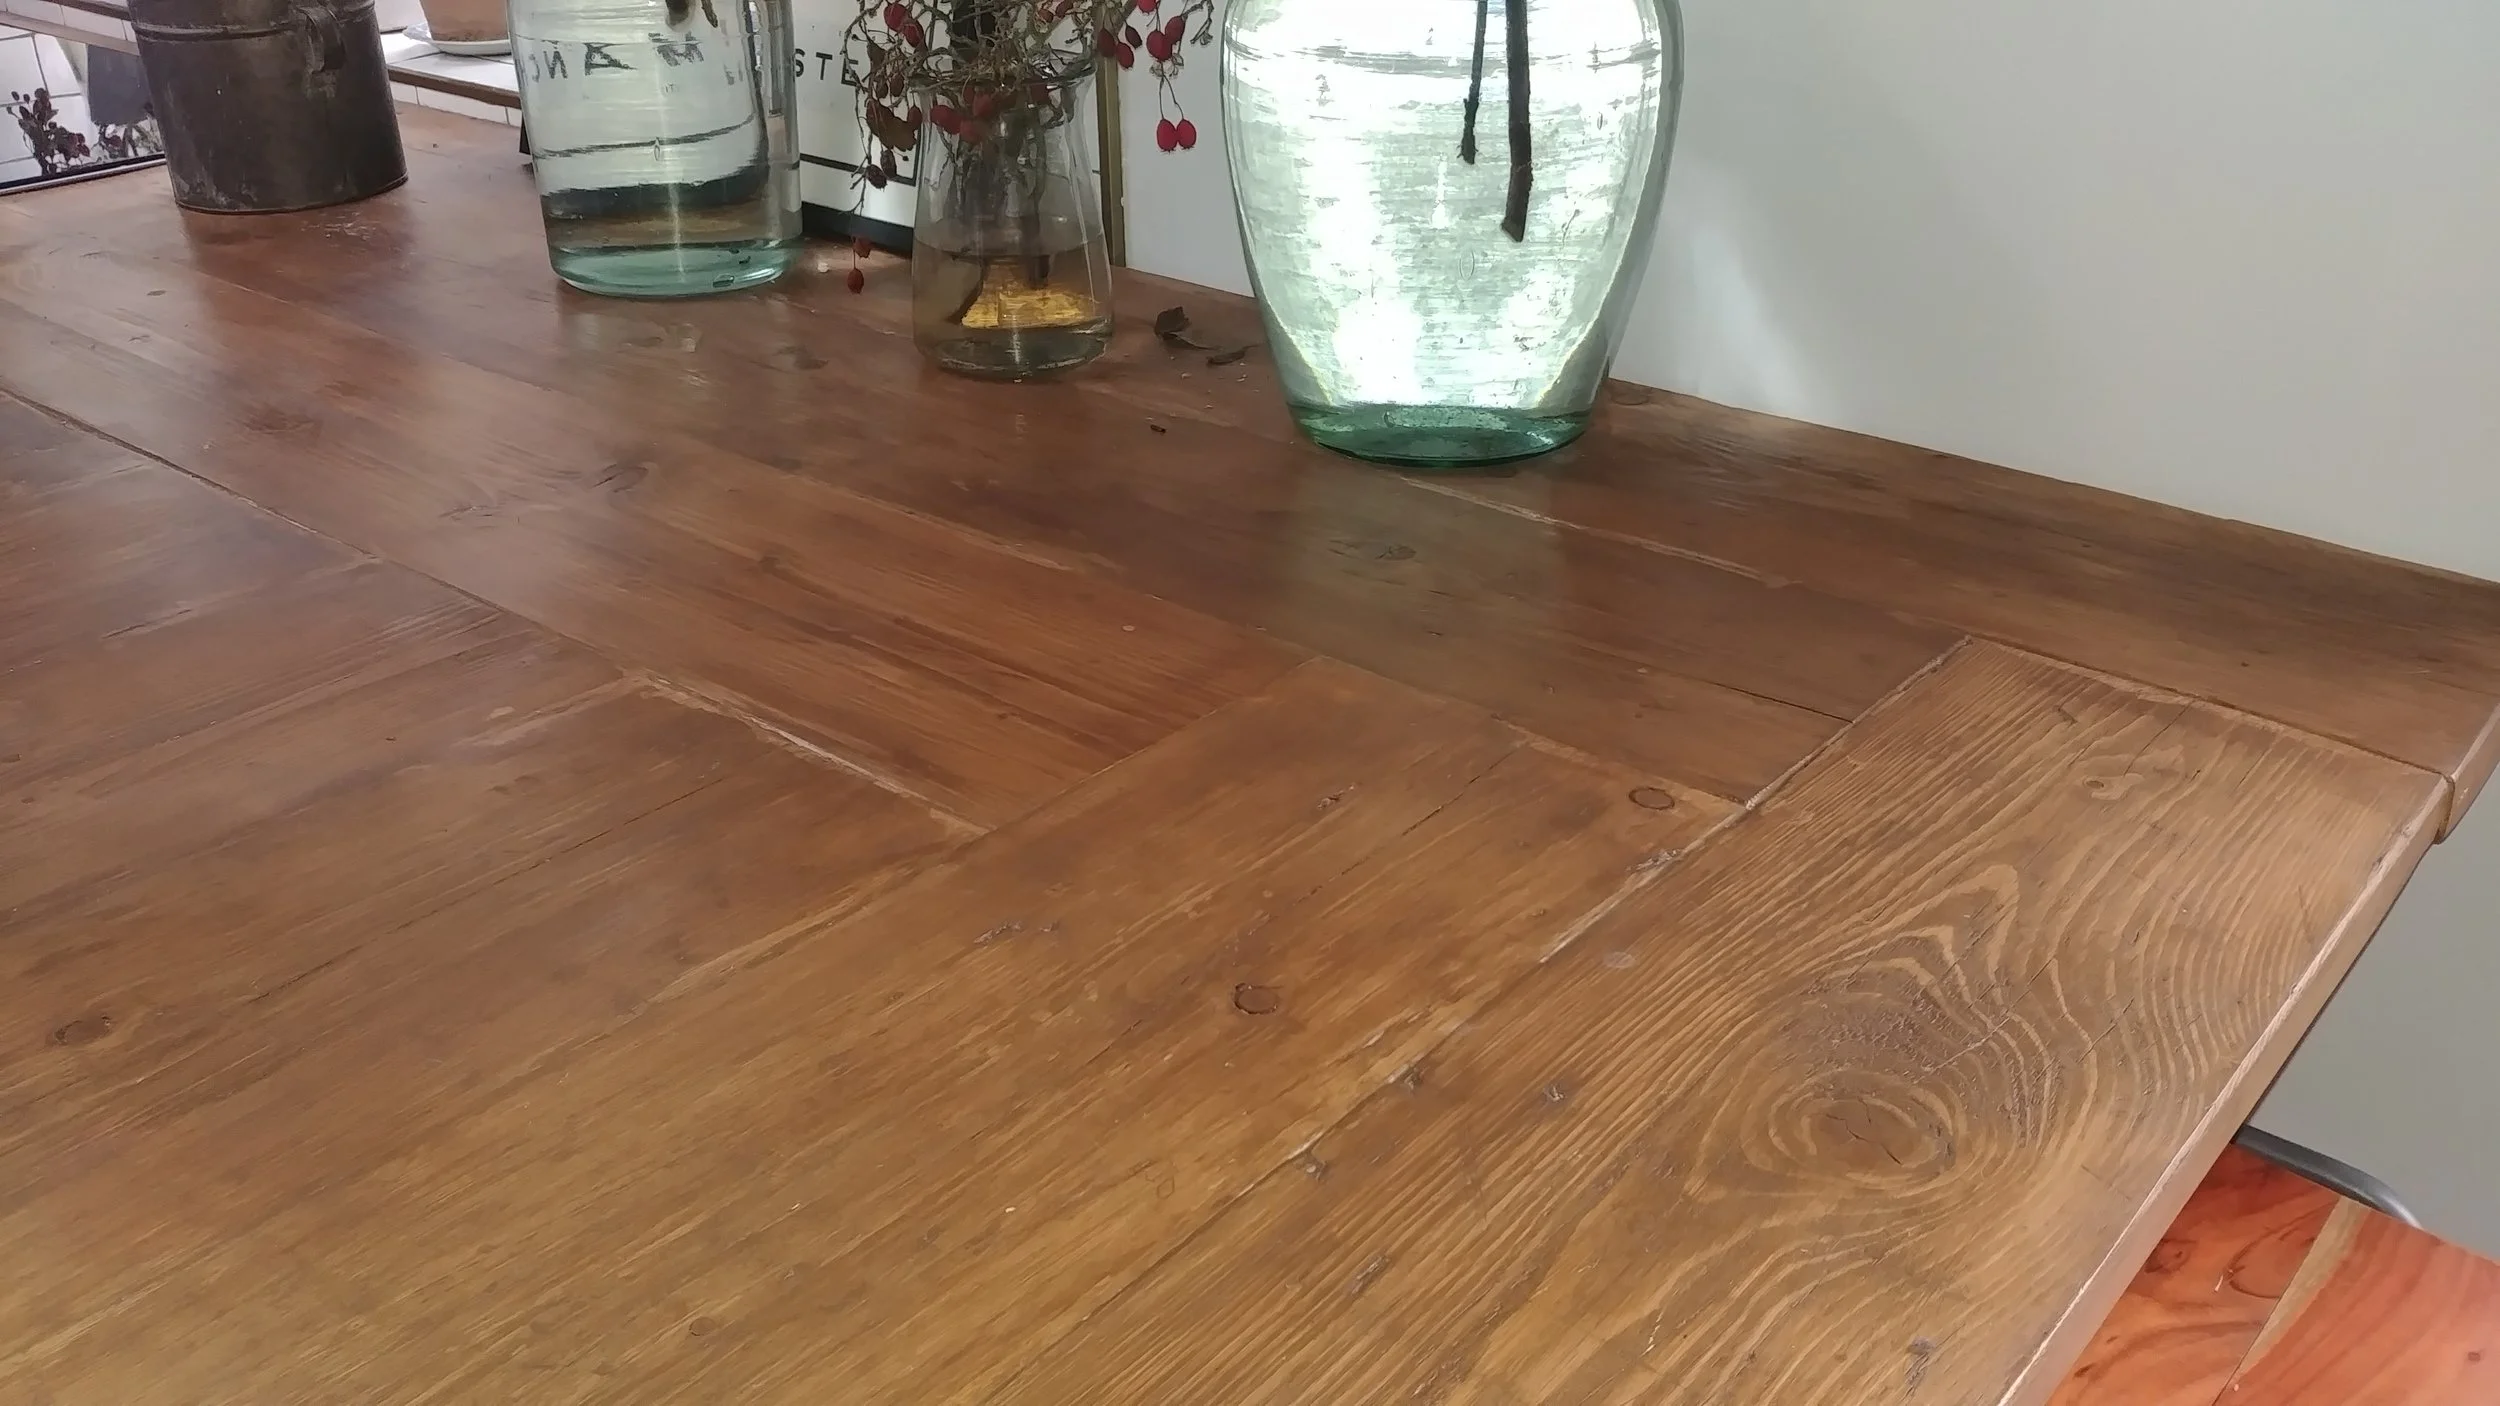
You can see the diagonal pattern we used to create the worktops on the large peninsula unit.
Something else that's worth considering with scaffold boards is the width of your boards, how deep you want your worktop to me, the design of the planks, and therefore the placement of your kitchen units. For example, we used three 22.5cm planks in a row to give a total depth of 67.5cm, which is deeper than the average worktop, so we pulled our units out accordingly. I deliberately wanted to use 3 boards rather than, for example, designing a 70cm deep worktop which would have necessitated an extra little strip of wood at the back. See, all the GCSE Maths does come in useful :-) And it's a decided benefit of creating your own worktops that you can make them as deep as you want to, rather than having to use standard sizes.
So what did we do? First we sanded each board on all four sides on 40 grit using our Makita belt sander. Then we cut the pieces to size and pocket holed them together underneath. This created pieces of worktop-sized wood. We then sanded across the top with more 40 grit to level out any uneven pieces. Then we did the same with 120 grit. We don't usually bother with an 80 or midway grit because our experience from sanding lots of things is that 40 takes the dirt off and 120 smoothes it out, and that's good enough.
We then bevelled the edges and corner with the belt sander, and finally gave the whole piece a sand by hand with 240 grit.

Close-up of the sanded, bevelled worktop edges.
Then we fastened the worktops to the cabinets using the Ikea fittings. Scaffold boards are pretty level but are not the perfectly straight pieces of wood that you would get if you were buying an oak worktop off the shelf. So I put pressure onto the wood to push it down into place while Andre screwed it in.

I designed the pattern so we had two shorter pieces running vertically against the main horizontal plank pattern on either side of the Belfast sink.
We then filled in the little gaps between the boards with wood glue, plus any holes in the wood. Once dry, we sanded again to remove any residue glue (which would prevent the oil from sticking). I then finished the worktops with one layer of Osmo worktop oil (what else!) in Acacia, followed 24 hours later by a coat of clear satin-matte.

The boards around the sink, now treated with oil.
And boom! Done. They're ace. For £200, they're really, really ace. You can put a hot pan onto them. You can chop directly onto them. They don't stain. Liquid bounces off them. You need to wipe up water splashes from around the sink to prevent rot, but that's true of any wooden worktop.

Now, scaffold board kitchen worktops aren't the most practical choice in some ways. They take a bit more cleaning because as I mentioned earlier, flour dust will get stuck in the tiny crevices in the natural grain of the wood (not the tiny gaps between the boards as we glued these) and needs to be scrubbed out with a brush. And they do not provide a completely even surface. We sanded ours until they were very nearly level as I wanted to retain some of the quirkiness, but they're definitely not level. So if this is important to you, then scaffold boards are not for you.

We used a couple of the more bowed boards on this little worktop on the left of the main kitchen, which we use as a coffee-making station. It doesn't matter that the boards aren't flat in this part of the worktop as it's only for occasional use. I also like the look of them :-)
But for £200? We're totally in love.
I hope this post has been helpful for anyone thinking of doing the same. Any questions, please let me know.