How to Build Raised Beds from Reclaimed Bricks
Some of the most evocative scents from my childhood are from my Grandma’s garden on the Tyneside coast. Fragrant sweetpeas, fruity marigolds, and the unmistakable spicy scent of tomato leaves mingling with paraffin in the greenhouse. We stayed there every summer, and picking the sweetpeas was my job - bunches and bunches of them in the most glorious pink, mauve and white shades. Back home in my parents’ garden in Yorkshire, I remember the potent scent of the deep red, orange and yellow roses that my Dad grew, and the warm scent of the rich soil from my own little patch of garden that I assiduously tended, complete with a little round mirror for a pond, and gravel edging. We were a National Trust family, and spent many happy weekends exploring the great local gardens - Harlow Carr, Newby Hall, and Harwick Hall. I loved the kitchen gardens in particular, wandering around the raised beds and neat privet hedges imagining myself to be a great lady of the manor (in reality, of course, I’d have been a scullery maid at best!). Growing things is in my blood, but since having children, the thought of having anything else to look after, even if just a few seeds or supermarket herbs on the kitchen windowsill, felt overwhelming.
When we knocked down the back of the house, I instructed the builders to keep all the old bricks, and stack them in the garden. We even kept the broken half and quarter bricks on the basis that they’d “come in useful for something” (the builders were sceptical of this latter point to say the least). My plan was to build raised beds with them - just a few courses of bricks high; enough to keep the plants in, and the dogs out. Should any bricks be leftover from this endeavour, we’ll use them to complete the high wall at the end of the garden, and build a few paths.
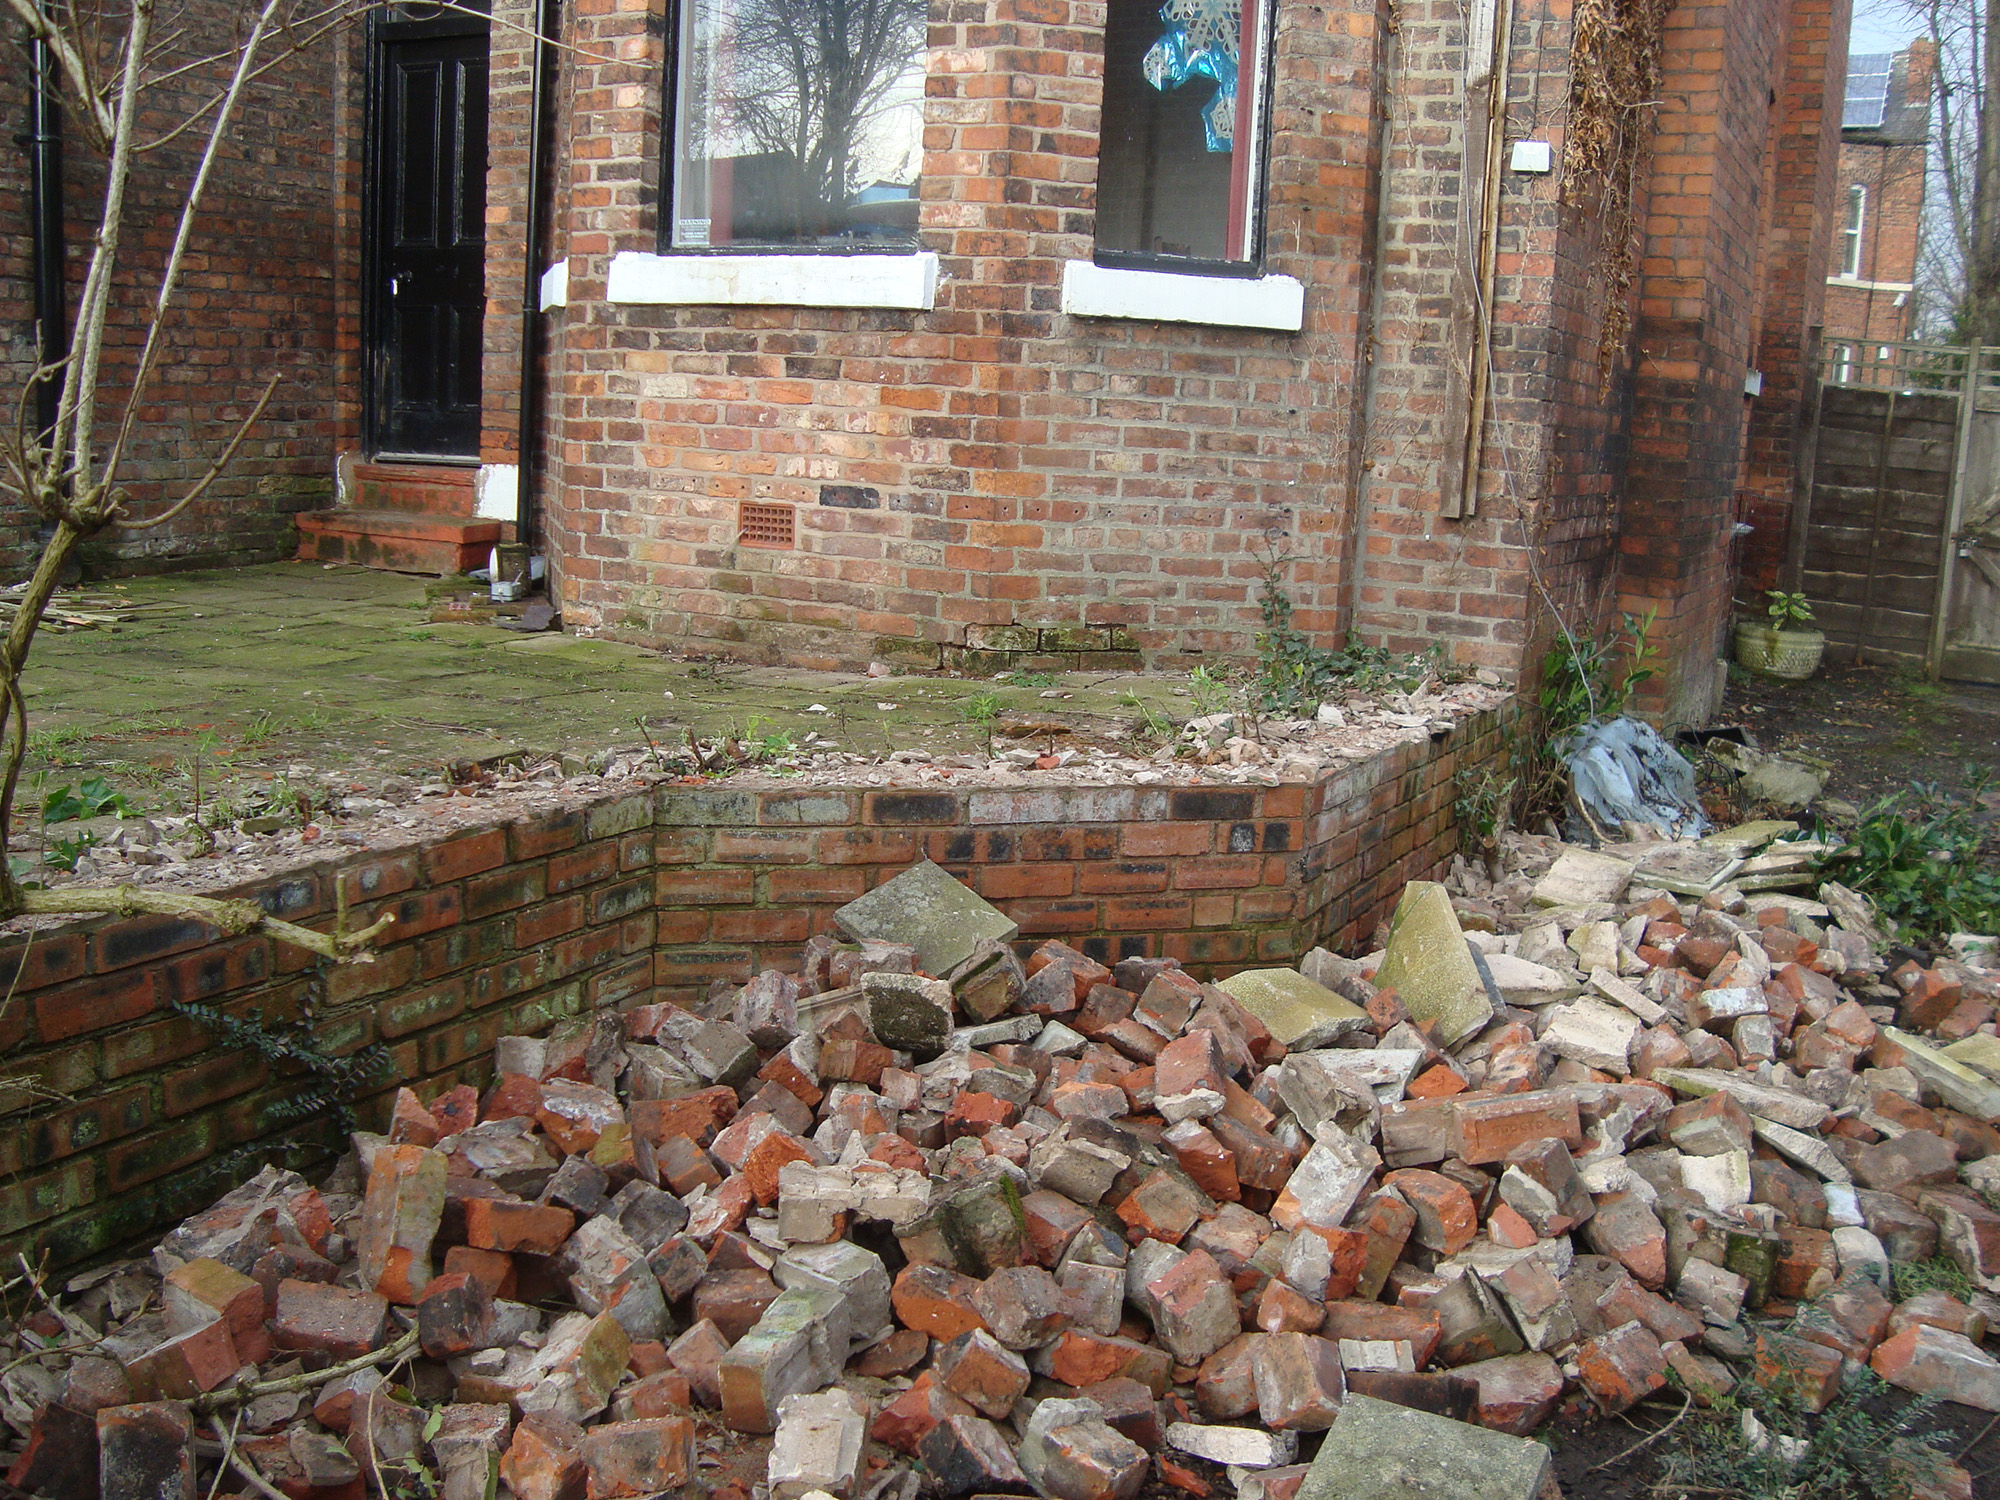
These bricks were from the old terrace wall.
Those bricks sat on pallets in our garden, hidden behind various unattractive shrubs, for over three years. During this time our third daughter didn’t sleep through for two years, I left one job and started a new one, we installed the new kitchen, decorated the entire ground floor (including sanding and oiling all the floors), renovated our family bathroom, stripped the wallpaper from the hallway and landings and painted the yellowing, chipped woodwork, and framed and hung dozens of treasured photos and pictures acquired over the years.

Man, that mutant laurel shrub is ugly.
Every time I stepped outside into the garden, I thought “I wish we had time to build those raised beds”. As I step outside into the garden at least a thousand times a year, the absence of raised beds was a fairly frequent recurring thought. One of the main tricks to DIY renovating with small children around is accepting that projects are guaranteed to take a loooooooong time to complete, and with some projects it may take years before you even get started. Feeling frustrated by this isn’t healthy or helpful. Instead, it’s better to focus on doing the best you can to accept the horrible wallpaper, or the tired old woodwork, or the ugly piles of bricks in the garden, and look forward to the day when your long-awaited project finally comes to fruition.
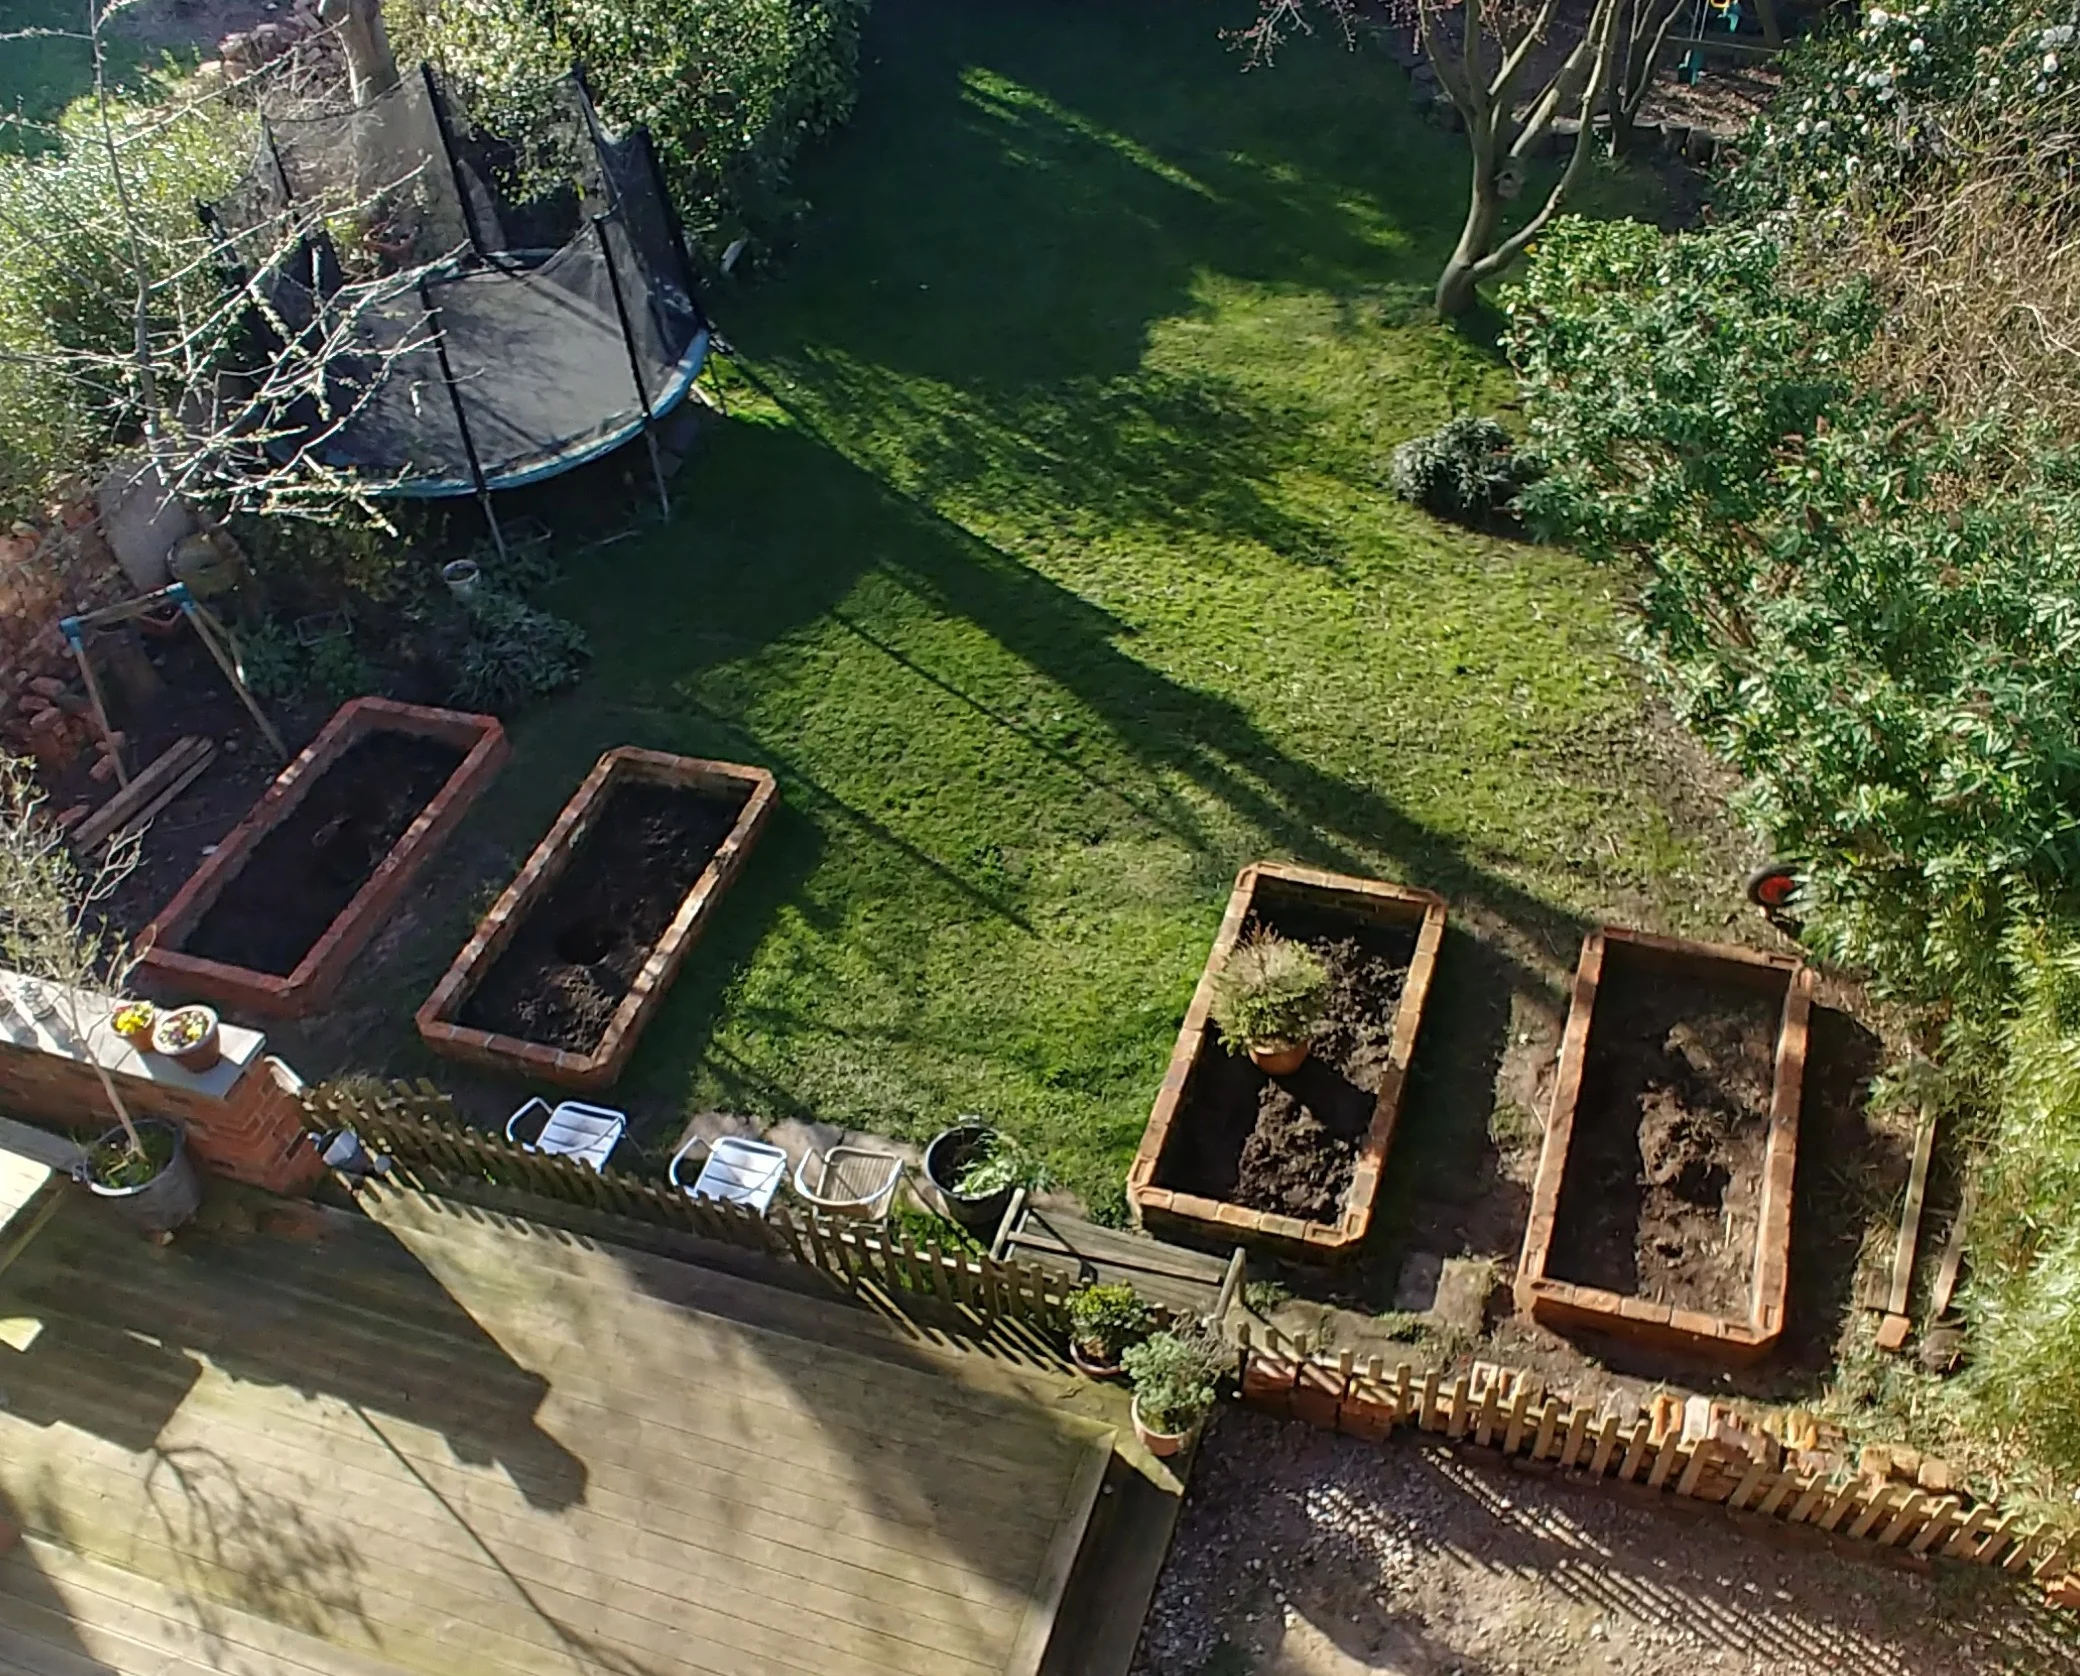
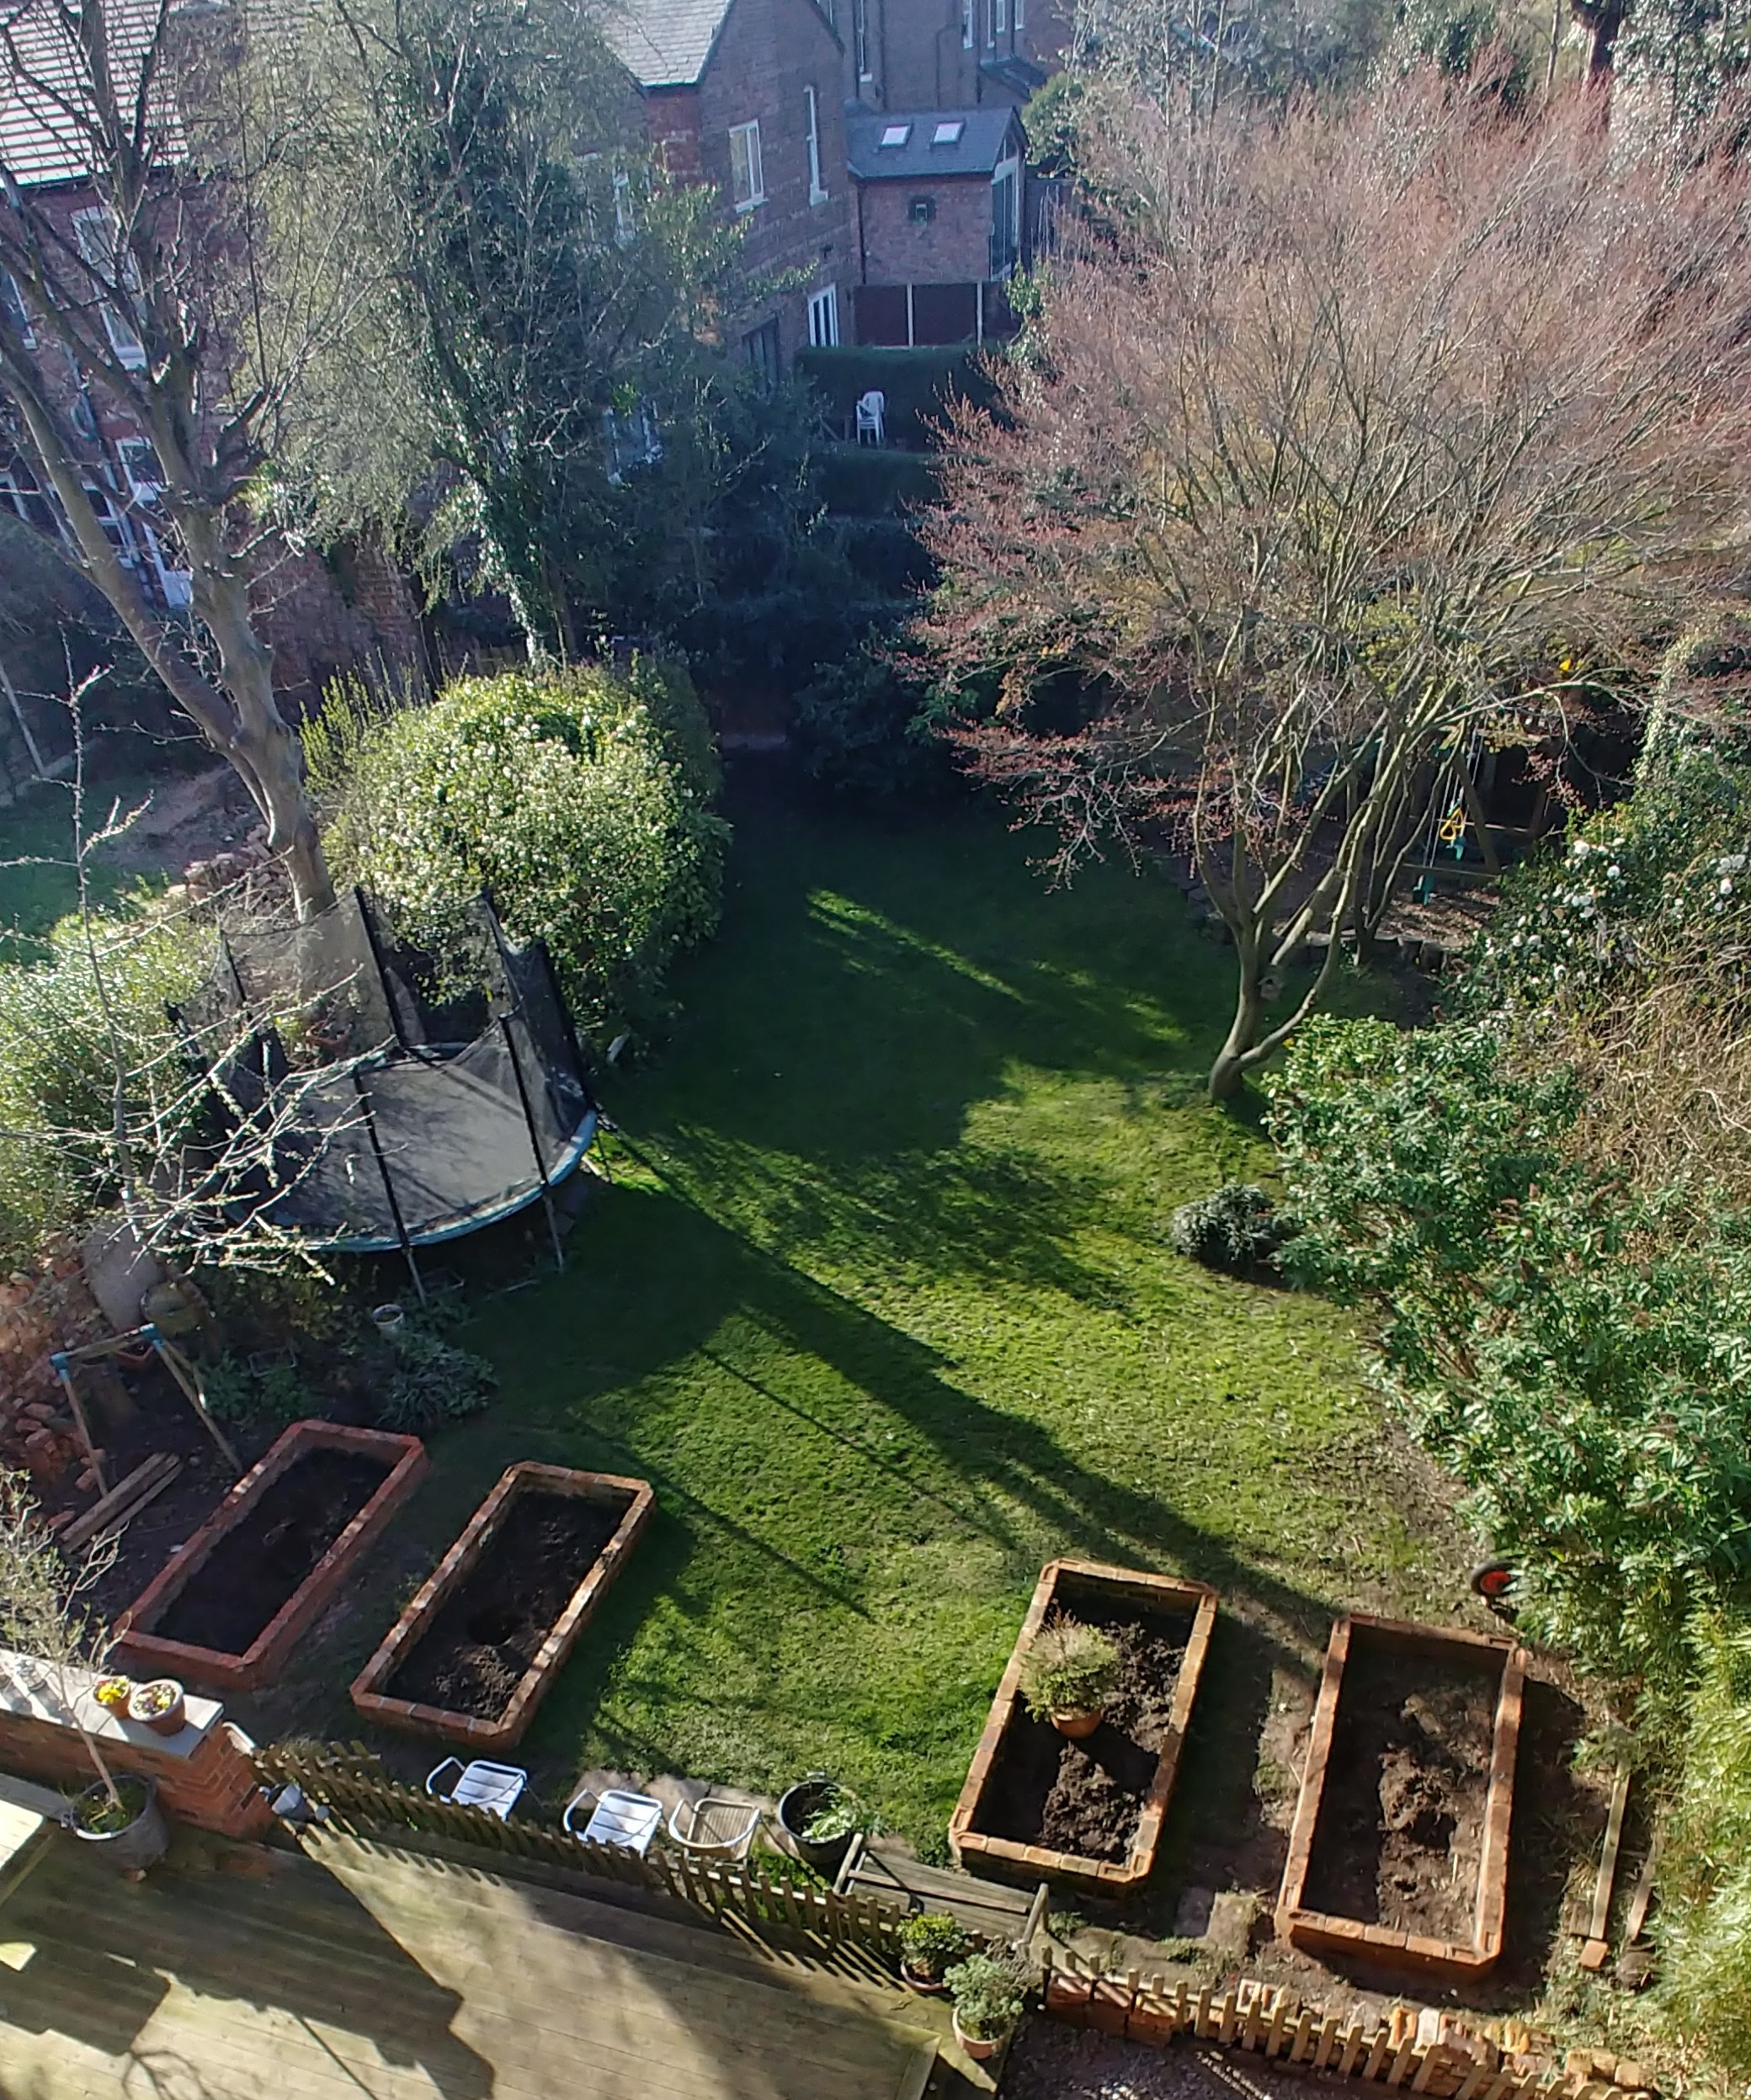
Four luscious and long-awaited raised beds.
Our theme for 2019 is ‘nurture’, which means growing plants, which means raised beds. With three unruly Jack Russells running around weeing on everything, the average plant doesn’t stand a chance in our garden. Raised beds offer some protection from those furry cocked legs (even lady Penny gets in on the act). I decided to install the beds immediately in front of the deck, an unconventional act borne from my desire to stroll outside, casually snip some mint for my mojito and some peonies for my vase, and then stroll back into the house without having to wade through the mud in the rest of the garden (our drainage isn’t great, so the slightest rainfall turns the ground into a swamp). I also wanted to incorporate the structure of the raised beds into a fence spanning the entire width of the garden (to keep the dogs and their golden packages off the lawn), and thought that a fence broken up by some bricks and ornamental wire would be less imposing than a giant swathe of pickets.
We’ve built four large beds in six months thus far, one last autumn and three this year, which by our standards constitutes lightning progress.
We used the pointed bricks from our old bay window to create little rounded off hexagonal corners on the beds.
There are plenty of professional guides out there for building raised beds out of bricks, so I’ll just share a quick overview of how we tackled ours, simply to show that a couple of total amateurs can produce some pretty sturdy results given a bit of time and elbow grease, rather than to provide comprehensive step-by-step instructions.
I laid out the design with bricks to work out what size beds I wanted, and what kind of space between each bed felt right.
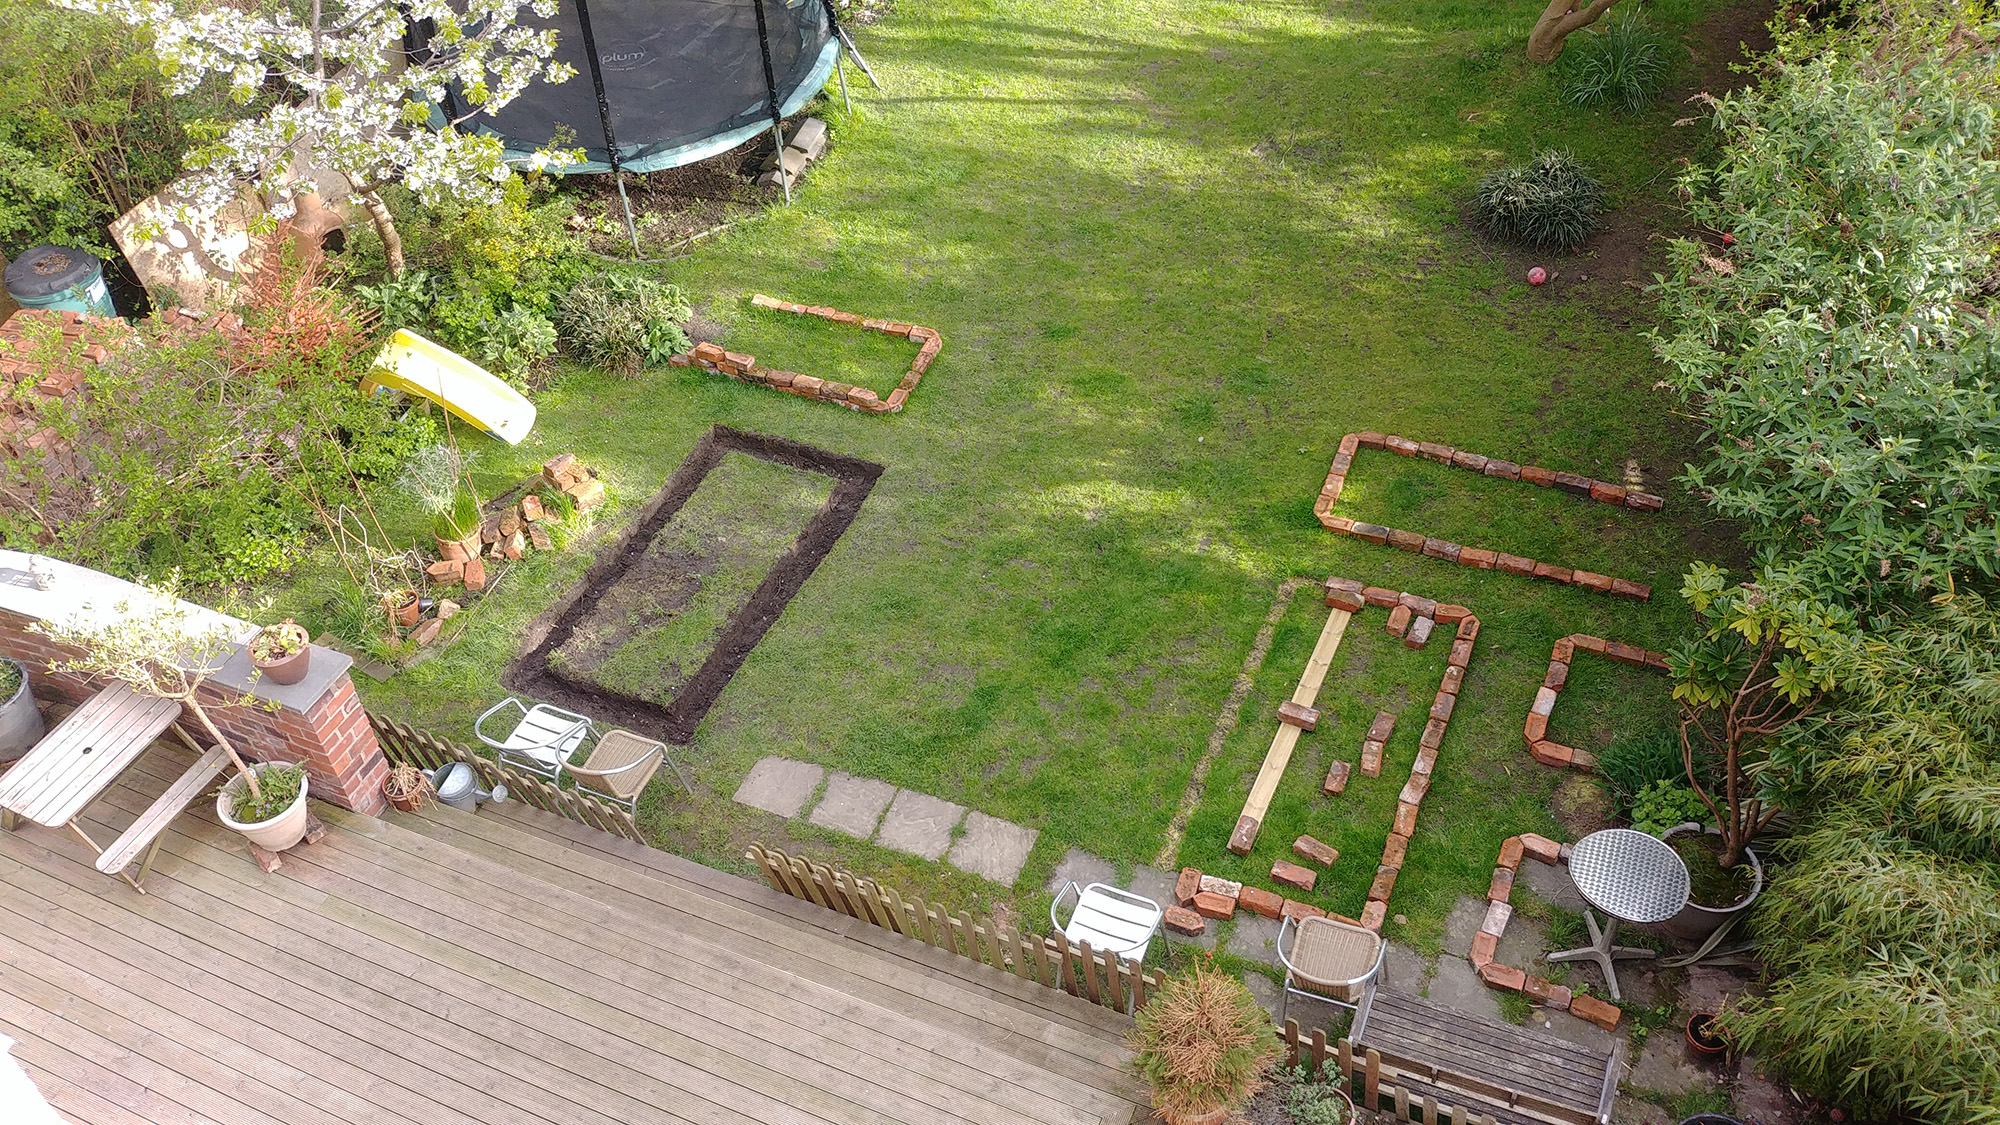
I ended up changing the design to include four vertical raised beds with one horizontal at each end.
I used a laser spirit level to align the first bed with the deck, pegged it out with string, and then dug out a neat rectangle from the grass where I wanted to place the foundations. I filled this with a mix of MOT and sharp sand (both of which we had lying around the garden after the building work), and levelled it along each side and across from one side to the other using a decking board, spirit level, and mallet. When one side was higher than the other, I either temporarily removed the MOT and sand mix to dig out a bit more, or added more MOT to increase the height.
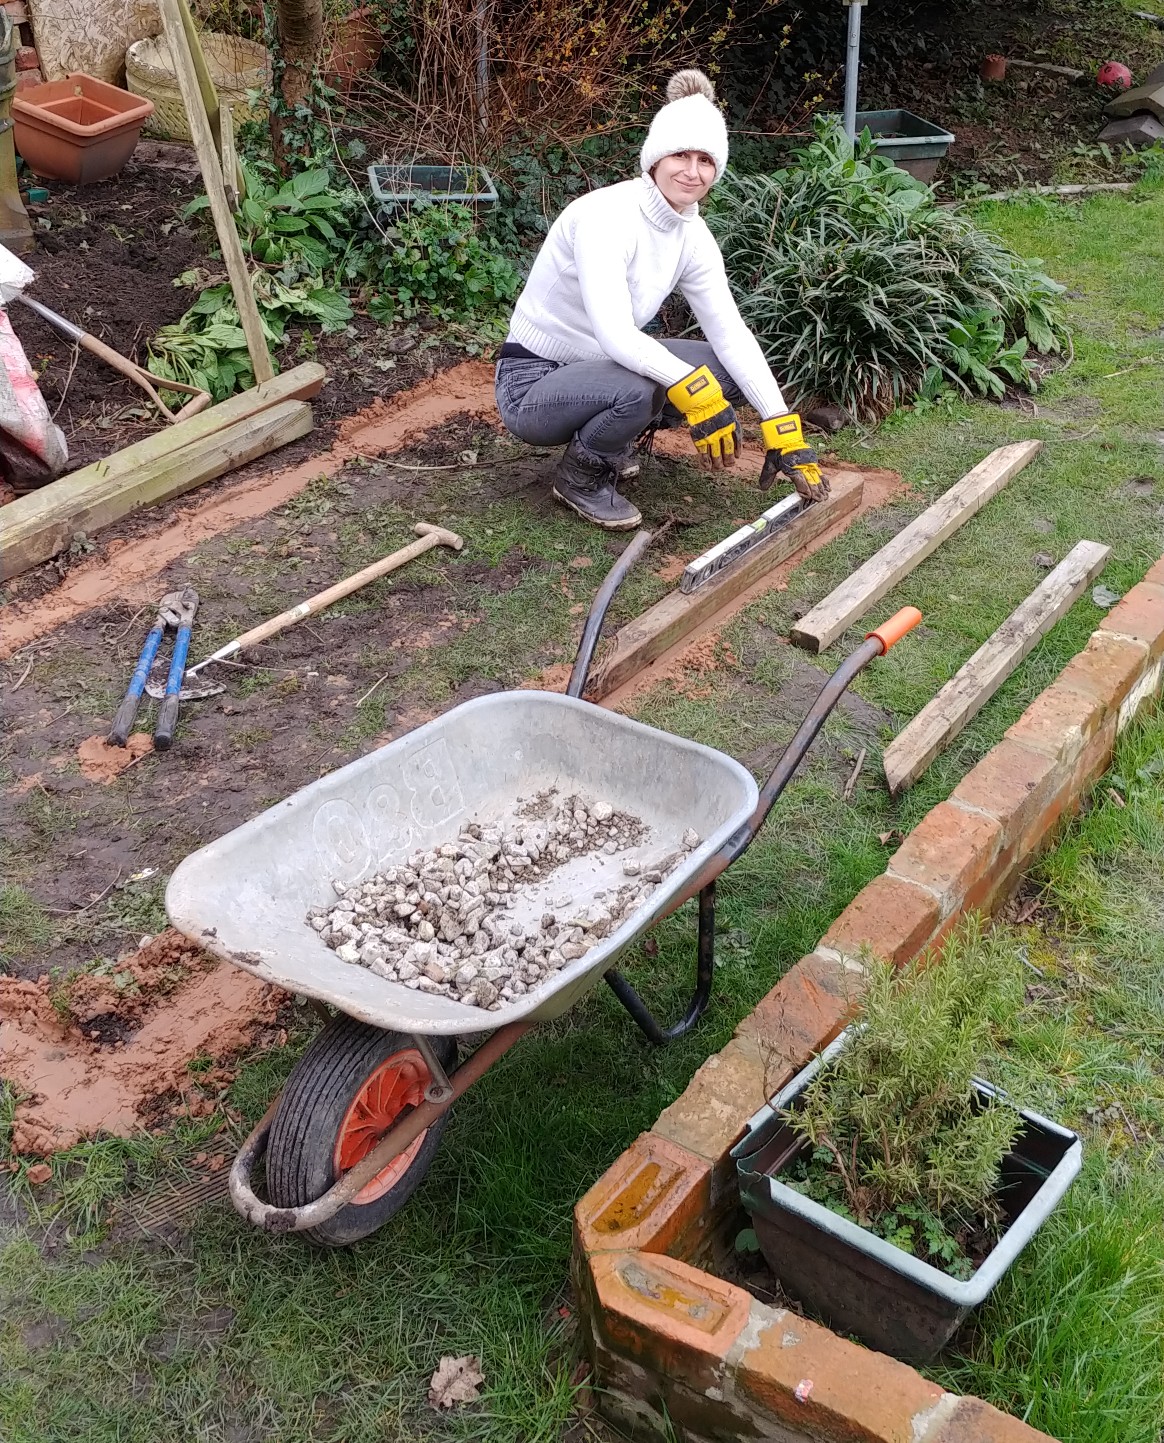
Rigger gloves and a big bobble hat. Standard bricklaying outfit.

Levelling the raised beds from one side to another. Perhaps a slightly rudimentary approach :-) but good enough for our purposes.
Neither of us had ever attempted bricklaying before, but we like to have a go at things, so that’s exactly what we did. We mixed our own mortar in a bucket using cement powder, sharp sand and water, blending it all together with a special attachment for our power drill.

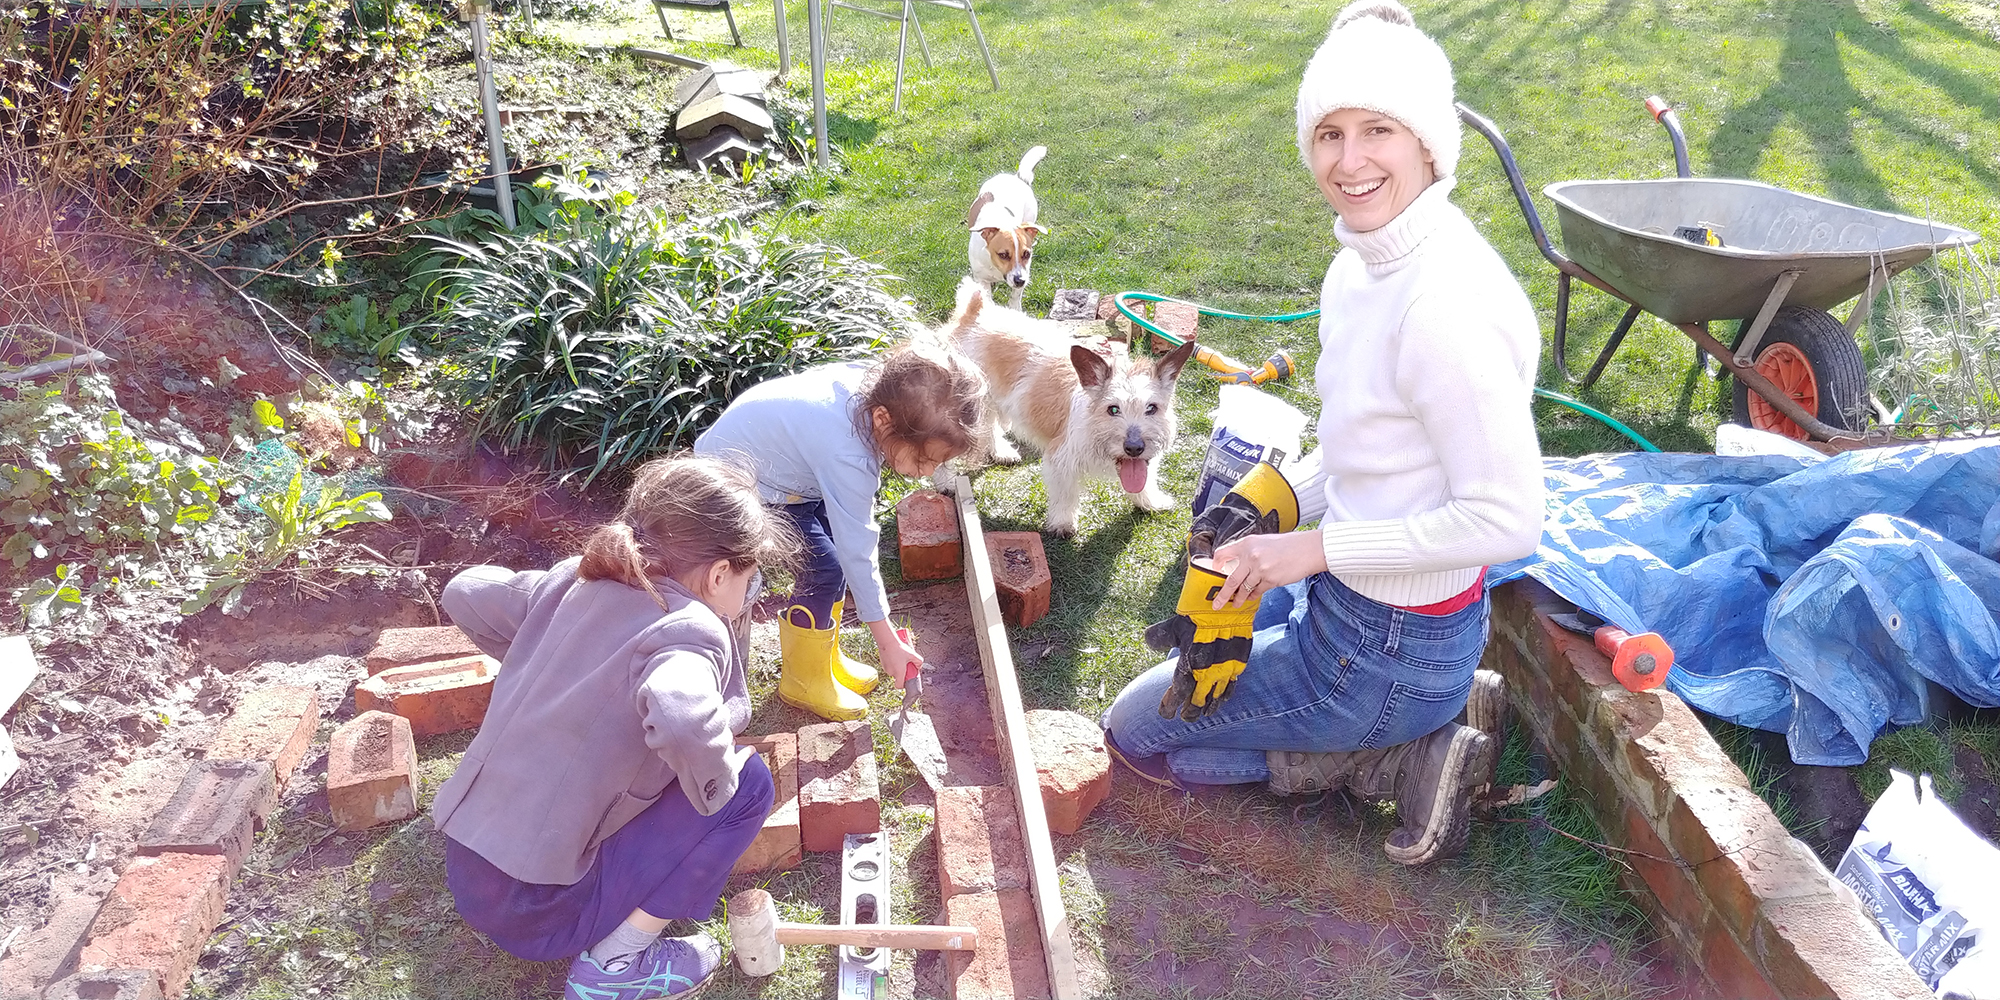
The majority of the family got involved in mortar mixing.
I slapped some mortar onto the MOT base, put a brick on top, checked it with the spirit level, and tapped it into place with the mallet. I then buttered the end of another brick with more mortar, wedged it against the first brick (still on the the mortar base), levelled it again, and tapped it into place.

Buttering bricks is a similar technique to icing a cake.
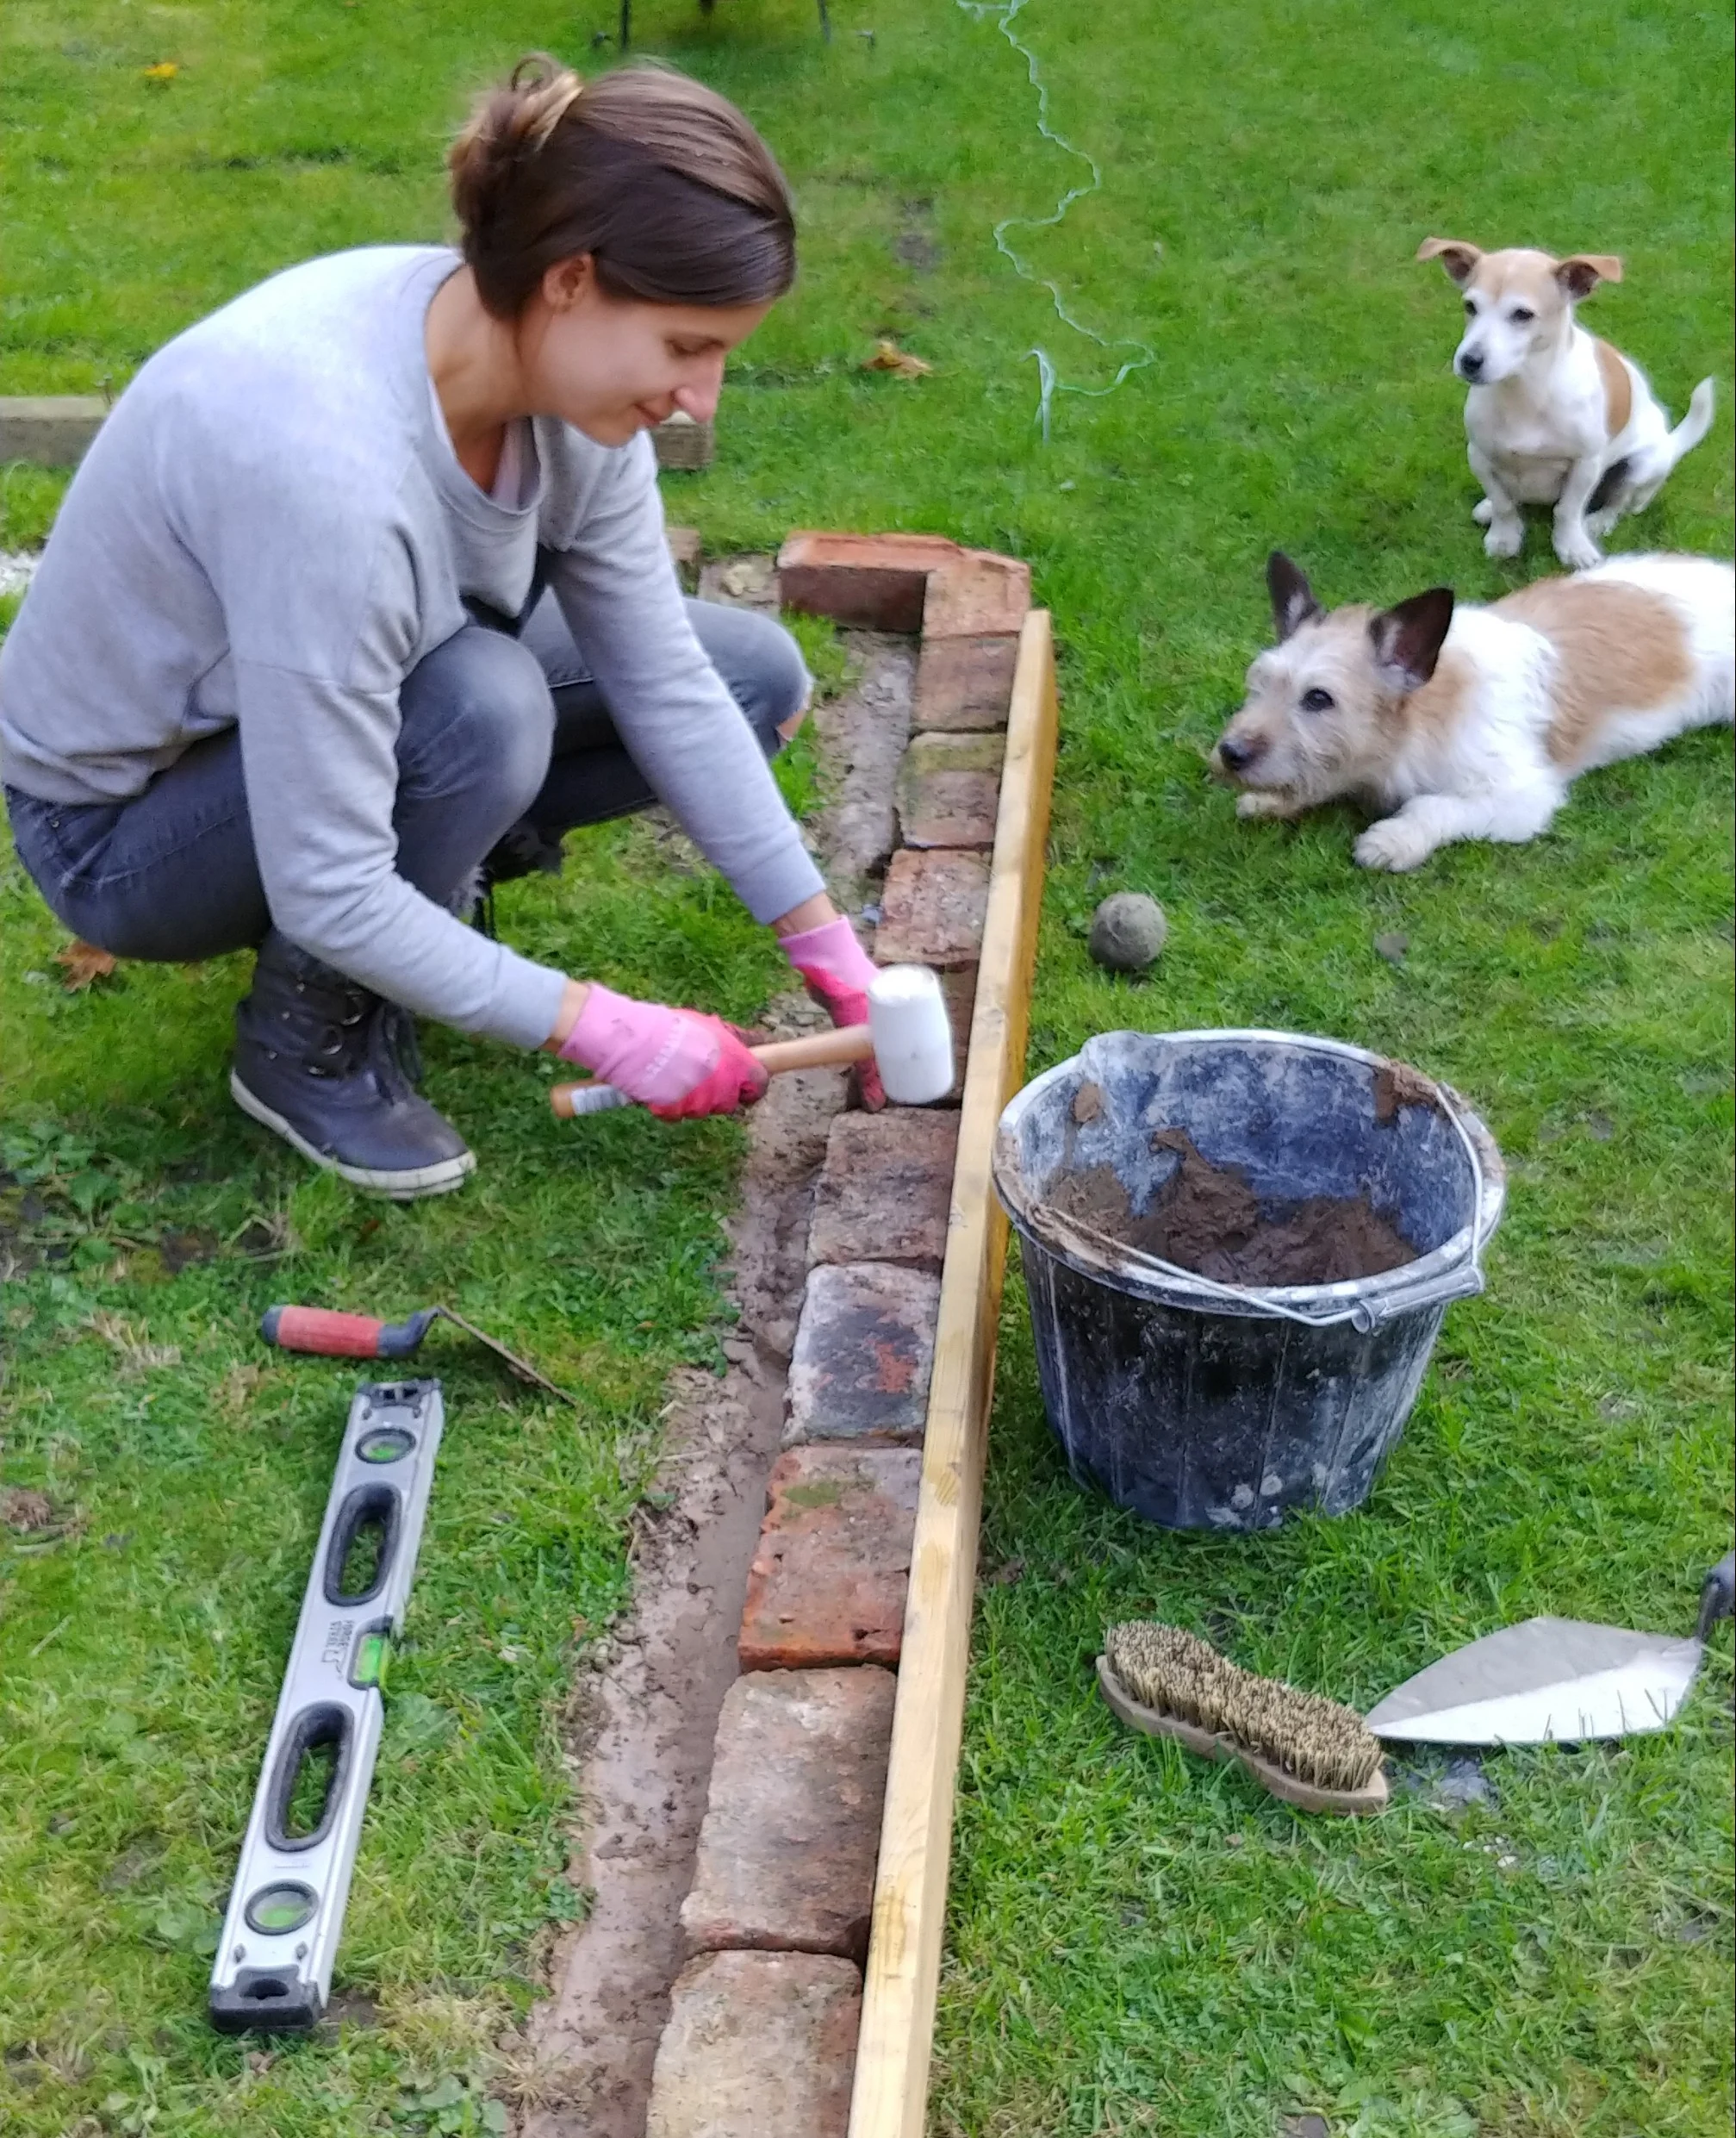
We used decking boards to keep the bricks in a straight line while we set them in place. Also, spot the filthy tennis ball, and the eager ball chasers.
It sounds pretty easy, and there’s an extent to which it was. We quickly got into the flow of things: me selecting the bricks, buttering them, levelling them, and tapping into place, while my husband mixed up the mortar, and followed me around tidying up my mortaring, and pointing up the bricks (you can get tools for this, but with a thumb encased in a rigger glove works perfectly well). Things that slowed us down: the bricks were different heights with varying states of wonkiness, so finding suitable ones from the mounds in the garden was time-consuming; having to throw the ball for Enrique every ten seconds; three girls who wanted to help; getting rained off; bad light; cold weather (I’m only willing to brick lay in the cold for three hours before I need to throw in the towel, which while being a pretty solid time commitment, isn’t enough to complete a single bed, especially considering all the speed-reducing factors).
Progress was slow :-)

Every time it rained, we repaired indoors with a filthy Jack Russell.
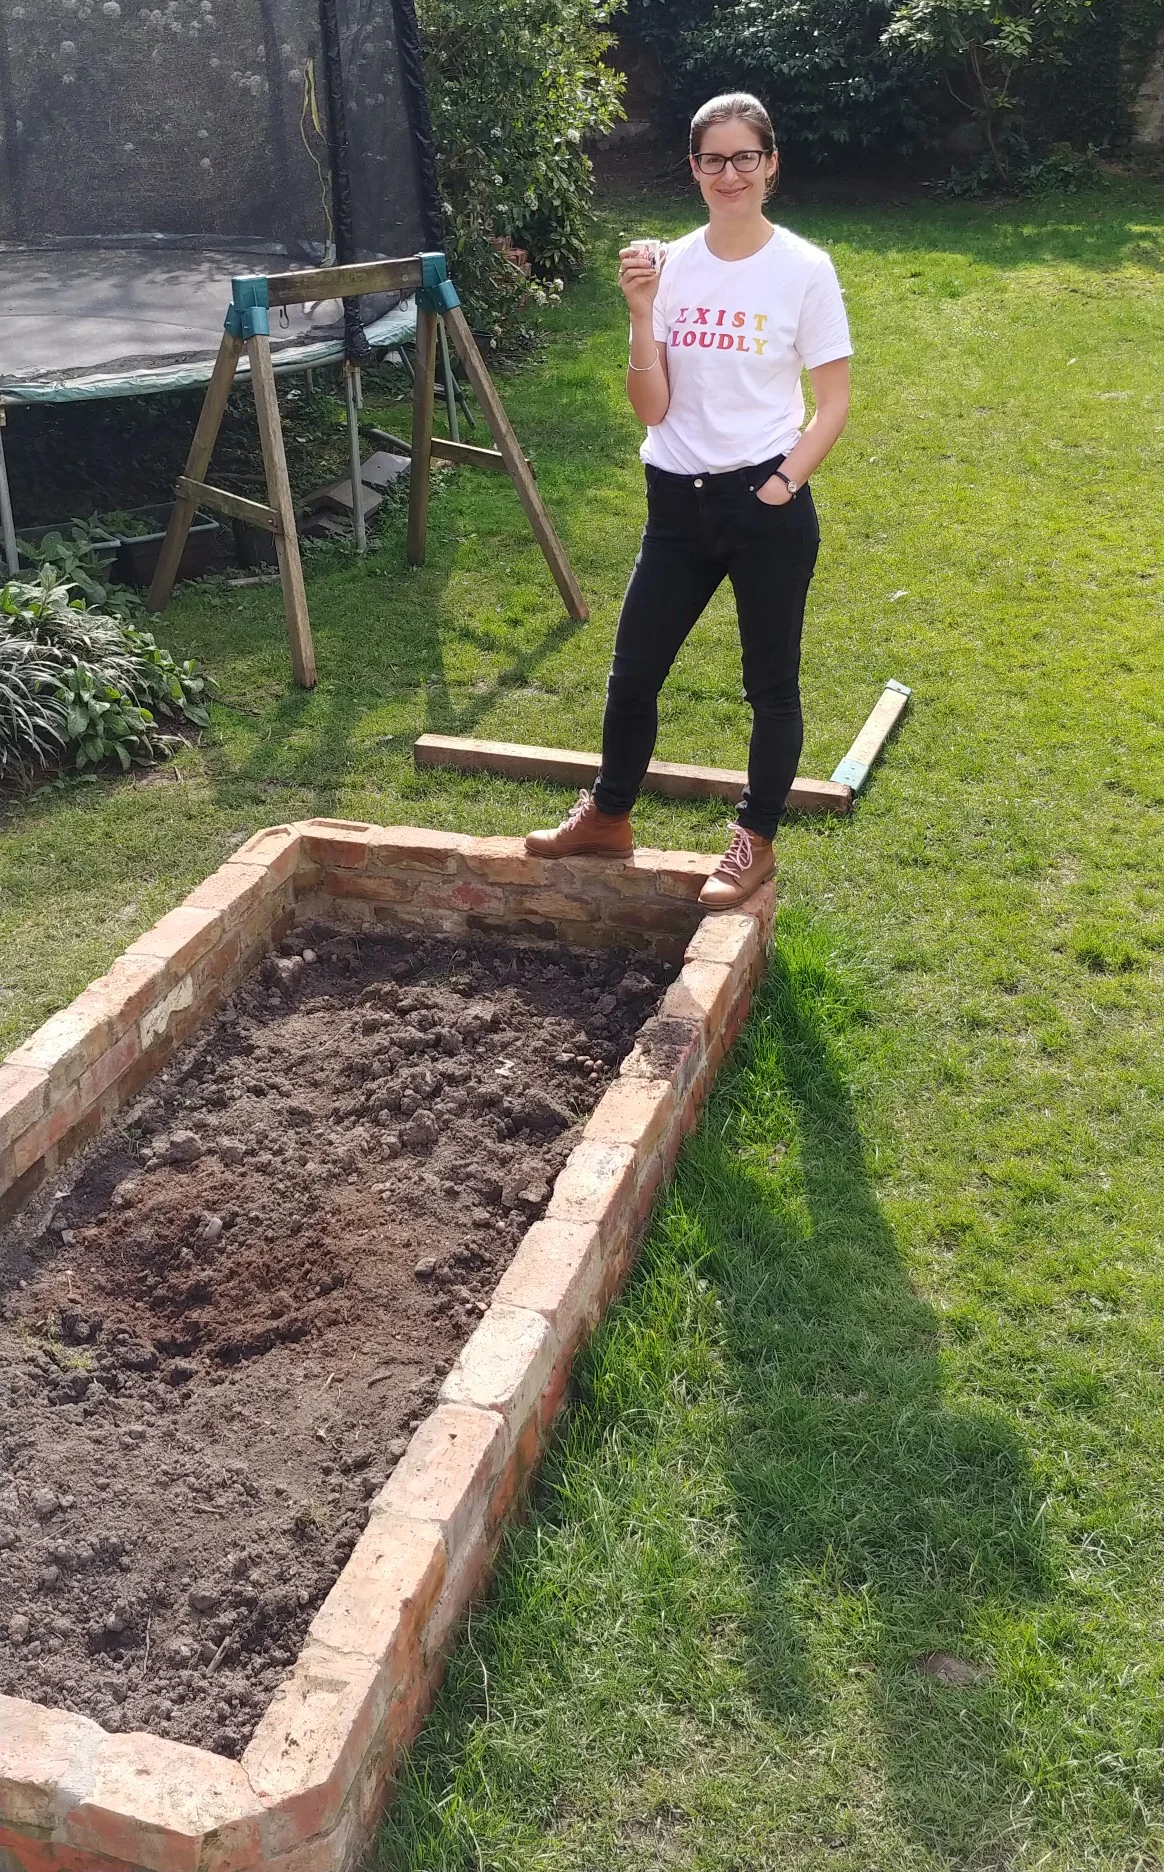
With four beds in place, it was time to fill them up. I ordered a couple of tonnes of top soil mixed with compost, which got delivered to the driveway in sacks by a guy with a remote control crane. We then wheelbarrowed it round to the back and dumped it carefully into the beds. (Before this, I dug out the base of the beds and removed loads of roots and stones, with the help of my six year old, who was under the impression that pirates used to live in our house, and therefore might feasibly have buried treasure in the garden.)

Crikey, my HIIT classes have nothing on digging as a full-body workout.

Post-work digging with my faithful companion. I look like I’m sporting a bunny rabbit tail, but it’s actually caused by having recently sat in oil-based white paint :-)
So far, I’ve planted some long-awaited David Austin roses, along with peonies, sage, mint and thyme. I’ve also got strawberry plants in pots, but they need a new bed building for them, as the cut flowers have taken up all the room. I’ve got carrots, kale, cosmos and sunflowers growing indoors from seed, plus some dahlia tubers in pots. Meanwhile, my parents are growing cherry tomatoes and sweetpeas for us - and I’m thinking of planting some potatoes. I have no idea if I’ll be able to successfully grow any of this, but my ambition this summer is to eat a single carrot that I’ve nurtured myself from seed. Wish me luck!