How To Make A Custom Table Lamp From A Tree Branch
This is a sponsored post.
Natalia needed a lamp for her bedroom, so we decided to make one for her using a branch from the acer that we cut down a few months ago. Obviously going to a shop and buying one like a normal person would have been a tad easier, but significantly less satisfying.


Here's what you need to make your own table lamp from a tree branch:
Suitable branch, wood for base, drill, long wood drill bit, jigsaw, wood glue, metal glue, switched lamp holder (we chose one with a bayonet fitting), lampshade, fabric to cover lampshade, fabric glue, 2-core lighting wire, plug, copper pipe, pipe cutter, drill bit the width of the copper pipe, wood files, sandpaper, paint, varnish or wood oil.
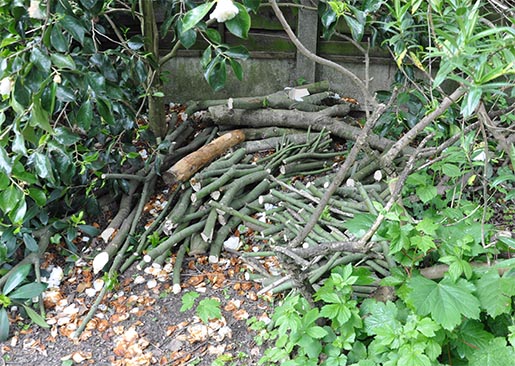
First of all, I pulled a suitable log from the pile where they had been drying naturally for several months under the shelter of our camellia, and stripped the bark from it (it was nice and dry, so it peeled away easily).
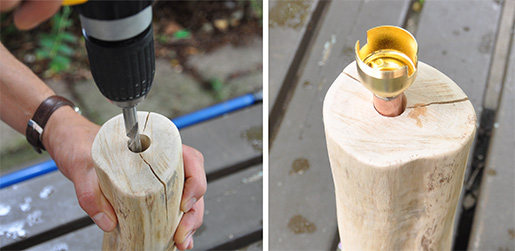
Then Andre drilled a hole straight down the middle of it using a super-long wood drill bit. I guess there's probably some kind of tool you can use to more accurately calculate the required angle, but we just did it by eye. When we eventually made it through to the other side we found the hole was a bit off-centre, so we re-drilled from the other side until we joined up with the first hole.
The next stage was to make a lamp base, because the branch by itself was too wobbly. After much contemplation (there are no quick decisions round here because we have to keep putting projects on hold part-way through to take care of those pesky daughters of ours, which has the benefit of giving us plenty of time to mull over various options) I decided to replicate one of the shapes from the yellow and white suzani fabric that we planned to cover the lamp shade in.
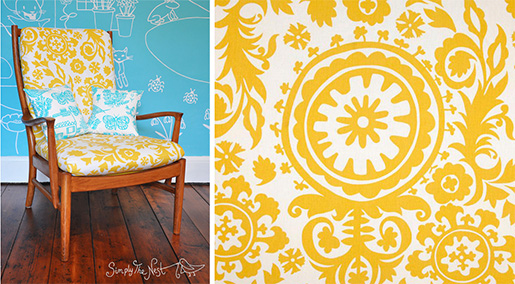
I wouldn't necessarily have chosen this shape if the lamp were intended for our bedroom but for a child's bedroom it's perfect - sometimes it looks like a flower, sometimes a sun, sometimes a construction cog, sometimes a giant robot foot type thing...
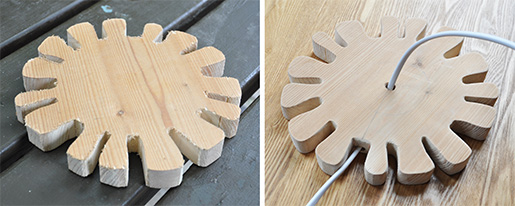
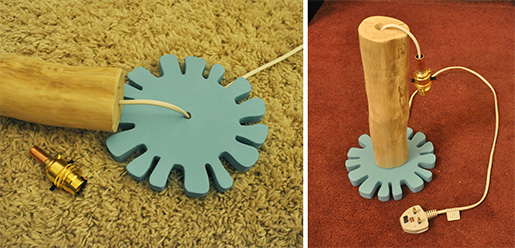
After drawing a template on paper, I cut it out and pencilled round it on a suitable piece of wood from the cellar, and Andre cut it out with the jigsaw. I sanded it down using wood files and various grades of sandpaper from 80 to 320. Next, Andre drilled a hole from the side (and back) of the lamp base to the centre, and a second hole from the top and the middle to meet the first hole. We ran a piece of lighting wire through to make sure the holes were drilled correctly, and connected a plug to the end.
To secure the lamp holder to the branch, we used metal glue to attach it to a short piece of copper pipe. Before gluing the two pieces together we cut the copper pipe down to the right size by fastening the lampshade to the lamp holder, holding it in place by hand on top of the branch, seeing how high we wanted the lampshade to sit above the base, and adding a couple of cm to that measurement to account for the pipe being sunk within the branch to keep it steady. We then used the drill to enlarge the hole in the top of the branch to fit the width of the pipe.
Next, I painted the lamp base using the same turquoise paint as Natalia's mural wall. It's just regular emulsion rather than wood paint, but I knew it would be fine once I sealed it with some varnish or Osmo oil. I kept the lighting wire in place while I painted the base (with some tape wrapped around the wire to prevent splashes) but you could easily pull it out and replace it once the paint dried. We then pushed the wire through the branch, and glued the branch to the base with wood glue, pulling firmly on the wire as we did so.
(You can tell by the random backgrounds and colour variations in these photographs that we worked on this project at various times of day and night and in assorted locations!)
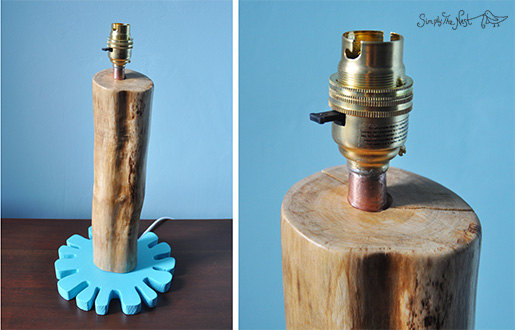
We glued the copper pipe and attached lamp holder into the top of the branch - we did this with the lampshade attached to the lamp holder so we could make sure we had the lamp holder at the correct angle in the branch. I positioned the two sides of the switch at two and seven o'clock because that's where my thumb and fingers naturally fall (I'm right-handed) when I go to switch a lamp on.
Finally I gave the branch and the base a couple of coats of clear satin-matt Osmo polyx oil.
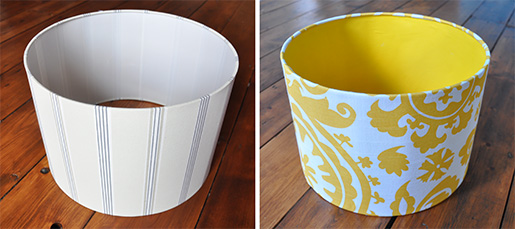
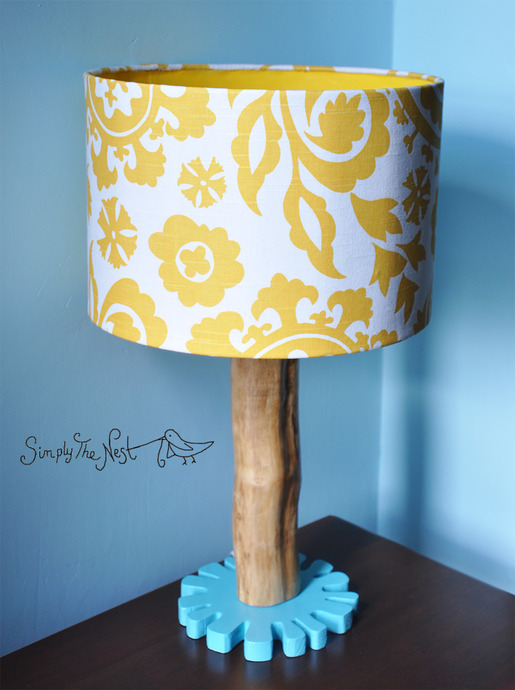
For the lampshade, I chose a simple drum shade from John Lewis - you can see the full range of lamp shades from John Lewis here. I covered the lampshade in some leftover fabric from the spare bedroom curtains and Natalia's chair using this tutorial. I realised I could still see the stripes from the original lampshade through the new fabric, so I lined it with blackout fabric (checking on another lamp first to make sure it wouldn't look weird when it was switched on) and then painted it yellow. Again, I just used regular emulsion (the same paint that I used to paint the yellow stool in the spare bedroom, which I had chosen originally to match the yellow and white curtains) - it wasn't necessary to use special fabric paint because it didn't matter if the fabric went stiff.
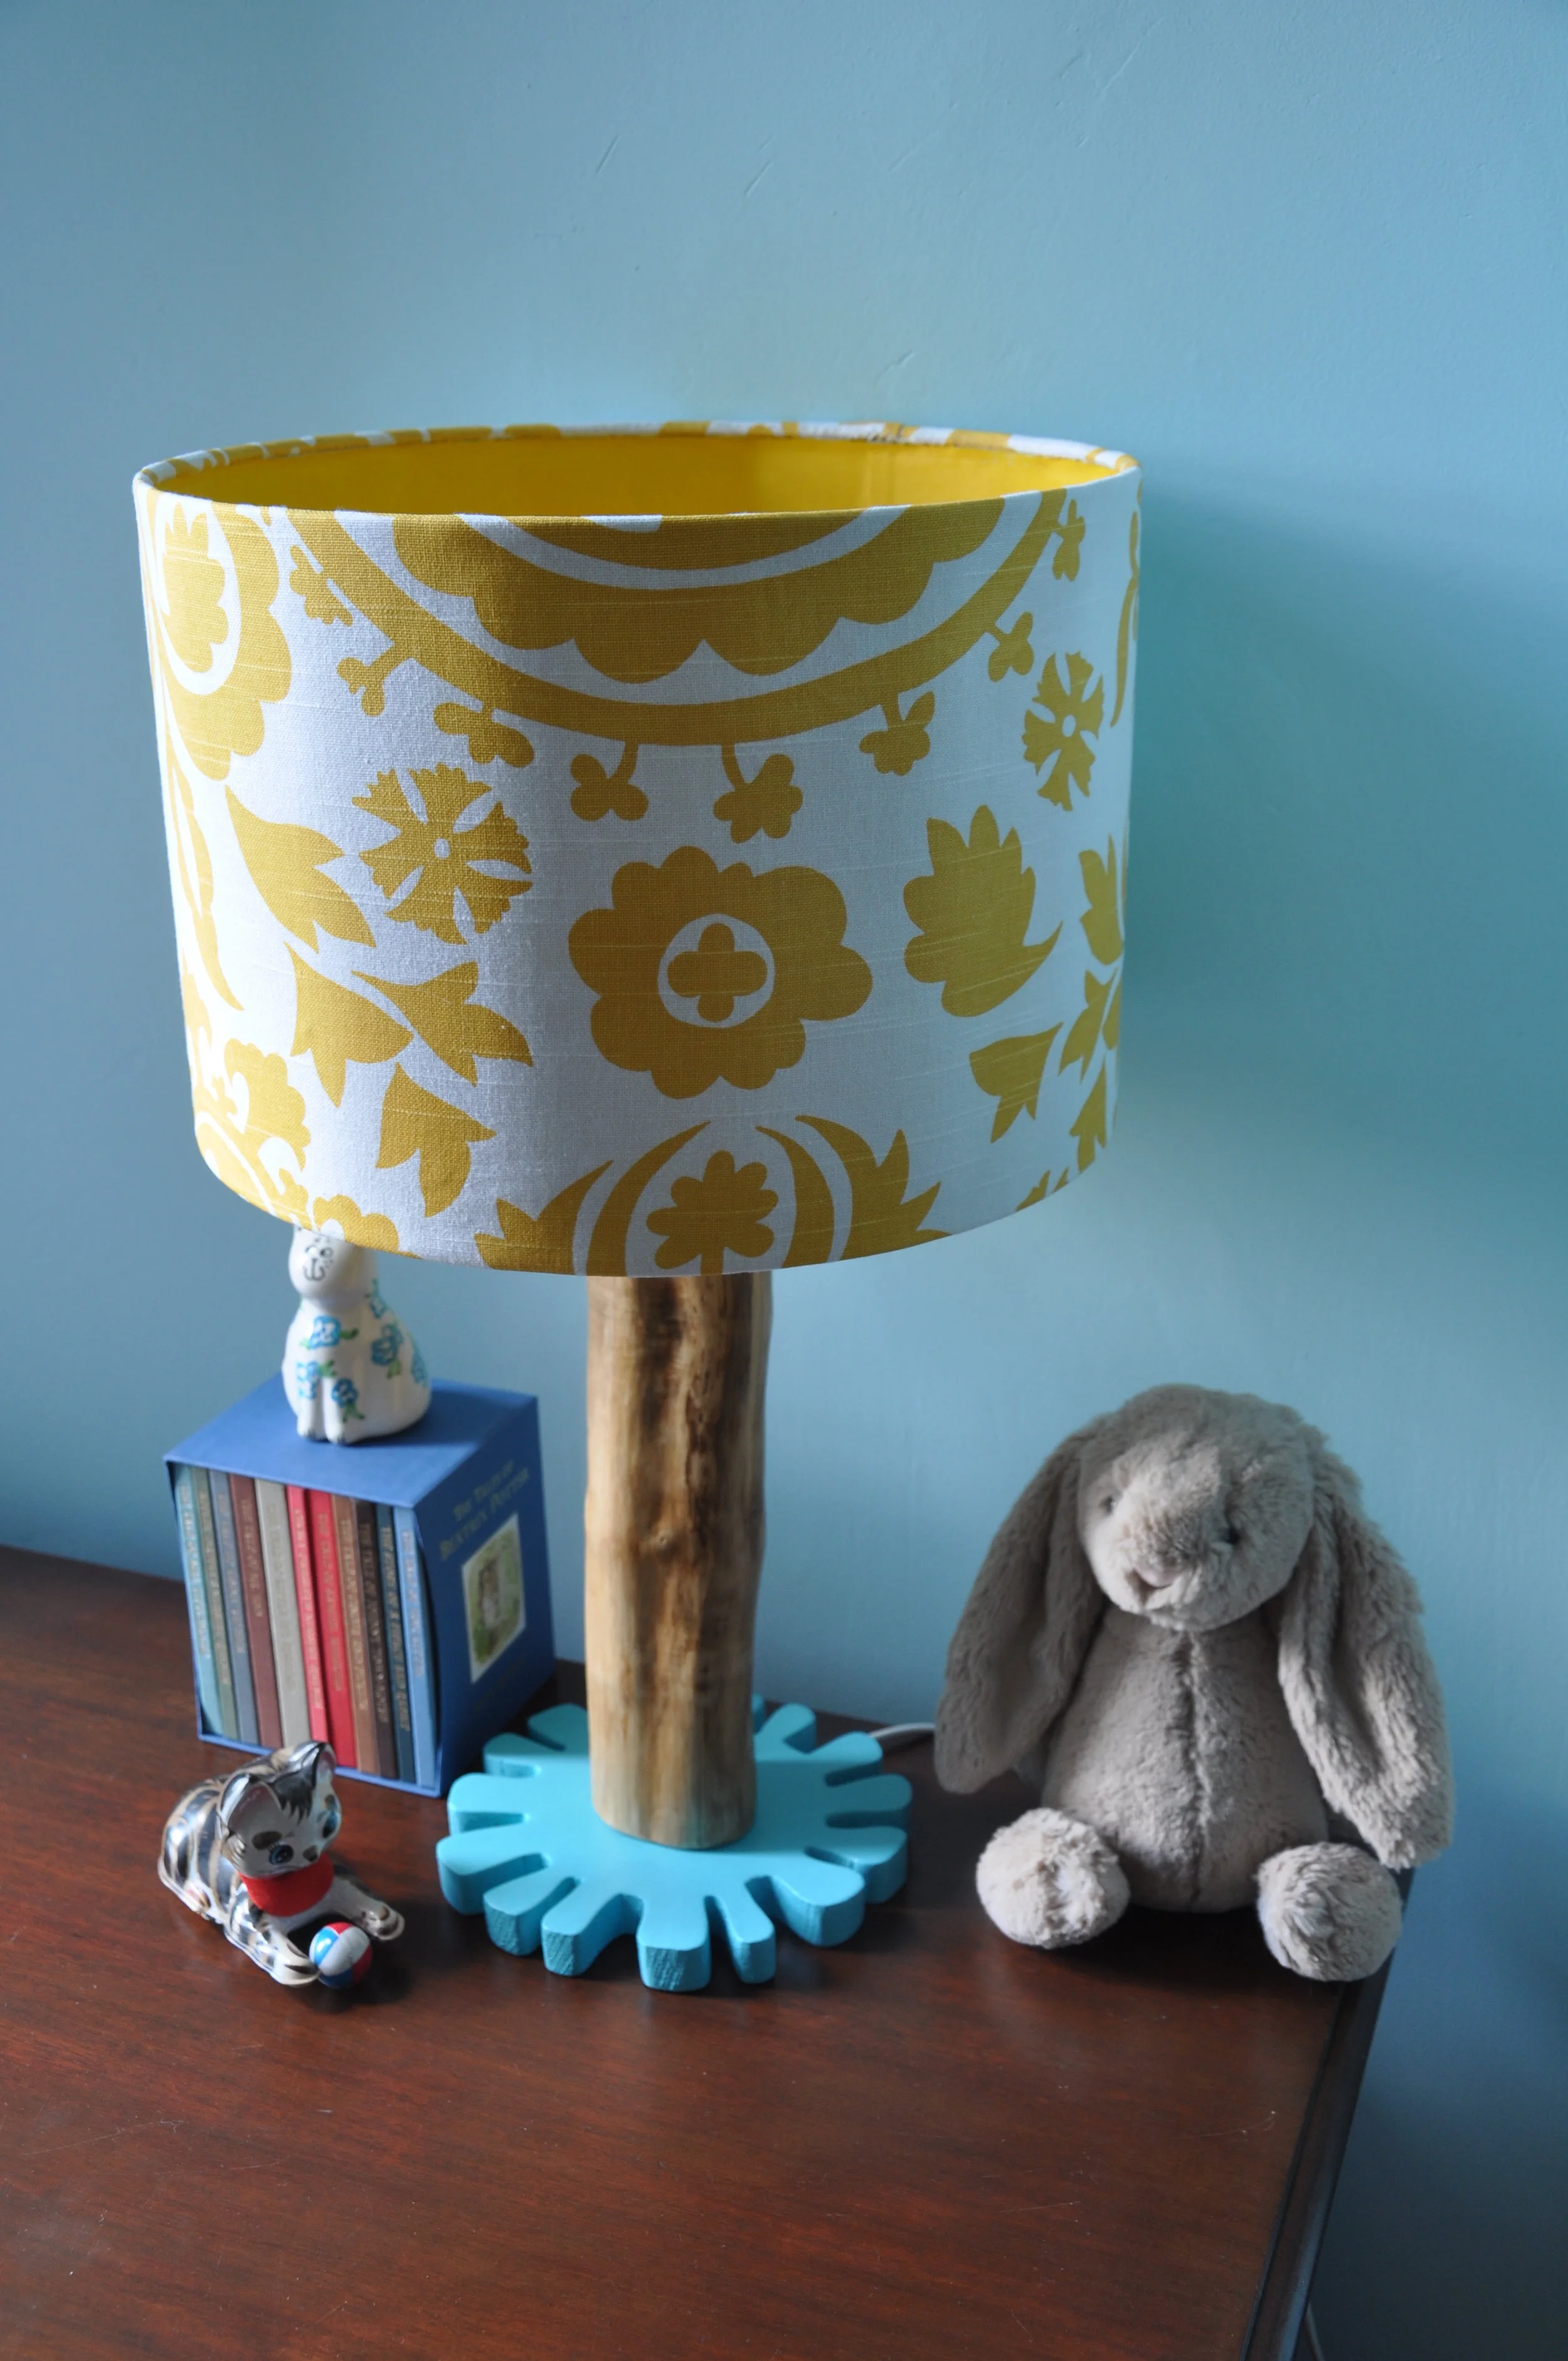
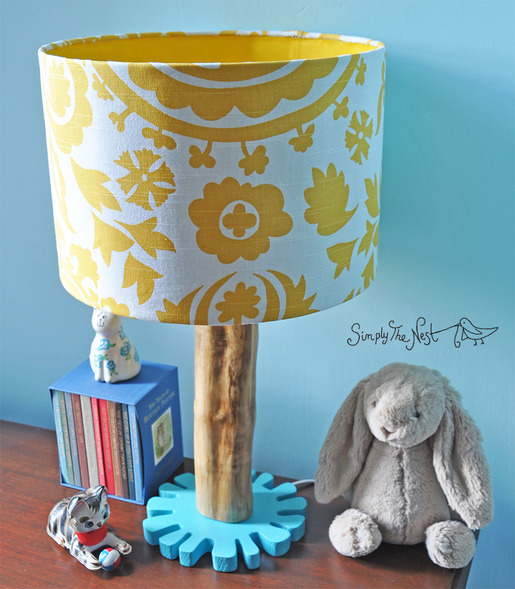
Ta da! A completely custom and unique table lamp built entirely to your own design.
Let's took a closer look at that lovely tree branch:
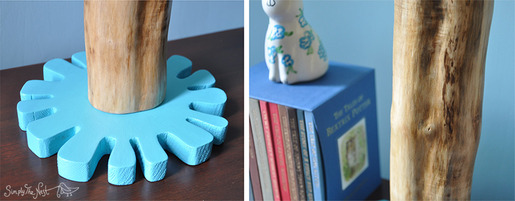
And with some of Natalia's toys on the chest of drawers:
Overall this project probably took about four hours of effort, plus paint and glue drying time, and about a month of childcare in-between. Clearly it would have been slightly quicker to drive to Ikea and just buy a lamp, but then again I'm fairly certain that Ikea don't sell crazy turquoise and yellow robot foot lamps made with branches from your own garden, so all the effort was worth it for us!
Disclaimer: I was given a number of vouchers which I used in part to purchase the lampshade. All words, opinions, layouts and photographs are my own.