Natalia's Turquoise Bedroom Curtains

Shortly after Natalia was born, I chose the fabric for her curtains. I wanted a turquoise on white fabric with a simple handpainted-style English country garden scene (a wish-list so specific that disappointment seemed inevitable) so was understandably astonished when I came across this Designer's Guild fabric (Boqueria in turquoise) that ticked all the boxes.
So I placed the order and a roll of gorgeous fabric was duly delivered, which then sat in the corner of Natalia's room mocking me for about ten months until I finally got round to turning it into curtains. Sigh, such is the way of DIY house renovations with small children around.
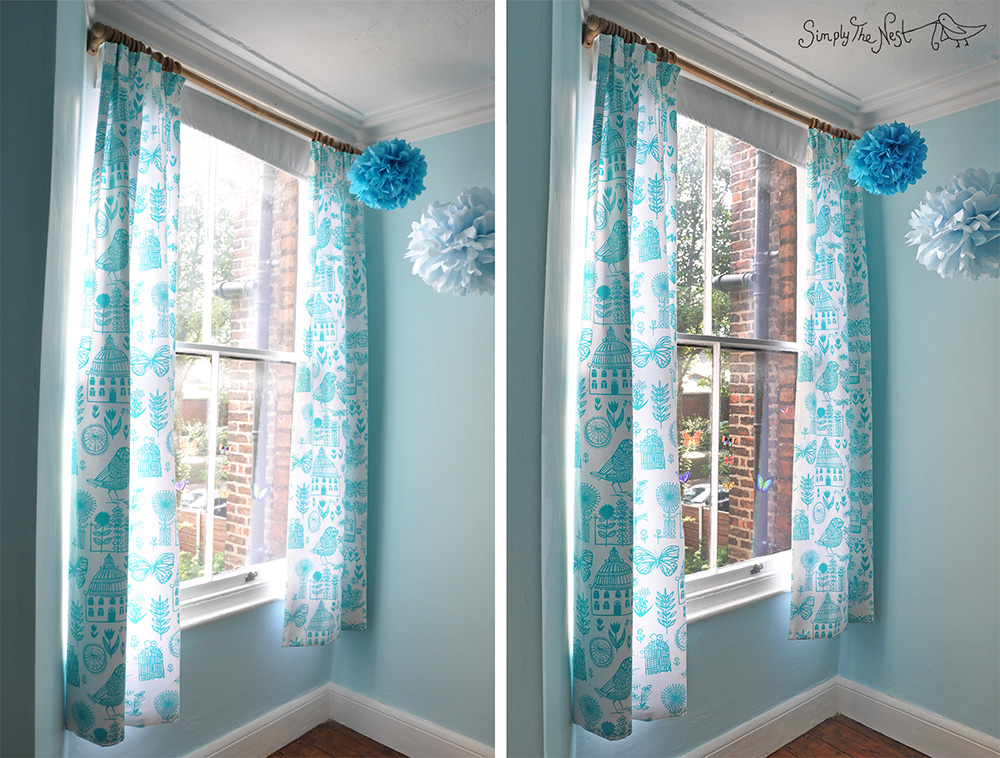
And here they are, looking pretty against the pale turquoise walls:


It's usually hard taking photographs of rooms with windows because you often end up with an overly dark interior and an overly blown out window. One method of dealing with this is to
take two identical photographs on a tripod at different exposures and then merge them in PhotoShop
. However, when you have a couple of adorable pint and half-pint sized ladies following you round all day trying to climb your leg and/or ride on your back like a horsie, getting a tripod out and taking a bunch of wobble-free pictures isn't very practical, so I prefer to just take the picture as quickly as I can and then sort it out in PhotoShop afterwards. It's not perfect, but it's good enough. So here's a quick and easy tutorial for dealing with blown-out windows in PhotoShop:
- Open your image in PhotoShop, select the entire image, and paste it over the top of your original image. You now have two identical layers.
- Select the bottom layer, and darken it up using the Brightness and Contrast tool.
- Select the top layer, and use the Eraser tool to brush out the window panes (leaving the curtains and surrounding walls untouched). You will brush through to the darker layer underneath. You can also use the Magnetic Lasso to select the window pane (you'll then automatically just erase within the window) but I prefer just to zoom in and do it by hand, adjusting the size of the eraser to make it smaller as I get closer to the edges.
- Lighten the top layer using the Brightness and Contrast tool.
- Select the bottom layer, and adjust the brightness as required to darken or lighten it up.
- Select the entire image, select Copy Merged, and paste into a new image.
Ta da! Here's a side by side comparison. You can see I also used the same technique to lighten the strip of wall on the left-hand side without also lightening the entire image.
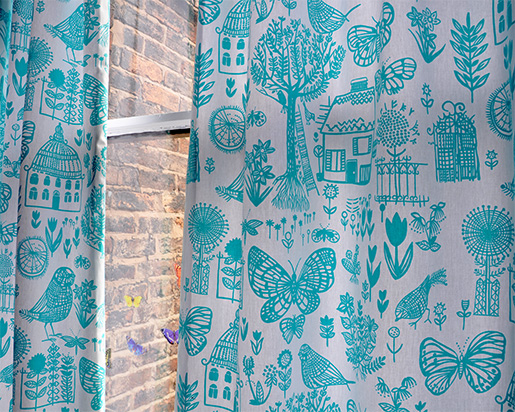
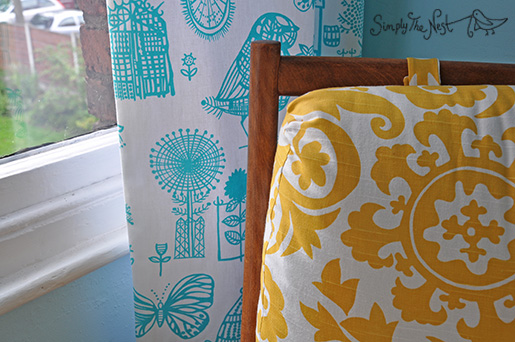
Here's a close-up of the fabric, which (as with
) inspired the design for
, with a cottage, tree, flowers and birds.
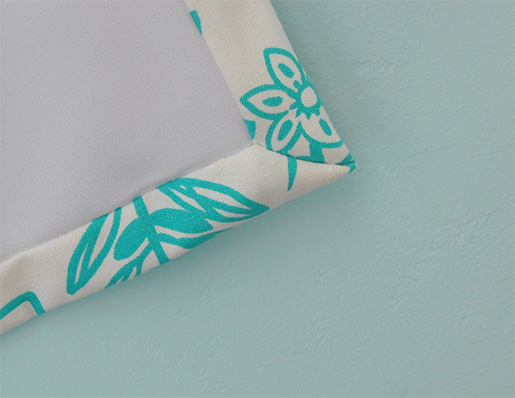
I lined the curtains with a simple white fabric using invisible seams. I prefer not to use blackout fabric because it makes the curtains quite stiff, and also because when the children are older and no longer wake up at the crack of dawn it's nice to see the light streaming in through the pattern in the curtains. So we have blackout blinds instead which can be removed when we no longer need them.
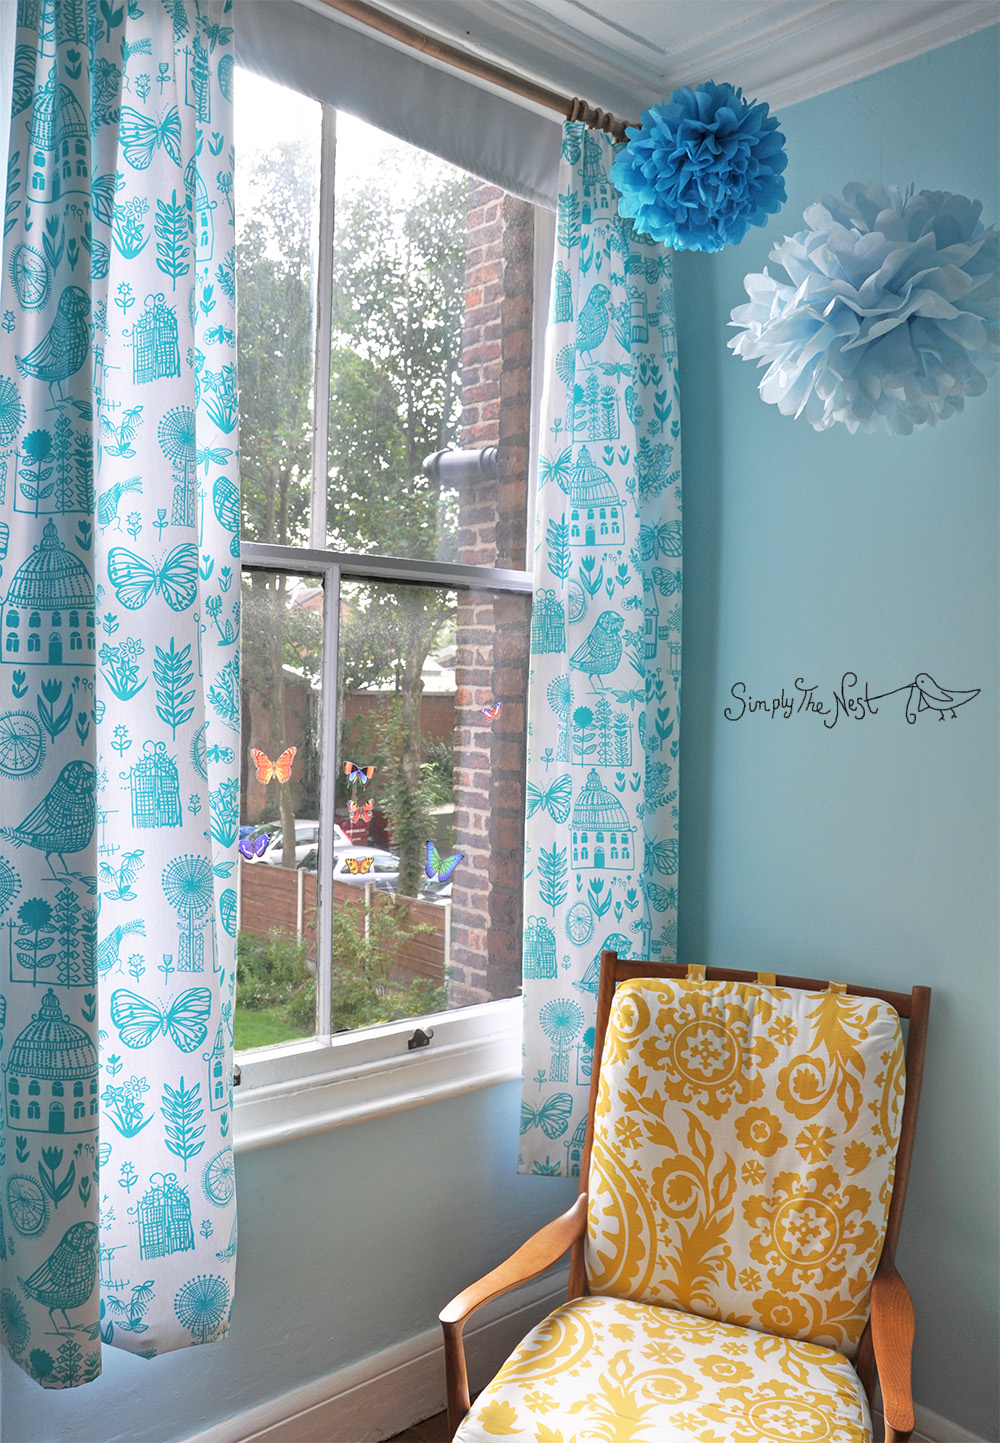
Normally Natalia's chair lives in the other corner of the room, but I pulled it over to the window so you can see how the two fabrics look together - completely different patterns and colours, but somehow it seems to work.
As with most of our projects, we hit an unexpected hiccup when installing the curtain pole as the plaster was too soft to take the screws on the right-hand side of the window and the whole thing came crashing down on our heads, so we had to chip out the plaster, replaster, sand and re-paint before we could actually get the curtains up. But it's all done now, yay!
The next project on the list for Natalia's room is the main ceiling light fitting - we're making a chandelier-type light out of an old olive tree, so I'm currently getting an education in chandelier lighting terms (cups! sleeves! tubes! bobeches!) as I search for the parts we need on eBay.