How To Make A Really Easy Rainbow Cake

Look! I made a rainbow cake!

We threw an explorer-themed party at the weekend for Eva's third birthday. The guests decorated cardboard binoculars with feathers, sequins and tissue paper shapes, which they used for a treasure hunt in the back garden. This culminated in digging up a buried treasure chest which was then hung from a nearby tree branch and whacked vigorously with a rolling pin before it capitulated and released a huge pile of chocolate coins and plastic tat all over the grass. Lovely stuff.
Anyway, I decided that a simple-looking cake with a secret surprise hidden inside would nicely continue the explorer/treasure theme, and I've been wanting to try and make a rainbow cake for ages, so I bought the required food colouring gels and gave it a shot.
Do you know what? I don't actually have any super-cute styled photographs of it. And here's a question, which I'm going to whisper partly as it's a little controversial, partly because I consider myself to be a renovator first and a blogger second, and therefore don't usually spend much time dwelling on or writing about blogging issues, and partly because I feel a bit nervous asking in case no one agrees with me at all: but is anyone else getting a little bit tired of all the super-pretty, super-styled stuff out there in blogland? Is anyone else wondering how all these people manage to get these great craft/baking/DIY projects done AND get them styled beautifully AND take great photographs AND create cute PhotoShop layouts AND... you know, actually take time to just live in the moment and enjoy what they've created? Wouldn't it be refreshing to feel inspired by the creative idea itself, rather than the presentation of that idea? For bloggers to share more than the obligatory (and occasional) 'keeping it real' shot of how their living rooms look with toys and coffee mugs and magazines lying around (the horror!), but to actually share real-life pictures and information about how creative projects turn out when they're undertaken by real people with jobs who are trying to raise their kids and renovate their houses and look after their pets and sustain relationships with friends and family and get food on the table every day and watch the latest episodes of Breaking Bad and check the news online and worry about Syria and clean their bathrooms and keep on top of the shoe mountain at the front door and any or all of the above?
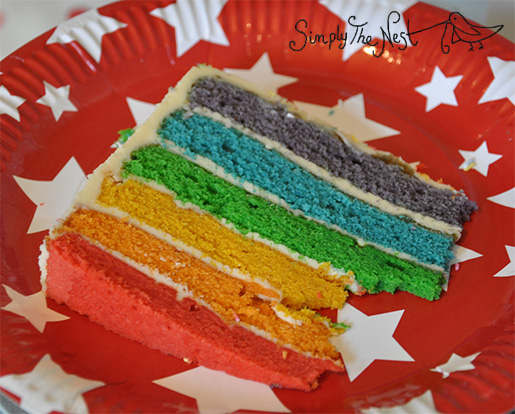
When I was looking online for rainbow cake recipes, I saw some lovely pictures of beaming children dressed just so, holding perfect cakes on pretty platters, with the cake sliced open at just the right angle to reveal the colourful layers inside, with the perfect lighting and white balance... And you know what? Our rainbow cake turned out pretty damn perfect. It tasted great. I was dead proud of my efforts. Eva absolutely loved it, and her little face lit up when we brought it in, sang Happy Birthday to her, and cut into it. In fact, she helped me to make it and was really interested in how the different tubs of gel turned the cakes different colours. And all our guests were fascinated by it - most people had never seen one before, a few wanted to know where I'd bought it, some wanted the recipe.
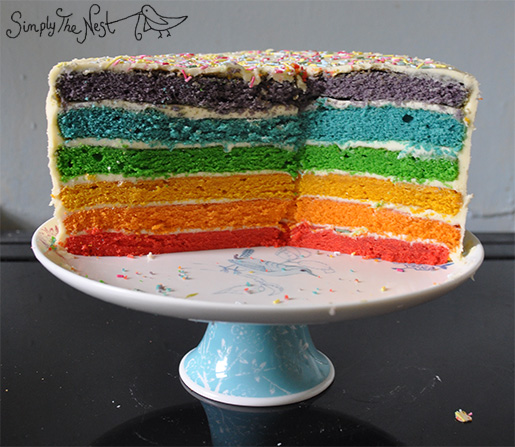
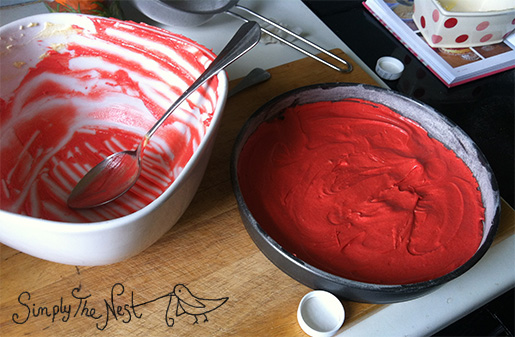
However - I don't have any perfectly-styled pinnable pictures of any of it. I took a couple of quick pictures of the cakes in their raw format with my iPhone. Our weird kitchen-in-a-bay-window forms the backdrop, so they're not particularly pretty. And although I've got a nice Nikon, it was quite a cloudy day and I don't have the right kind of lens to cope with darker lighting conditions so the photos taken on the day are a bit blurry. And once we'd cut into the cake, I obviously didn't have time to mess around trying to take a bunch of stylish pictures of it, because I had to, you know, get it cut and transferred onto plates and passed round our hungry guests. And it was my lovely daughter's third birthday party and I just wanted to enjoy it, not worry about how it would look to the world at large when I shared photographs on the internet afterwards.

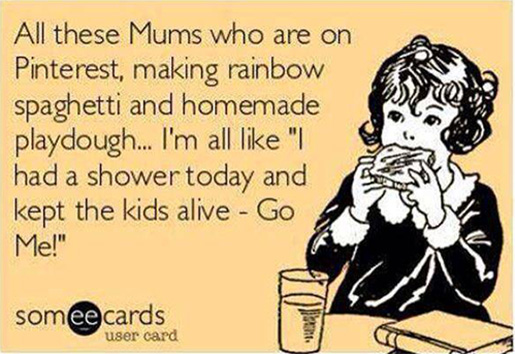
Of course, it's not the creation of cute crafts and DIYs and projects that I have a problem with - because yes, I like my house to look pretty. And I like it to be tidy. And filled with attractive colours and patterns and furniture and pictures (and people) that make me and my family feel happy. And I like (no, I love) creating things and making things and baking things and have been drawing floorplans and moving furniture around ever since I was a little girl re-arranging my bedroom furniture. And when I see those jokes about Pinterest Moms all I think is 'hey, that reminds me that I need to make some more homemade playdough' because we've run out and you know what? It's cheaper and quicker to make your own than it is to buy it. And yes, I watermark my photographs with my bird logo, and sometimes add explanatory text in a cute font, so that if it gets pinned and ends up somewhere random it can still be identified as my work.
And neither is it the documentation that bothers me, whether this is done publicly or in private, of creative projects and crafts, or indeed just of life in general. After all, I've been blogging for years, sharing photos and stories of our house renovation, DIY projects, recipes and snapshots of family life. And before that I took a ton of photos and glued them into scrapbooks, old-school style. So the desire to document and share is one that's been with me for a really long time.
But what I don't want to do is feel like I should be worrying all the time about how it all looks to other people. That I need to take a time-out from my daughter's birthday party to photograph her cake. Worrying that unless I do as great a job of styling and photographing my DIY project as I did of creating it in the first place, then no one will pin it because it just doesn't look pretty enough and it won't drive enough traffic to my blog. Because, really - does it matter that I can't get a decent photograph of Natalia's bedroom because I don't have a proper wide-angle lens and I don't have time to get the tripod out (or more truthfully, find where the tripod is buried in the cellar)? As long as she likes her room, and we like her room, isn't that what's most important? Are people judging me because I can't white-balance properly, and because I served our rainbow cake on random red starry paper plates because that's what the local supermarket sold? I really, really hope not. There seems to be a growing, modern obsession with presenting everything online as if it were perfect - something which I think is exacerbated both by Instagram (allowing users to share only a tiny, edited aspect of their situation) and the current interior design trend for sharing room vignettes rather than wide-angle views of the entire (possibly imperfect) space.
So I think it's about finding the right balance between presenting, documenting and preserving picture-perfect snippets of our lives, and trying to live our lives as perfectly (or as imperfectly) as we can. And personally, I'm finding that in blogland overall that balance is tipping just a little bit too far in the wrong direction. Is it just me? Does anyone else think the same? And if so, what can we do about it? Because personally I think we probably should do something about it because otherwise historians looking back upon this little slice of time are going to get a pretty skewed perspective of what what life was like, and what our priorities were.
So - if you're looking for some gorgeous inspirational images to add to your 'party decor' Pinterest board, you're probably not going to find them here. But if you want some practical advice about how to make a pretty decent rainbow cake when you don't really have time to make a rainbow cake, because you spend all your time holding down a job and/or taking care of your family during the day, and scraping endless layers of lead paint from your stairs during the night - well, then read on.
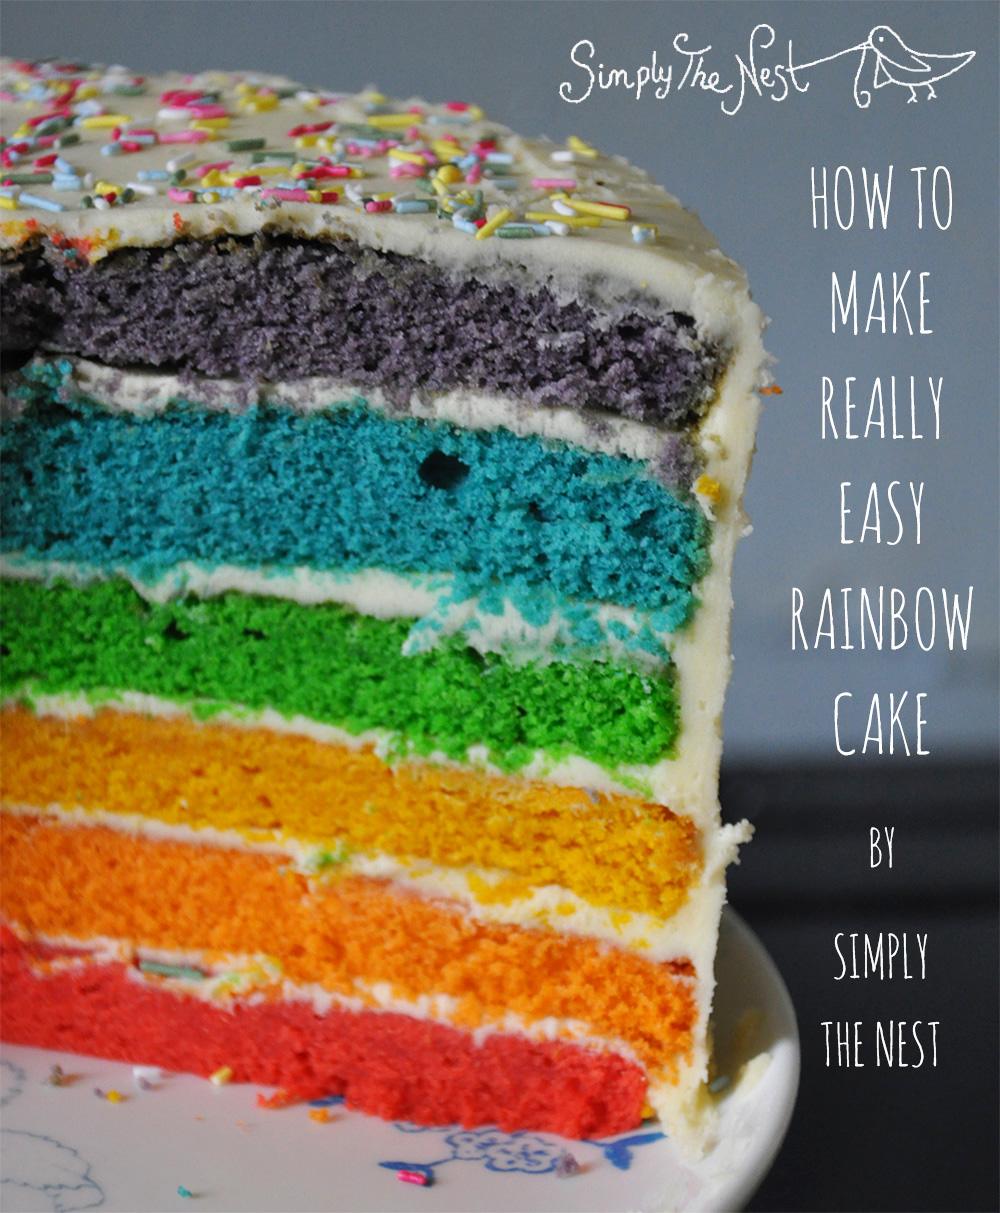

Making rainbow cake is actually pretty easy. One batch of mixture makes two layers, which can then be frozen (four of the layers were frozen and two were fresh, and they all looked and tasted exactly the same), so you can make a couple of layers here and there in advance when you get time.
Ingredients to make two layers:
- 175g self raising flour
- 175g golden caster sugar
- 175g butter
- 3 large eggs (which if you weighed them would most likely equal about 175g)
- 1 teaspoon vanilla extract
- Pinch of salt
- And of course a set of Wilton food colouring gels. I bought this rainbow set. Regular food colouring won't work on cakes - it's fine for icing, but the colour disappears when cooked, so you need the special gels.
The recipe I followed originally (from the excellent River Cottage Handbook 8: Cakes) had a really complicated set of instructions - faffing around beating butter and sugar for five minutes (really?), then adding a spoonful of egg and a spoonful of flour, whisking, repeating until all the egg was gone and then folding in the remaining flour super-carefully- I followed it to the letter for the first two cakes and it took AGES. And then I tried to mix in the gel and found it impossible to get an even colour unless you beat the mixture really thoroughly, which completely undid all my careful work.
So, here's what you do. Take a large bowl and weigh it. Write down how much it weighs. Put your eggs into the bowl and whisk them. Throw all the ingredients apart from the gel into your bowl, and beat thoroughly. Now, weigh your bowl with all the ingredients inside it. Subtract the weight of the bowl and divide by two. That's how much you need to remove and transfer to a second bowl. You now have two bowls containing equal amounts of batter. Add a small amount of food colouring to each bowl using a cocktail stick. Don't put too much in at first because if it's too dark you can't go back. I found I needed quite a lot of red gel to make the cake red rather than coral - about a fingertip sized amount - but the blue gel turned the cake blue immediately with only a very small amount.

Carefully spoon into two 23cm buttered-and-floured cake tins. You could probably use greaseproof paper instead. Bake in the oven at Gas Mark 4 for about 15 minutes. The cakes will rise in the oven but once cooled and turned out onto a wire rack will be quite flat, about 12mm high. Normally this wouldn't be a good thing, but you need a flat cake so your layers don't become unwieldy. It also makes the cakes very easy to pick up and turn over without crumbling or cracking.
I found that the outside of some of the cakes turned a slightly odd brown colour. Don't worry if this happens - you don't need to try and cut it off to reveal the coloured cake below because you'll never see it once the cake's been iced.
Speaking of icing, here's what you need:
- 500g butter (yes, two whole pats)
- At least 1kg sifted icing sugar, possibly a little more, to taste
- Several teaspoons of vanilla extract, to taste.
So, you need a LOT of butter cream. I only had one and a half pats of butter and it wasn't quite enough to work with comfortably, so I'd suggest making more as per the quantities above. Unless you have an electric mixer with a huge bowl, you may need to make it in batches or you'll end up with icing sugar billowing everywhere. It also took me ages to beat this quantity of icing sugar and butter together, so don't start making it at 11pm the night before the party, OK?
Here's how you ice the cake. First, boil a kettle of water, and then fill up a mug with boiling water. Grab a roll of kitchen paper. Place the red layer onto your cake platter. Spoon a dollop of butter cream onto the middle of the red cake. Dip your knife into the hot water, dry it on a piece of kitchen roll, and start spreading the buttercream. If you don't heat the knife in the boiling water first you'll have a terrible time and get crumbs everywhere, so don't skip this step. I had to reboil and refill my mug a few times to keep the water nice and hot.
The buttercream is very rich, so you want to try and use as little of it as possible. Enough to cover the cake in a thin, even layer, but not smother it. Carefully place the orange cake on top, and repeat the process, continuing all the way to the violet layer. The cake probably won't look great at this stage - the layers will probably not look quite the right colours, some could be brown, the orange and the yellow layers might look too similar - but don't worry, it's going to be fine.
That's the easy part done. The hard part is the sides. Using your hot knife, carefully press (don't spread) lots of small dollops of buttercream against the side, starting at the top and working down. You'll have some butter icing squeezing out from the cake layers, so aim to cover in-between these. Once you've covered the cake sides with all these little dollops, you can start spreading and smoothing. If you try and spread before you've pressed icing over the whole cake sides, you'll end up with crumbs everywhere, despite the best efforts of your hot knife. You could, of course, just slap the icing on any old how with scant concern for getting crumbs mixed up in your icing (this is known as creating a 'crumb coat'), wait until it dries, and then do a new layer on top, but that would be way too much buttercream and the cake would be too sickly to eat. Also, I found the buttercream was still pretty soft and creamy the next day so I'm not sure if it would dry sufficiently for this technique to work.
And you're done! Scatter some sprinkles on top shortly before serving - any earlier and they may bleed into the icing. Now you just have to wait for the fun of holding your breath, cutting into it, and exhaling in relief when you see that's it's turned out exactly as you hoped it would :-)

Do let me know if you make the cake, I'd love to see or hear about your efforts! And if you have any thoughts on the apparent aspiration for perfection that seems prevalent throughout blogland, I'd love to hear those too.